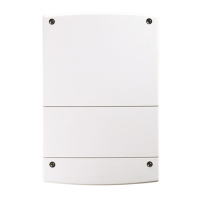
The SH701AX radio repeater relay is designed to extend the radio range between various components of an alarm system and the control panel. It acts as an intermediary, allowing up to 20 products to be relayed through a single repeater. The control panel can accommodate up to 5 radio repeater relays per installation.
Function Description:
The primary function of the SH701AX is to enhance the communication distance within a Daitem alarm system. It relays signals from control devices, detectors, sirens, diallers, and 8-channel relay output receivers to the central control panel. This ensures reliable operation even when components are located far from the central unit.
Important Technical Specifications:
- Max. number of relayed products per relay: 20
- Max. number of relays per installation: 5
- Power supply: 2 x (3.6 V - 17 Ah) lithium power pack, MPU01X. The low voltage threshold is Type C 3.1 V.
- Battery life/average current consumed: 5 years under normal conditions of use / 535 µA.
- Radio links: TwinBand® technology.
- 433.050 MHz - 434.790 MHz, 10 mW max, Duty cycle: 10%
- 868 MHz - 870 MHz, 25 mW max, Duty cycle: 0.1%, Rx: category 2
- Use: Interior/exterior in sheltered locations.
- Operating temperature: -25°C to +70°C.
- Anti-tamper protection: Against opening, against removal, and against radio jamming.
- Degrees of mechanical protection: IP54 / IK08.
- Dimensions (H x L x D): 240 x 160 x 55 mm.
- Weight with lithium battery: 800 g.
- Security grade: Grade II according to EN 50131-3.
- Environmental class: Class III according to EN 50130-5.
Usage Features:
Installation and Placement:
The relay can be installed indoors or outdoors in a sheltered location. It should be placed at least 2 metres away from other products (except detectors) and at a height of over 1 metre from the ground, clear of any obstacles (furniture, metallic structures). It should also be kept away from potential sources of electrical disturbance (electricity meters, telephone cabinets, etc.). Crucially, the relay cannot be installed directly on a metallic surface.
Recognition Programming:
Recognition programming is a key step to integrate the relay and other products into the alarm system. This process must be performed in a specific order: first, the relay is programmed for recognition by the control panel, then the relayed products are programmed.
- Relay to Control Panel: The relay and control panel must be in installation mode. The relay automatically enters installation mode when powered. The control panel confirms recognition with a voice message and a long beep from the relay.
- Relayed Products: All transmitter/receiver products (control devices, diallers, 8-channel relay output receivers, etc.) must be programmed for recognition on the same relay. A relayed product can only be programmed for recognition by one relay; programming it for another relay is not possible. Cascading multiple relays is also not possible.
- Programming Sequence:
- Remote Control: Briefly press the "test" button on the relay, then press and hold the "Off" button on the remote control until the control panel responds. The remote control LED will light up green for 1.5 seconds.
- Keypad (Standard/Voice): Briefly press the "test" button on the relay, then press and hold the "Off" button on the keypad until the control panel responds. The keypad will issue a long beep. For voice keypads, the control panel will also guide through group and time delay selections for infrared detectors.
- Detector: Briefly press the "test" button on the relay, then press and hold the "test" button on the detector until the control panel responds. The control panel will indicate the detector number and prompt for group and time delay selection.
- Siren: Briefly press the "test" button on the relay, then press and hold the "test" button on the siren until the control panel responds. The siren will issue a long beep.
- Dialler: Briefly press the "test" button on the relay, then press and hold the button on the dialler until the control panel responds. The dialler will issue a long beep.
- 8-channel relay output receiver: Briefly press the "test" button on the relay, then press and hold the "test" button on the receiver until the control panel responds. The receiver will issue a long beep.
- Error Indication: The control panel issues three short beeps to indicate a manipulation error during programming. In such cases, the programming sequence must be restarted.
- Verification: The control panel can read out a list of programmed products, specifying whether they are relayed or not.
Parameter-setting:
- Operating Mode Change Indication: This feature provides a beep when the system's operating mode changes. It can be enabled or disabled via the control panel keypad (factory setting: enabled).
- Radio Anti-tamper Protection: The relay continuously monitors radio link availability. If disturbed, it sends a radio tamper message, triggering alarms. This can be configured via the control panel keypad (factory setting: disabled; configuration to enabled is necessary for EN50131-3 compliance).
- Anti-tamper Protection Against Removal: If the device is tampered with (attempted removal), the relay sends a tamper message, triggering alarms. This can be deactivated via the control panel keypad (factory setting: enabled).
Testing the Radio Range:
Before final installation, position the relay and relayed products in their intended locations and perform a radio range test. If tests are satisfactory, proceed with fixing; otherwise, adjust positions.
- Relay Test: Press the relay "test" button for more than 5 seconds. The LED lights up green. The control panel issues a voice message, and the relay confirms with a long beep.
- Remote Control Test: Press the "Off" button on the remote control. The control panel issues a voice message, and the remote control LED lights up a steady green for 1.5 seconds.
- Keypad Test: Press the "Off" button on the keypad (must be in installation mode). The control panel issues a voice message, and the keypad confirms with a long beep.
- Detector Test: Press the "test" button on the detector for more than 5 seconds. The control panel issues a voice message.
- Siren Test: Press and hold the "test" button on the siren for more than 5 seconds. The siren will beep once, and its LED will flash for 3 seconds. The control panel issues a voice message, and the siren confirms with a long beep.
- Dialler Test: Press the button on the dialler for more than 5 seconds (must be in installation mode). The control panel issues a voice message, and the dialler confirms reception with a voice message.
- 8-channel remote relay output receiver Test: Press the "test" button on the receiver for more than 5 seconds. The LED lights up green. The control panel issues a voice message, and the receiver confirms with a long beep.
Maintenance Features:
Fault Indications:
The control panel supervises the relay's status, monitoring its power supply, radio link, and anti-tamper contact. If a fault is detected, the control panel issues a voice message after a system command. A power fault is also indicated locally by three short beeps from the relay. If the control panel indicates "beep, fault, anti-tamper, device X", check the anti-removal magnet's position and ensure the cover is closed.
Changing the Battery:
- Switch the system to installation mode via the control panel keypad.
- Loosen the four cover screws and open the relay.
- Remove the battery seal.
- Press the unlocking button and slide the depleted lithium pack upwards.
- Wait for 2 minutes, then connect the new lithium power pack. The relay will beep, and the LED will light up green for 2 seconds.
- Replace the battery seal.
- Close the cover and tighten the four screws.
- Switch the system back to user mode via the control panel keypad.
- Important: The lithium battery pack must be replaced with an MPU01X pack (2 x 3.6 V – 17 Ah) to ensure safety and reliability. Dispose of waste lithium packs in appropriate recycling bins.
Deleting a Product Programmed for Recognition:
To delete a recognised product, enter the appropriate code on the control panel keypad. If the radio repeater relay itself is deleted, relayed products are not automatically deleted and must be deleted individually from the control panel.
Returning to Relay Factory Configuration:
To reset the relay to factory settings:
- Connect the lithium power pack while simultaneously pressing the test button.
- Hold the button down until a beep is heard.
- Release the button; a long beep confirms the reset.
Recommendations:
Internal parts of the device should not be accessed beyond the instructions in the manual, as this voids the warranty and may damage electronic components. The product is designed to not require internal access for operation or maintenance.