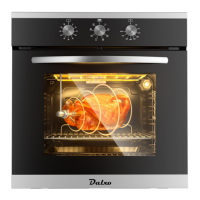
This document describes the Dalxo EB-67ERC-8BC54T Electric Wall Oven, a 24-inch built-in electric oven designed for home use.
Function Description
The Dalxo electric wall oven offers 8 practical functions for versatile cooking. It features a convection mode for even and faster heating, and rotating forks for 360° roasting of items like turkey. A 60-minute timer helps prevent food from scorching. The oven is equipped with over-temperature protectors for safety.
The available functions, selectable via a knob, include:
- Off: The oven is turned off.
- Pizza Function: Air heated by the lower heating element is circulated by the fan, distributing heat between 122-392°F (50-200°C). This function is also suitable for sterilizing glass jars.
- Light: Illuminates the oven interior.
- Hot Air Economy + Rotisserie (Convection): This setting utilizes the central heating elements (upper inside heating element) and the fan, with the oven door closed. It's important not to set the temperature over 350°F (175°C). This combination enhances heat radiation to penetrate food and prevent charring.
- Defrost with Fan: Ambient temperature air is distributed inside the oven to defrost food more quickly without altering proteins.
- Bake Broil + Rotisserie: Combines upper inside heating elements with rotisserie for baking or broiling, such as biscuits. This function requires a half-open door and control protection.
- Bake + Rotisserie: A conventional oven mode where heat rises, making the top hotter than the bottom. Ideal for cooking different sides of meat simultaneously.
- Broil: Designed for grilling and gratinating small quantities of traditional food. This function is for very short times (5-10 minutes) and must be used with a half-open door and control protection for longer durations.
- 3D True Convection Heat: Both the fan and the circular heating element work together, adjusting hot air at 120°F (50°C) to the maximum temperature for even distribution inside the oven. This is ideal for cooking several types of food simultaneously without affecting taste or smell, suitable for chicken and delicate pastries.
The oven also includes a rotisserie feature, which can be used in combination with the rack. Food is fitted onto the spit "S" and secured with two forks "F". The spit's end fits into the motor "M" at the back of the oven, and a support fits into the circular groove. A handle "A" is used for removal. The oven tray with a little water should be placed on the lowest shelf. The rotisserie icon on the knob activates this function, and the oven door should be partially closed. An oven glove is recommended when handling hot components.
Important Technical Specifications
- Dimensions: 23.4"L x 23.4"W x 21.5"H
- Cut Out Dimensions: 22.05"L x 23.19"W x 21.65"H
- Voltage/Frequency: 220V/60Hz (single-phase alternating current, 220-240V 50Hz)
- Material: Stainless Steel finish + Tempered Glass door
- Capacity: 2.6 cu. ft
- Rated Power: 2700-3220W
- Max Temperature: 440°F
- Timer: 60 Mins (adjustable range 1-60 minutes, recommended >5 minutes)
- Temperature Range: 0-440°F (around ±59°F/15°C)
- Heating Elements Power:
- Lower Heating El.: 1200W
- Circle Heating El.: 2100W
- Total Upper Heating El.: 1000W + 1900W
- Upper Inside Heating El.: 1900W
- Upper Outside Heating El.: 1000W
- Oven Light: 15W
- Heating Motor Power:
- Synchromotor: 4W
- Shaded Pole: 25W
- Exhaust Blower: 15W
- Lamp Specification: AC 220V-240V, 25W, Socket: G9 (high-temperature lamp, around 572°F/300°C)
Usage Features
The oven features a control panel with knobs for time, function, and temperature selection. Functions are activated only after a temperature is selected. An indicator light above the control panel turns on/off with the heating element. When the oven reaches a preset constant temperature, the neon light turns off; it re-lights when the oven cools and the thermostat re-activates heating elements.
Installation:
- The oven should be installed by qualified personnel.
- Opening dimensions for installation are Width: 22.05 +/- 0.05" and Height: 23.19 +0-0.09".
- For efficient air circulation, a minimum of 2.76" (70 mm) clearance is required behind the rear panel.
- The oven is mounted to surroundings using screws through 2 holes in the door frame, with plastic covers.
- Adjacent furniture panels should be heat resistant, with adhesives withstanding 250°F (120°C).
- If paired with a stovetop, follow the stovetop's instructions. If a gas stove is installed above, the distance between them should be >1.58".
Electrical Connection:
- The appliance must be grounded.
- Ensure the rated power and outlet wattage match the nameplate.
- The plug should be inserted into a socket with a third contact point to the ground.
- If no plug is installed, the "yellow/green" grounded wire must be 0.39" (10mm) longer than others, connected to the terminal. The "blue" neutral line connects to terminal "N", and "Black, Brown or Red" live wires connect to terminal "L".
- A double pole switch with a minimum gap of 0.12 inches (3mm) between contacts, proportionate to the load, can also be used.
- The yellow/green earth wire should not be controlled by the switch.
- The plug or two-pole switch must be accessible after installation.
- The power cord should be placed below 120°F (50°C) ambient temperature.
Safety Tips:
- The oven heats up during operation; keep children away from the glass door.
- Do not use the oven door handle as a moving tool.
- Initial use may produce acrid smoke due to adhesive heating; wait for it to dissipate before cooking.
- Never roast or bake directly on the oven base.
- Keep packing materials (plastic sheeting, polystyrene) out of reach of children.
- This device is for non-professional home use; its functions should not be altered.
- The electrical system requires proper grounding.
- The manufacturer is not responsible for damage from incorrect installation or unreasonable use.
- Accessible parts become hot; avoid touching heating elements.
- Avoid contact with the appliance when wet or barefoot.
- Do not pull the appliance or power cord to unplug.
- Do not block ventilation or cooling slots.
- Prevent power supply cords of small appliances from touching hot parts of the unit.
- Avoid exposing the appliance to atmospheric agents (rain, sun).
- Do not use the oven for storage.
- Do not use flammable liquids near the appliance.
- Avoid using adaptors, multiple sockets, or extension cords.
- Do not attempt installation or repair without qualified personnel.
- Unplug the appliance before cleaning or maintenance.
- Unplug and turn off the gas cock (if applicable) when not in use for a long time.
- Use cooking pull handle or gloves to remove cookware.
- Grasp the oven door in the center to avoid hot ends.
- Ensure the control knob is at "o" when not in use.
- Unplug the appliance if no longer in use.
- If the power cord is damaged, needs replacement, or if the equipment malfunctions, contact an authorized service center for original spare parts.
Maintenance Features
Cleaning:
- Unplug the oven before cleaning or maintenance.
- Do not use steam equipment.
- Do not immerse the unit, cord, or plug in liquid, or sprinkle water.
- Clean the inside and external surfaces with a damp cloth when cooled down.
- Dry condensation with a soft cloth.
- Regularly check the rubber seals around the oven opening. Avoid abrasive products. If damaged, contact an after-sales service center and avoid using the oven until repaired.
- Never put aluminum foil on the bottom of the oven.
- Clean the glass door with a damp cloth and dry with a soft cloth.
- Do not use harsh abrasive cleaners or sharp metal scrapers on the glass door to prevent scratches and shattering.
Removable Glass Door:
The oven door has 3 layers of glass. If condensation forms between the panes, the door can be removed for cleaning.
- Press buttons on the left and right sides of the door to remove the top rail (Fig.7).
- Slowly remove the inner glass (Fig.8).
- Loosen clips (Fig.9).
- Remove the middle glass (Fig.10).
Clean glass and other parts with a damp microfiber cloth, sponge, or hot water solution with a small amount of detergent, then dry with a soft cloth. Place the door on a protective surface (e.g., tablecloth) with the handle aligned with the table edge to prevent scratches and breakage.
Disassemble/Assemble the Oven Door:
To clean the inside oven:
- Open the door completely and lift the 2 levers “B” (Fig.11).
- Slightly shut the door and lift it out by pulling out hooks “A” to reassemble (Fig.12).
- To reassemble, insert hooks “A” into the slots with the door in a vertical position.
- Ensure seat "D" is hooked onto the edge of the slot (move the door slightly back and forth).
- Open the door fully, unhook the 2 levers “B” downwards, then shut the door again.
Replacing the Light (Fig.15):
- Unplug the oven.
- Unscrew the glass cover attached to the lamp holder.
- Unscrew the lamp and replace it with a high-temperature lamp (around 572°F/300°C).
- Remount the glass cover and reconnect the appliance to the power supply.
WARNING: Ensure the appliance is unplugged before replacing the lamp to avoid electric shock. Do not operate the device with a damaged power cord or plug; return it to an authorized service center for inspection and repair.
Troubleshooting:
The manual provides a troubleshooting guide for common issues:
- Upper crust dark, lower part pale: Not enough heat from the bottom. Solution: Use natural convection, deeper cake tins, lower temperature, or put the cake on a lower rack.
- Lower part dark, upper crust pale: Excessive heat from the bottom. Solution: Use natural convection, lower side tins, lower temperature, or put the cake on a higher rack.
- Too cooked on the outside, not enough on the inside: Temperature is too high. Solution: Lower the temperature and increase cooking time.
- Outside too dry in the right color: Temperature is too low. Solution: Increase the temperature and lower cooking time.
Warranty
Dalxo products sold in the U.S. are warranted for one year against defects in material and workmanship. A receipt is required for proof of purchase. Repairs, refunds, or replacements are provided at Dalxo's discretion. The warranty is non-transferable and applies only to the original consumer purchaser from an authorized retailer. For new home purchases, the warranty period starts from the date of ownership.
Exclusions:
The warranty does not cover damage or defects caused by:
- Consumer misuse
- Abuse
- Neglect (including lack of cleaning and regular maintenance as described in the manual)
- Commercial use
- Subjecting the product to voltage outside the specified range
- Loss of parts
- Affixing attachments not provided with the product
- Accident
- Use in a manner not intended or outlined in the manual
Subsequent damages caused by these exclusions are not covered. Liability is limited to the purchase price and excludes:
- Retail-offered extended warranties
- Tax
- Other charges (including postage for materials)
- Incidental and/or consequential damages associated with the product
All implied warranties, including merchantability or fitness for a particular purpose, are disclaimed except where prohibited by law, in which case they are limited to the duration of the written warranty. This warranty grants specific legal rights, which may vary by location. Some states do not allow limitations on implied warranties or special, incidental, or consequential damages.
For warranty claims, contact support@dalxo.com. Provide the model number, serial number, and receipt for faster service.
Disposal:
This product must not be disposed of with household waste. Electrical and electronic equipment must be recycled at an authorized facility. Collecting and recycling waste conserves natural resources and ensures environmentally friendly disposal. If the oven is no longer used, unplug and disconnect the power cord. Abandoned appliances can be a safety risk for children.