VERTICAL
5-PART SYSTEM INSTALLATION INSTRUCTIONS
TOOLS REQUIRED: Use either a #2 Phillips head driver or a 1/4-inch hexhead driver, as both types of screws are
included with this sysem. To install the system, you will need:
• racheting driver • screw starter • scissors
• cordless drill • small hammer • file
• small blade screwdriver • chalk or other marker • measuring tape
• wirecutters
The following is a list of components:
.
Purpose
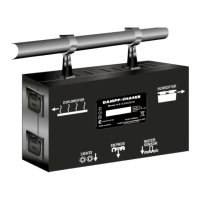
1 91 cm Dehumidifier (with attached extensions) Removes excess moisture from the piano
1 Humidistat Controls the Humidifier and Dehumidifier
1 Humidifier Brings moisture into the piano
1 Water Sensor Probes Measure water depth in Humidifier
1 Humidifier Heater Bar Warms pads to aid evaporation
1 Two-light Panel Shows System is energized and when to add water
1 Watering tube Enables the delivery of water to the Humidifier
1 Humidifier pads Used to vaporize moisture from the Humidifier
1 3 m Extension Power Cord Connects Humidistat to electrical wall outlet
1 Moisture Distribution Baffle Dispenses moisture throughout the piano
1 Watering Can For adding water to the Humidifier
1 Bottle of Humidifier Treatment Additive that prolongs the life of the pads
1 Hardware kit Described below
1 System Care and Maintenance sheet / 5-Year Warranty Certificate
The hardware kit includes the following:
2 Y Hangers Used to suspend the Humidifier tank when necessary
13 13 mm #8 screws Mounts clamps
2 19 mm #8 screws Used to attach the light panel
3 5 mm clamps Attaches wire between light panel and Humidistat
2 13 mm standard clamps Attaches watering tube between keybed and Humidifier
2 Half clamps and serrated washers Attaches the end of the watering tube to the rim
6 6 mm clamps Anchors Humidistat power cord wire
2 Screw hooks Used to suspend the Humidifier when necessary. Used with Y Hangers
2 Wire ties and cable ties Used to bundle excess cords
4 Pin pegs Used to mount Dehumidifier and the Moisture Distribution Baffle
2 Plastic hanger C clips Used to mount the Humidistat on the Dehumidifier
1 “STOP, DO Not Unplug Label Can be attached to power cord near wall outlet
1 Warranty Registration card
While we make every effort to ensure all components are included, it is a good idea to check that none are missing prior to
arriving at the installation location. In the unlikely event that a part is missing, please call your supplier with information from
the end of the box and the assembler’s name. The replacement part will be shipped to you without delay.
Smart Bracket package includes:
Smart Bracket Sensors Attaches to Humidifier heater bar and senses when pads are dry
Single-Light Cube Signals when Humidifier pads are dry