EasyManua.ls Logo

Danby DDW1899BLS - User Manual

Danby DDW1899BLS
11 pages
Print Icon
To Next Page IconTo Next Page
Loading...
DDW1899BLS
Question and Answer IconNeed help?

Do you have a question about the Danby DDW1899BLS and is the answer not in the manual?

Summary

Before Installation

Safety Warnings

Critical safety precautions regarding electrical shock and tipping hazards during installation.

Installer and Consumer Notes

Instructions for installers to leave documentation with owners and for consumers to keep manuals.

Skill Level Requirements

Specifies basic mechanical and electrical skills needed for installation.

Important Installation Note

Dishwasher must be installed for future service removal.

Installation Preparation

Materials and Tools

Lists included and not included materials, and required tools for installation.

Unit Dimensions

Provides the physical dimensions (height, width, depth) of the dishwasher unit.

Prepare the Location

Guidance on positioning the dishwasher near plumbing for supply lines.

Corner Installation

Specific clearance requirements when installing the unit in a corner.

Type of Drain Connection

Details on connecting the drain hose to various plumbing configurations.

Prepare Electrical Wiring

Instructions for safely preparing the electrical wiring for connection.

Electrical Requirements

Specifies the voltage, frequency, and circuit breaker requirements for the dishwasher.

Remove Kick-Plate

Steps to remove the kick-plate to access water and electrical connections.

Prepare Water Line

Instructions for drilling holes and connecting the hot water supply line.

Adjust Door Balance

Guidance on adjusting door spring tension for optimal opening/closing.

Prepare Drain Connection

Instructions for preparing the drain hose connection to the sink or disposal.

Installation Steps

Slide Dishwasher into Cabinet

Procedure for carefully sliding the dishwasher into its installed location.

Position and Secure Dishwasher

Steps to position the unit and secure it to the countertop or cabinet sides.

Electrical Connections

Detailed steps for making secure electrical connections inside the junction box.

Connect Drain Line

Instructions for connecting the drain hose to the air gap, waste tee, or disposer.

Level the Dishwasher

Procedure for leveling the unit using adjustable legs for proper operation.

Connect Water Supply

Steps for connecting the hot water supply line to the dishwasher's inlet valve.

Pre-Test Check List

A list of checks to perform before powering on to avoid service charges.

Dishwasher Wet Test

Procedure for testing water fill, drain, and checking for leaks.

Reinstall Kick-Plate

Instructions on how to reattach the kick-plate after installation.

Overview

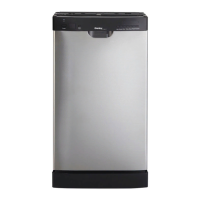
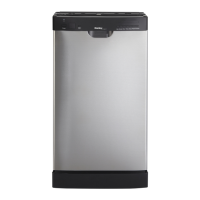
This document is an installation manual for the Danby Designer Built-In Dishwasher, model DDW1899BLS. It provides comprehensive instructions for preparing the installation location, connecting the dishwasher to water and electrical supplies, and securing it within a cabinet. The manual emphasizes safety warnings, required tools, and materials, as well as pre-test checks to ensure proper operation after installation.

Function Description:

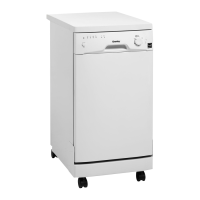
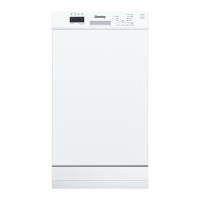
The Danby Designer Built-In Dishwasher (model DDW1899BLS) is designed to be permanently installed within kitchen cabinetry, providing an integrated solution for dishwashing. Its primary function is to clean dishes, and it requires connections to a hot water supply, a drain system, and an electrical power source to operate. The installation process is detailed to ensure the unit is level, securely mounted, and properly connected to prevent leaks, electrical hazards, and operational issues.

Important Technical Specifications:

  • Dimensions:
    • Depth: 23 inches (580mm)
    • Width: 18 inches (450mm)
    • Height: 33 to 35 inches (840 to 890mm)
  • Cabinet Opening Requirements:
    • Depth: 24 inches (610mm)
    • Width: 18 inches (460mm)
    • Height: 33 to 35.5 inches (840 to 900mm)
  • Electrical Requirements:
    • Voltage: 120 volts, 60 Hz
    • Circuit: Separate (individual) circuit with a fuse or circuit breaker rated for at least 15 amps, but not more than 20 amps.
    • Wiring: Must be connected to a grounded metal, permanent wiring system. The equipment-grounding conductor must be run with the circuit conductors. House wiring, if aluminum, requires UL Listed anti-oxidant compound and aluminum-to-copper connectors.
    • Electrical cable: Must extend a minimum of 24 inches from the rear wall to the front cabinet.
    • Junction Box: Located on the right front side of the dishwasher behind the kick-plate.
  • Water Supply Requirements:
    • Water Line: Must be installed on a "hot" water line, using no less than 3/8 inch O.D. copper tubing or 3/8 inch flexible braid (high pressure, high temperature) hose designed specifically for dishwasher installations. Regular rubber or garden hoses are explicitly prohibited.
    • Water Temperature: At least 120°F (49°C).
    • Water Pressure: Between 20 and 120 psi.
    • Shut-off Valve: Recommended to be installed in an accessible location (e.g., under the sink) between the hot water supply and the dishwasher connection.
    • Elbow: A 3/8 inch Male (N.P.T.) 90° elbow is required for the water inlet valve connection.
  • Drain Connection Requirements:
    • Drain Hose: Factory installed. If a longer hose is needed, an additional 42 inches can be added for a total length not exceeding 10 feet. Use 5/8 inch or 7/8 inch inside diameter hose and a coupler with hose clamps.
    • Drain Hole: A 2-inch diameter hole is required in the cabinet to pass the drain hose.
    • Drain Methods: Supports connection to an air gap with a waste tee, an air gap with a disposer, a waste tee, or directly to a disposer. Local codes may require an air gap kit (not included).
    • Disposer Plug: If connecting to a disposer, the disposer plug must be removed for the dishwasher to drain properly.
  • Built-in Design: The dishwasher is designed to be fully enclosed within kitchen cabinetry, requiring specific cabinet dimensions and clearances.
  • Corner Installation: If installed in a corner, a minimum 2-inch clearance between the dishwasher and adjacent cabinet/wall/appliances is required, along with a 22-inch minimum clearance from the front for door opening.
  • Door Balance Adjustment: The door's opening/closing tension can be adjusted by repositioning the spring holding pin to higher (increase tension) or lower (decrease tension) hole openings. This ensures the door operates smoothly and does not fall open or close too easily.
  • Leveling: The dishwasher must be leveled using its four adjustable leveling legs to ensure proper dish rack operation and wash performance. A level should be placed on the door and rack track inside the tub to check.
  • Secure Mounting: The dishwasher must be secured to the countertop or cabinet sides. For wood countertops, screws are used. For granite or other materials that won't accept screws, side mounting brackets (supplied with some models) are used.
  • Kick-Plate: The kick-plate is removable for access to electrical and water connections and is designed to snap back into position without needing to replace the original mounting screws.
  • Future Removal: The dishwasher must be installed in a way that allows for future removal from the enclosure for service.
  • Accessible Shut-off Valve: Installing a shut-off valve for the hot water supply in an accessible location (e.g., under the sink) facilitates disconnecting the dishwasher for service or moving.
  • Pre-Test Checklist: A detailed checklist is provided to verify all connections, alignments, and functionalities before the first use. This includes checking for leaks, proper door operation, wiring security, and water supply.
  • Pump Seal Lubrication: Adding 1.5 quarts of water to the bottom of the dishwasher before the first use is recommended to lubricate the pump seal.
  • Leak Detection: The wet test procedure involves running a normal wash cycle and checking for leaks under the dishwasher, around the door, and in the drain lines. Any leaks require immediate power shut-off and correction.
  • Drain Verification: During the wet test, it's crucial to ensure water drains completely and that the disposer plug (if applicable) has been removed and/or the air gap is not plugged.

Danby DDW1899BLS Specifications

General IconGeneral
BrandDanby
ModelDDW1899BLS
CategoryDishwasher
LanguageEnglish

Related product manuals