EasyManua.ls Logo

Datalogic MemorX3 - User Manual

Datalogic MemorX3
10 pages
Print Icon
To Next Page IconTo Next Page
Loading...
Copyright Datalogic 2019 Confidential Proprietary Information
Dear Valued Customer,
Your device has been repaired by Datalogic repair
center. In order to provide our customers with
enhanced level of support, this document provides
the steps needed to basic troubleshooting of your
device which could help you to solve common
technical malfunctions directly at your side. Let us
recommend you to follow this guide and save your
time with unnecessary delivery of your device to
repair center. The guide is best place to start prior
submitting the RMA and helps you to easily remedy
most common malfunctions that can occur in daily
operation.
Thank You!
1
Question and Answer IconNeed help?

Do you have a question about the Datalogic MemorX3 and is the answer not in the manual?

Summary

Your Guide Through Device Troubleshooting

Troubleshooting Flowchart

Resetting the Device SkorpioX3;X4 Falcon X3;X3+;X4 (Windows)

Warm Boot

To perform a warm boot, press and hold the following keys simultaneously.

Cold Boot

To perform a cold boot, do the following steps:

Clean Boot

To perform a clean boot, do the following steps:

Resetting the Device Skorpio X4, Falcon X4, JoyaTouch, DL-Axist (Android)

Configuration Reset

Configuration reset sets the configuration of the device (all its settings) to a known status.

Factory Reset

Brings the device to the default configuration, clearing all the user-customized settings.

Resetting the Device ELF

Warm Boot

To perform a warm boot, press and hold the following keys simultaneously:

Cold Boot

To perform a cold boot, do the following steps:

Resetting the Device Lynx

Warm Boot

To perform a warm boot, press and hold the following keys:

Cold Boot

To perform a cold boot, do the following steps:

Clean Boot

To perform a clean boot, do the following steps:

Resetting the Device MemorX3

Warm Boot

To perform a warm boot, press these keys simultaneously:

Cold Boot

To perform a cold boot, press these keys simultaneously:

Clean Boot

To perform a clean boot, follow these steps:

Resetting the Device Memor1, Memor10, Memor20

Factory Reset

Brings the device to the default configuration, clearing all the user-customized settings.

Troubleshooting Flowchart Hand Held Scanners

Resetting the Device PowerScan 8300, 8500

Restore Custom Defaults

Restore custom configuration saved in the scanner for the currently active interface.

Restore Factory Configuration

Permanently cancel setup defined by configuration file and restore factory default.

Resetting the Device Gryphon, Quickscan, Touch, Heron

Restore Custom Defaults

Restore custom configuration saved in the scanner for the currently active interface.

Restore Factory Configuration

Permanently cancel setup defined by configuration file and restore factory default.

Resetting the Device PowerScan 9100, 9300

Restore Custom Defaults

Restore custom configuration saved in the scanner for the currently active interface.

Restore Factory Configuration

Permanently cancel setup defined by configuration file and restore factory default.

Resetting the Device PowerScan 9500

Restore Custom Defaults

Restore custom configuration saved in the scanner for the currently active interface.

Restore Factory Configuration

Permanently cancel setup defined by configuration file and restore factory default.

Resetting the Device Magellan

Return to Factory Settings

Return the scanner to the default settings configured at the factory for the currently active interface.

Overview

This document serves as a comprehensive guide for basic troubleshooting and resetting various Datalogic devices, aiming to empower users to resolve common technical malfunctions independently and efficiently. It emphasizes saving time by avoiding unnecessary device deliveries to a repair center.

Function Description

The primary function of this guide is to provide step-by-step instructions for diagnosing and resolving common issues across a range of Datalogic mobile computers and handheld scanners. It covers scenarios such as devices failing to turn on, inability to read barcodes, connectivity problems (Wi-Fi, PC transfer), and battery-related issues. The guide also details various reset procedures—Warm Boot, Cold Boot, Clean Boot, Configuration Reset, and Factory Reset—tailored to specific device models and operating systems (Windows and Android).

Usage Features

The guide is structured around a troubleshooting flowchart for both mobile computers and handheld scanners, making it easy for users to navigate and identify potential solutions based on the symptoms their device exhibits.

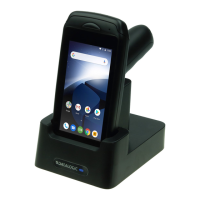
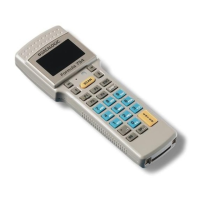
For Mobile Computers (SkorpioX3/X4, Falcon X3/X3+/X4, JoyaTouch, DL-Axist, Elf, Lynx, MemorX3, Memor1/10/20):

  • Initial Diagnosis: The flowchart begins by asking if the device can turn on. If not, it directs users to try pressing and holding "SCAN" and "Reset" buttons for 15 seconds, or to check the battery.
  • Barcode Reading Issues: If the device turns on but cannot read barcodes, the flowchart suggests checking if the scan window is clean. If not, cleaning the window is recommended.
  • Connectivity Problems (Wi-Fi): For devices unable to connect to a Wi-Fi network, the guide advises resetting to default settings or contacting technical support.
  • General Device Problems: If the device has other problems, a reset to default settings is recommended.
  • Battery Management: The flowchart includes steps to check if the battery is charged, and if not, to charge it. If charging is not possible, it suggests cleaning battery contacts or replacing the battery. It also considers the battery's warranty period, recommending a new purchase if outside warranty and replacement if within.
  • RMA Submission: If troubleshooting steps fail, the flowchart directs users to submit an online RMA and deliver the device to a repair center.

For Handheld Scanners (Gryphon, Quickscan, Touch, Heron, PowerScan 8300/8500/9100/9300/9500, Magellan):

  • Initial Diagnosis: The flowchart starts by asking if the device can turn on. If not, it directs users to try the device with a new battery or cable.
  • Barcode Reading Issues: If the device turns on but cannot read barcodes, it asks if the device is sending the barcode to the PC.
  • Connectivity Problems (PC Transfer): If the barcode is not correctly transferred to the PC, the guide advises setting the correct interface, changing the IF cable, or pairing the device following the user's guide.
  • Scan Window Cleanliness: Similar to mobile computers, it prompts users to check if the scan window is clean and to clean it if necessary.
  • Battery Management: Steps are provided to check if the battery is charged or the cable is plugged in, and to charge the battery or plug in the cable if needed. If charging is not possible, cleaning battery contacts is suggested. The battery's warranty period is also considered.
  • RMA Submission: If troubleshooting fails, users are directed to submit an online RMA.

Resetting Procedures:

The guide provides detailed instructions for various reset types, crucial for resolving software-related issues without losing data unnecessarily.

  • Warm Boot: This terminates unresponsive applications and clears working RAM, preserving the file system. Registry is restored from persistent memory or factory default.
    • SkorpioX3/X4, Falcon X3/X3+/X4 (Windows): Press and hold + + ESC simultaneously.
    • Elf: Press and hold specific keys simultaneously (visual representation provided).
    • Lynx: Press and hold specific keys simultaneously (visual representation provided).
    • MemorX3: Press and hold ESC + G simultaneously.
  • Cold Boot: This forces all applications to close, completely reinitializing the system, clearing working RAM, but preserving the file system. Registry is restored from persistent memory.
    • SkorpioX3/X4, Falcon X3/X3+/X4 (Windows): Turn off the device, remove the battery, simultaneously press SCAN and Reset buttons, insert the battery, and turn on the device.
    • Elf: Turn off the device, pull down the battery latch, remove the battery pack, press the reset button, insert the battery pack, and turn on the device.
    • Lynx: Turn off the device, slide the battery latch leftward, remove the battery pack, press the reset button, insert the battery pack, and turn on the device.
    • MemorX3: Press and hold ESC + ENT + C simultaneously.
  • Clean Boot: This restores the device to a clean configuration, returning both the Registry and file system to a factory default status.
    • SkorpioX3/X4, Falcon X3/X3+/X4 (Windows): Perform a Cold Boot, then press and hold ESC + 0 simultaneously after resetting. Confirm with Enter key.
    • Lynx: Perform a Warm Boot, then press and hold 0 and Telephone End keys simultaneously before the splash screen appears. Confirm with Enter key or cancel with Blue + Telephone End.
    • MemorX3: Perform a Cold Boot, quickly release keys when the screen goes black, then within 1 second press and hold Esc and 0 keys until the Clean Boot confirmation shows up. Release keys, then enter 1 to proceed or 0 to cancel.
  • Configuration Reset (Android devices: Skorpio X4, Falcon X4, JoyaTouch, DL-Axist): Sets the device's configuration (all settings) to a known status (factory or enterprise-user-defined).
  • Factory Reset (Android devices: Skorpio X4, Falcon X4, JoyaTouch, DL-Axist, Memor1/10/20): Brings the device to the default configuration, clearing all user-customized settings.
    • Android Devices: Tap Settings > Backup&reset > Factory data reset > Reset phone.
    • Memor1/10/20: Tap Settings > System > Reset options > Erase all data (factory reset), then RESET PHONE.
  • Restore Custom Defaults (Scanners): Scans a specific barcode to restore the custom default configuration saved in the scanner, based on the active interface. This is available for Gryphon, Quickscan, Touch, Heron, PowerScan 8300/8500/9100/9300/9500.
  • Restore Factory Configuration (Scanners): This command is used to restart the machine from a known status (factory or custom configuration file). If no configuration file has been loaded, it restores factory defaults. This is available for Gryphon, Quickscan, Touch, Heron, PowerScan 9500.
  • Return to Factory Settings (Magellan): Scans a specific barcode to return the scanner to the default settings configured at the factory for the currently active interface. A caution is provided as this will reset ALL features programmed since installation. Users are advised NOT to scan the Enter/Exit Programming Mode barcode before and after scanning this barcode.

Maintenance Features

The guide implicitly suggests several maintenance actions through its troubleshooting steps:

  • Cleaning: Regularly cleaning the scan window is highlighted as a solution for barcode reading issues.
  • Battery Care: Checking battery charge, ensuring proper charging, and cleaning battery contacts are recommended to address power-related problems. The guide also acknowledges battery warranty, implying that users should be aware of their battery's lifespan and replacement options.
  • Software Resetting: The various reset options (Warm Boot, Cold Boot, Clean Boot, Configuration Reset, Factory Reset, Restore Custom Defaults, Restore Factory Configuration) serve as crucial software maintenance tools, allowing users to clear software glitches, unresponsive applications, or corrupted settings without requiring professional intervention. This helps in maintaining the device's optimal performance and resolving common software malfunctions.
  • Documentation and Support: The guide directs users to www.datalogic.com for technical support and online RMA submission, providing a clear path for further assistance when self-troubleshooting is insufficient. It also mentions a 3-month warranty coverage for consumables or equivalent, unless covered by a dedicated Ease of Care program, including replacement of consumables, which is a key maintenance-related policy.

Datalogic MemorX3 Specifications

General IconGeneral
RAM128 MB
Storage256 MB Flash
Operating Temperature-10°C to 50°C
Storage Temperature-20°C to 60°C
Humidity5% to 95% non-condensing
IP RatingIP54
Processor806 MHz
Operating SystemWindows Embedded CE 6.0
ConnectivityBluetooth
Keypadnumeric
Scanner1D scanner
Expansion SlotMicroSD

Related product manuals