EasyManua.ls Logo

Datsun 1600 - THERMOSTAT REMOVAL AND INSTALLATION

Datsun 1600
258 pages
Print Icon
To Next Page IconTo Next Page
To Previous Page IconTo Previous Page
Loading...
or
foreign
matter
that
may
have
accumulated
on
the
front
sIde
of
the
core
3
With
the
aid
of
a
hght
make
a
ViSUal
check
down
through
the
radiator
filler
neck
onto
the
radiator
tubes
If
It
IS
apparent
that
the
tubes
are
severely
unpregnated
With
flakes
of
rust
It
will
be
necessary
to
have
the
upper
and
lower
radiator
tanks
un
sweated
from
the
radIator
core
and
the
tubes
thoroughly
cleaned
It IS
recommended
that
this
operahon
be
carned
out
by
a
radiator
speclahst
who
has
the
necessary
speclallsed
equipment
to
carry
out
tlus
type
of
work
TO
INSTAL
1
PositIOn
the
radiator
assembly
m
the
front
panel
opemng
and
mstal
and
l1ghten
the
four
secunng
boits
2
Connect
the
upper
dIld
lower
radIator
hoses
between
the
radiator
and
the
engme
Use
a
hght
smear
of
grease
between
the
hoses
and
pIpes
Cooling
System
2
NOTE
Inspect
all
hoses
before
mstallmg
for
crackmg
or
penshmg
and
renew
any
hose
that
upon
mspectlOn
proves
to
be
unservIceable
3
On
vehicles
fitted
With
automatIc
transrmsslOn
connect
up
the
torque
converter
cooling
pipes
at
the
lower
radiator
tank
4
Close
the
radiator
dram
tap
and
mstal
the
dram
plug
at
the
cylinder
block
Fill
the
system
with
clean
water
and
mstal
the
pressure
cap
5
Start
the
engme
and
check
that
the
water
level
m
the
radiator
IS
wlthm
approximately
12
7
mm
050
m
of
the
bottom
ofthe
filler
neck
NOTE
Use
care
to
aVOid
the
rISk
of
scaldmg
If
the
engme
IS
at
operatmg
temperature
remove
the
radiator
cap
slowly
to
allow
pressure
to
escape
before
removmg
the
cap
6
With
the
engme
temperature
thoroughly
transmiSSiOn
flUId
leaks
runmng
and
at
operatmg
check
for
water
and
or
1
TH
K
nSTAT
TO
REMOVE
AND
INSTAL
1
Remove
the
radiator
or
pressure
cap
and
dram
the
water
from
the
coolmg
system
Via
the
tap
on
the
lower
radiator
tank
2
Disconnect
and
remove
the
top
radiator
hose
3
Remove
the
two
bolts
secunng
the
water
outlet
elbow
to
the
thermostat
housmg
4
Detach
the
water
outlet
elbow
and
gasket
and
Withdraw
the
thermostat
assembly
from
the
recess
m
the
thermostat
housmg
5
If
the
thermostat
housmg
or
gasket
reqUIre
removal
disconnect
the
wife
from
the
heat
sender
umt
and
remove
the
thermostat
housmg
to
cyhnder
head
securmg
bolts
Withdraw
the
housmg
and
gasket
from
the
cylinder
head
NOTE
A
visual
exammaflon
of
the
thermostat Will
often
determme
Its
servzceablltty
and
obViate
the
necessity
for
further
testIng
For
mstance
a
thermostat
with
ItS
valve
open
when
removed
from
a
cold
engme
IS
obvIOUSly
faulty
and
should
be
discarded
and
a
new
umt
fitted
InstallatIOn
IS
a
reversal
of
the
remoyal
procedure
Ensure
that
new
gaskets
are
fitted
when
assemblmg
F1l1
the
coolmg
system
With
clean
water
to
approxunately
127
mm
050
m
below
the
radiator
ruler
neck
and
check
for
water
leaks
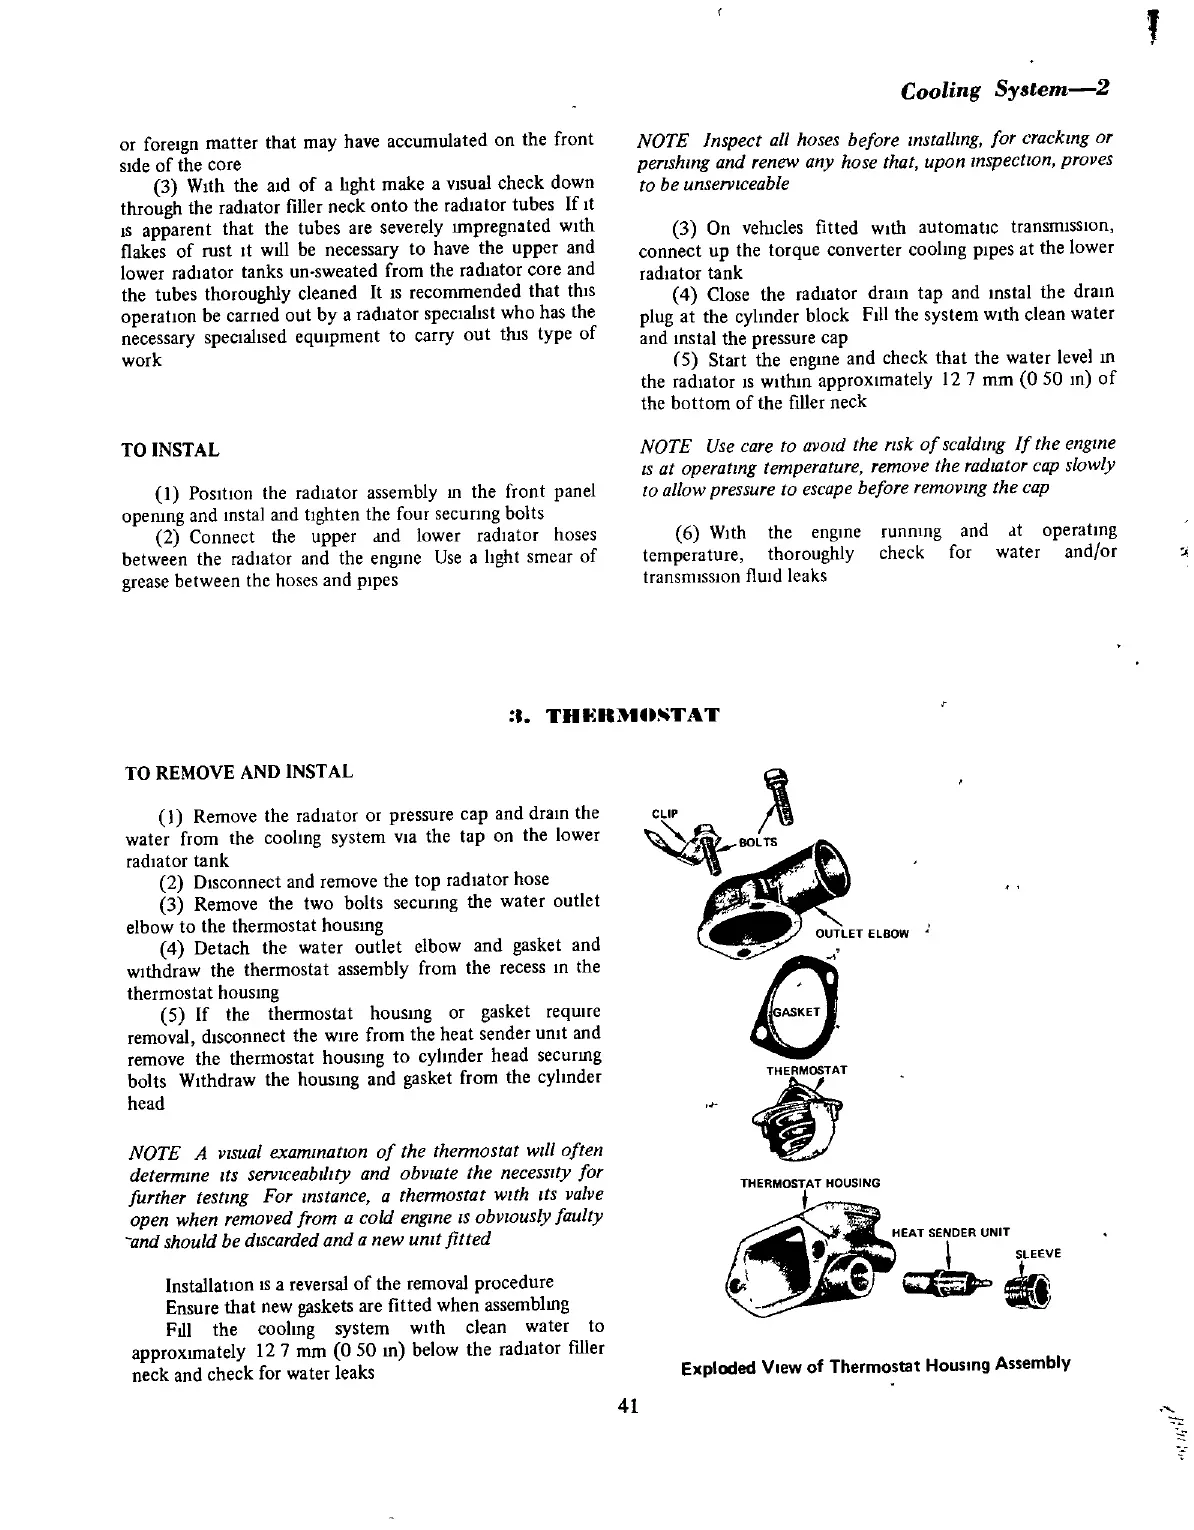
CLIP
t
e
lfj
THERMOSTAT
HOlJSING
t
HEAT
SENDER
UNIT
SLEEVE
Exploded
VIew
of
Thermostat
Housmg
Assembly
41
WWW.PlanDeGraissage.Org