March 2010
March 6, 2009
Fig. 3-5
Never expose the underside of the DAVCO® Brush Cutter to the operator’s cab (Fig.
3-5) or to personnel within sight of the machine. Flying debris can cause equipment damage, serious injury
or death. Never exit cab while loader arms are raised.
4. Knife change
Fig. 4-1
Remove the disc inspection cover (1) in Fig. 4-1 to gain access to the top of the disc.
Rotate the disc by hand until the first set of knife bolts are visible in the hole.
Fig. 4-2
To remove the knives, set the DAVCO® Brush Cutter on the stand or blocks, undo
the nuts (as illustrated on Fig 4-2), drop the bolts, and then remove the knives and the pucks horizontally.
To install the knives, reverse the procedure, and torque the bolts to 250 ft/lb for Course thread or 300 ft
lbs for fine thread bolts. Note- Remember to re-torque the bolts after the first 8 hours of operation
following a knife replacement
5. Identification
Fig 5-1
Fig. 5-1 shows the identification of the DAVCO® Brush Cutter that includes the
serial numbers and the model (B). Please refer to these numbers when calling for technical support, or
replacement parts.
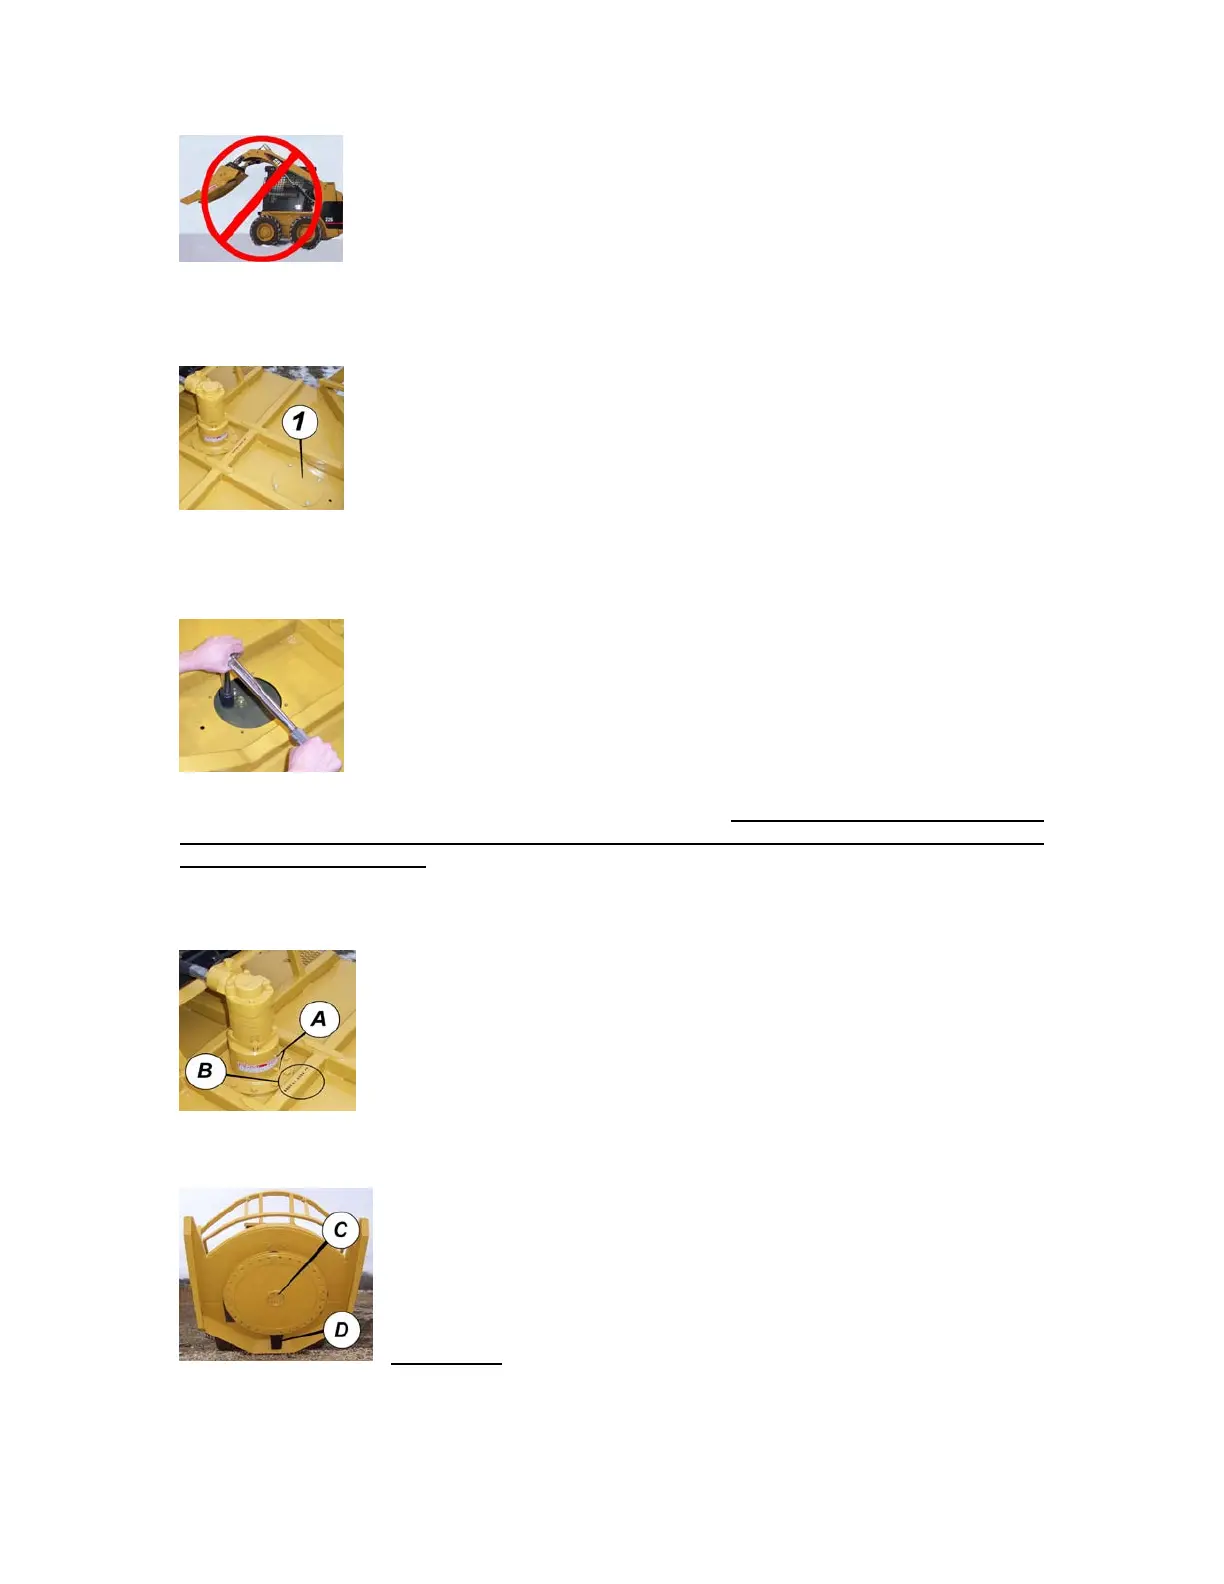
Fig 6-1
Spindle bolts (Item A in Figure 6-1) must be torqued to 300 ft/lb. Inspect
periodically.