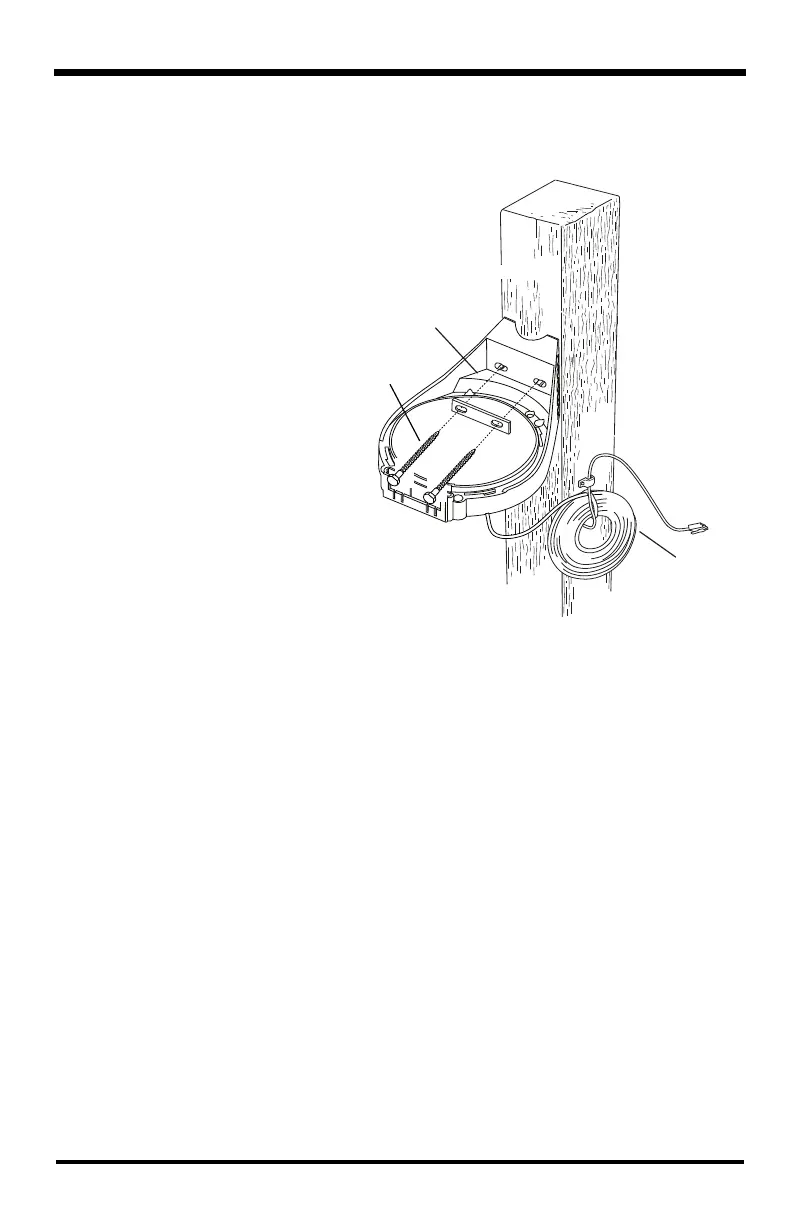
4
Installing the Rain Collector on a Post or Vertical
Surface
1. With a 3/16" (5 mm)
drill bit, drill two holes
approximately 2
1
/
8
" (54
mm) apart. Use the
metal backing plate as a
guide when marking
the holes and a
carpenter’s level to
ensure the holes are
level.
2. Remove the rain
collector cone if it is
installed.
3. Insert the 1/4" x 3" lag
screws through the
metal backing plate and
the holes in the
mounting base into the
post. Make sure the
base is level by
checking the built-in
bubble level.
4. Tighten the lag screws using an adjustable wrench or 7/16" (11 mm) wrench.
Installing the Rain Collector on a Pole
Accessories for Pole Mounting
• Use the Mounting Tripod (#7716) for easy mounting.
• Use the Mounting Pole Kit (#7717) to raise the installation height of the rain
collector by up to 37.5" (0.95 m).
General Guidelines for Installing on a Pole
• With the supplied U-bolt, the rain collector can be mounted on a pole having an
outside diameter ranging from 1
1
/
4
" to 1
3
/
4
" (32 – 44mm).
• A larger U-bolt (not supplied) can be used to mount to a pole with a maximum
outside diameter of 2
1
/
2
" (64mm).
• To mount on a smaller pole, obtain a U-bolt that fits the base openings but that has
a shorter threaded section. If the included U-bolt is used with a smaller pole, the
bolt will interfere with the rain collector cone.
• Use the built-in bubble level to ensure rain collector is level.
Backing Plate
1/4" x 3"
Lag Screws
40' Cable
(For clairty, the tipping
mechanism is not shown.)