-7-
�
�
�
�
�
�
�
�
-7-
�
�
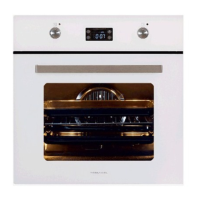
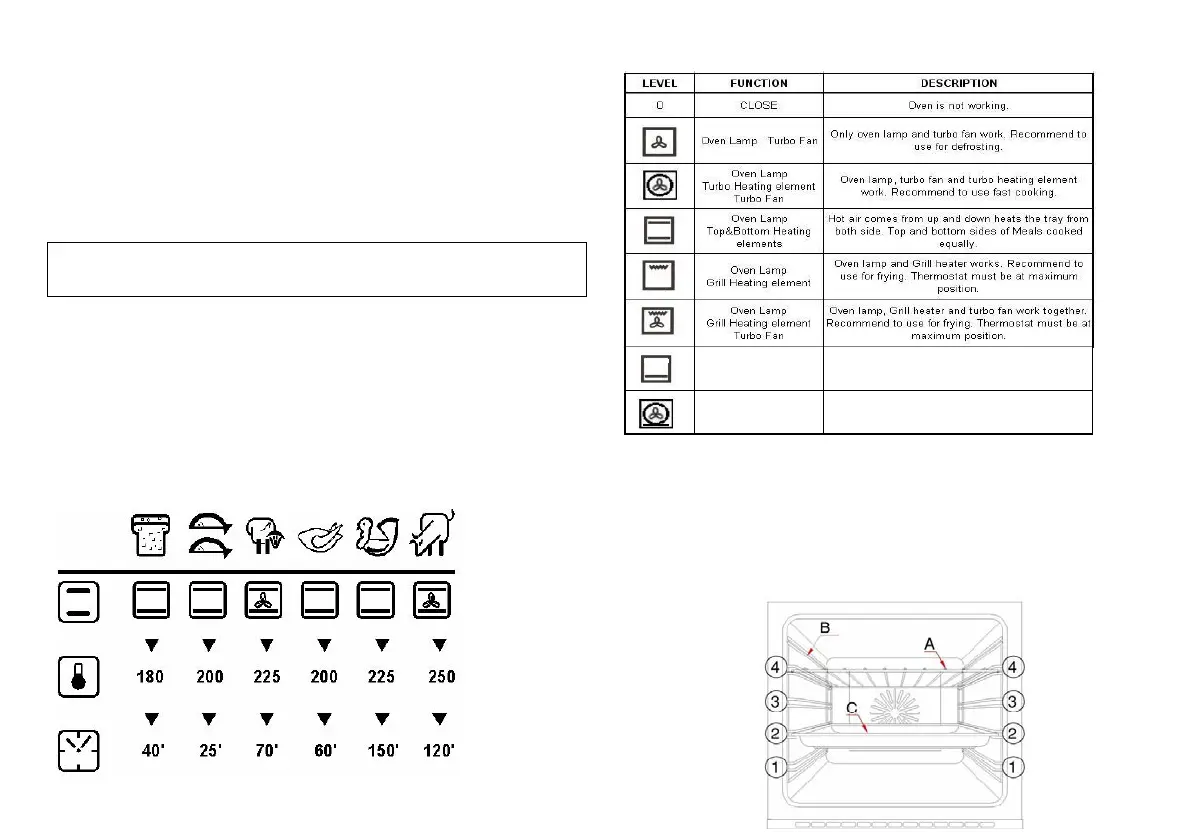
SECTION 4 INTRODUCTION of CONTROL PANEL
You can find control buttons in Figure.7 With these control buttons power of
each hea
ting element can be adjustable. Buttons can turn clockwise or
opposite
to clockwise directions. Please bring the control button to required
coo
king position and do not forget big numbers on button print means high
heat outlet
. For first cooking, it recommended to use highest cooking
position.
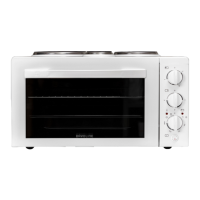
Figure 7. Front Panels for Ovens with 4&7 Functions
SEC
TION 5 USAGE of OVEN
Control
Switches of Oven
Indicator lamp will be on together with thermostat switch. When the heat
inside
the oven reaches the set value, thermostat cuts the circuit and the
la
mp is off. When the heat is below set value, thermostat is on again and
indicator
lamp is lit.
Usage of Oven
During initial opera
tion of your oven, a smell arising from insulation
materials and heating elements will be generated. To avoid it, operate your
oven at 250
C for 45 minutes without putting any trays before use.
1.
The
meals that can be cooked
2. Positions of trays
3. The
rmostat positions
4.
Reco
mmended cooking times are given in cooking table.
5. Turn the “oven heating con
trol” switch clockwise to adjust cooking time
for the meal you desire to cook, refer to cooking table.
6. Before cooking, pre-heat the oven for 10 minutes. The front cover of the
oven should be open. Pu
t the dish in the oven after pre-heating.
OVEN FUNCTIONS :
- 4 FUNCTIONS
- 7 FUNCTIONS
�
SECTION 4 INTRODUCTION of CONTROL PANEL
You can find control buttons in Figure.7 With these control buttons power of
each hea
ting element can be adjustable. Buttons can turn clockwise or
opposite
to clockwise directions. Please bring the control button to required
coo
king position and do not forget big numbers on button print means high
heat outlet
. For first cooking, it recommended to use highest cooking
position
.
Figure 7. Front Panels for Ovens with 4&7 Functions
SEC
TION 5 USAGE of OVEN
Control Switches of Oven
Indicator lamp will be on together with thermostat switch. When the heat
inside
the oven reaches the set value, thermostat cuts the circuit and the
la
mp is off. When the heat is below set value, thermostat is on again and
indicator
lamp is lit.
Usage of Oven
During initial opera
tion of your oven, a smell arising from insulation
materials and heating elements will be generated. To avoid it, operate your
oven at 250
C for 45 minutes without putting any trays before use.
1.
The
meals that can be cooked
2. Posi
tions of trays
3. The
rmostat positions
4.
Reco
mmended cooking times are given in cooking table.
5. Turn the “oven heating con
trol” switch clockwise to adjust cooking time
for the meal you desire to cook, refer to cooking table.
6. Before cooking, pre-heat the oven for 10 minutes. The front cover of the
oven should be open. Pu
t the dish in the oven after pre-heating.
OVEN FUNCTIONS :
- 4 FUNCTIONS
- 7 FUNCTIONS
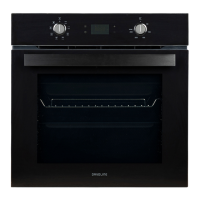
SECTION 4 INTRODUCTION of CONTROL PANEL
You can find control buttons in Figure.7 With these control buttons power of
each hea
ting element can be adjustable. Buttons can turn clockwise or
opposite
to clockwise directions. Please bring the control button to required
coo
king position and do not forget big numbers on button print means high
heat outlet
. For first cooking, it recommended to use highest cooking
position
.
Figure 7. Front Panels for Ovens with 4&7 Functions
SEC
TION 5 USAGE of OVEN
Control
Switches of Oven
Indicator lamp will be on together with thermostat switch. When the heat
inside
the oven reaches the set value, thermostat cuts the circuit and the
la
mp is off. When the heat is below set value, thermostat is on again and
indicator
lamp is lit.
Usage of Oven
During initial opera
tion of your oven, a smell arising from insulation
materials and heating elements will be generated. To avoid it, operate your
oven at 250
C for 45 minutes without putting any trays before use.
1.
The meals that can be cooked
2. Posi
tions of trays
3. The
rmostat positions
4.
Reco
mmended cooking times are given in cooking table.
5. Turn the “oven heating con
trol” switch clockwise to adjust cooking time
for the meal you desire to cook, refer to cooking table.
6. Before cooking, pre-heat the oven for 10 minutes. The front cover of the
oven should be open. Pu
t the dish in the oven after pre-heating.
OVEN FUNCTIONS :
- 4 FUNCTIONS
- 7 FUNCTIONS
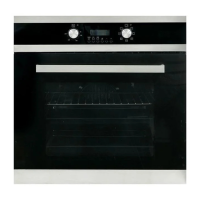
SECTION 4 INTRODUCTION of CONTROL PANEL
You can find control buttons in Figure.7 With these control buttons power of
each hea
ting element can be adjustable. Buttons can turn clockwise or
opposite
to clockwise directions. Please bring the control button to required
coo
king position and do not forget big numbers on button print means high
heat outlet
. For first cooking, it recommended to use highest cooking
position
.
Figure 7. Front Panels for Ovens with 4&7 Functions
SEC
TION 5 USAGE of OVEN
Control
Switches of Oven
Indicator lamp will be on together with thermostat switch. When the heat
inside
the oven reaches the set value, thermostat cuts the circuit and the
la
mp is off. When the heat is below set value, thermostat is on again and
indicator
lamp is lit.
Usage of Oven
During initial opera
tion of your oven, a smell arising from insulation
materials and heating elements will be generated. To avoid it, operate your
oven at 250
C for 45 minutes without putting any trays before use.
1.
The
meals that can be cooked
2. Posi
tions of trays
3. The
rmostat positions
4.
Recommended cooking times are given in cooking table.
5. Turn the “oven heating con
trol” switch clockwise to adjust cooking time
for the meal you desire to cook, refer to cooking table.
6. Before cooking, pre-heat the oven for 10 minutes. The front cover of the
oven should be open. Pu
t the dish in the oven after pre-heating.
OVEN FUNCTIONS :
- 4 FUNCTIONS
- 7 FUNCTIONS
Oven Lamp
Turbo Heating Element
Turbo Fan, Bottom
Heating Element
Oven Lamp, turbo heating element,turbo fan and bottom
heating element work together.
Recommed to use for pizza.
Bottom
Heating Element
Bottom heating element,
Recommed to use cake and bread.
 Loading...