This document is a user manual for the Daxys Bandicoot Kickscooter, providing instructions for assembly, operation, maintenance, and troubleshooting.
Function Description:
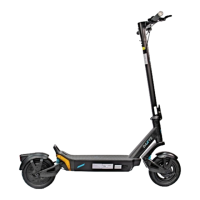
The Daxys Bandicoot Kickscooter is an electric scooter designed for personal transportation. It features a foldable design for portability and includes various safety and operational features to enhance the riding experience. The scooter is equipped with a display on the handlebar to show important information, an accelerator throttle for speed control, and an E-brake throttle for regenerative braking. It also has a dual drum brake system for effective stopping. The scooter is designed for adult use and emphasizes safe and lawful operation.
Important Technical Specifications:
- Tire Pressure: Ideal tire pressure is 45 PSI for both front and rear tires.
- Battery Voltage (Under Voltage Protection): Below 30 Volts indicates low battery voltage (E5 error).
- Battery Storage Temperature: Recommended between 10°C and 25°C.
- Long-Term Battery Storage Level: Approximately 70% (50V) for optimal stability.
- Brake Adjustment: A properly adjusted brake should leave about 2 cm of space between the brake lever and the grip handle.
Usage Features:
- Unfolding and Assembly:
- Unhook the stem from the rear footrest.
- Pull the stem to a vertical position until it's completely upright.
- Locate and bring up the folding latch to lock the stem, requiring some force.
- Clip the safety button of the folding mechanism into the stem to prevent accidental unlocking.
- Connect the male cable from the handlebar to the female cable from the front stem, ensuring pins are aligned.
- Insert the handlebar into the front stem and tighten with the provided hex screw.
- Adjust the left and right button panels/screws on the handlebar to a comfortable angle before tightening.
- Operation (Testing):
- Power On: Press the power button on the right side of the handlebar for 3 seconds.
- Kick to Start Mode: Spin the rear wheel, then press the throttle to engage motors. Normal motor operation may include a low-speed noise.
- Brake Test: Accelerate for 5 seconds, then release the throttle and apply both brakes simultaneously; the wheel should stop immediately.
- Gear Change: Short clicks of the power button cycle through speed levels:
- 1 click: Eco mode
- 2 clicks: Dynamic mode (Green "S" on display)
- 3 clicks: Sport mode (Red "S" on display)
- Lights: Press the Light button to turn on the headlight and rear tail light.
- Turn Signals: Press the right arrow button on the left handlebar for the right signal, and the left arrow button for the left signal. Click again to turn off.
- Tire Inflation: Locate the air valve on the front tire, remove the cap, attach an air pump, and inflate to 45 PSI. Repeat for the rear tire.
- Charging:
- Connect the wall AC plug to the charger box securely.
- Open the charging port cap on the scooter.
- Insert the round connector of the charger into the charging port.
- Plug the AC plug into a power outlet.
- Charger light will be red if charging, green if fully charged.
- The battery management system includes overcharging protection for short periods (e.g., overnight charging), but prolonged charging is not recommended.
- Charge fully after every ride to prolong battery life.
- If not used, check charge level monthly (ideally 70-90%).
- Braking:
- Regen Brake: Activated by pressing the left-hand side thumb throttle. Allows for smoother stops and recharges the battery. Not recommended when the battery is 100% charged (wait until 90% or less) to avoid overcharging and damage. Avoid prolonged use on long downward hills to prevent controller overheating.
- Dual Drum Brake: Provides additional stopping power.
- Warning: Braking distances increase in rain or wet weather.
- Throttle:
- Acceleration: Right-hand side thumb throttle. Progressive design: soft press for little acceleration, full pressure for maximum output.
- Folding:
- Press the safety button to unlock the folding lever.
- Pull down the folding latch to fold the stem, keeping one hand on the stem as it will drop quickly.
- Pull down until the latch is fully open.
- Fold the stem down towards the foot stand, ensuring it's fully down.
- Locate and take out the locking hook on the inside of the front stem.
- Attach the hook on the stem to the locking ring at the end of the deck, near the footrest and rear wheel.
- Handlebar Features (Numbered Diagram):
- Display
- Accelerator throttle (right-hand side)
- Accelerator throttle - Power button - Gear change
- Accelerator throttle - Light signal
- E-brake throttle (left side)
- E-brake throttle - Left turning signal
- E-brake throttle - Right turning signal
Maintenance Features:
- Recommended Schedule: Every 6 months for basic maintenance.
- Tune-up Steps:
- Tire pressure check
- Bearing lubrication
- Suspension lubrication
- Brake adjustment
- Screw tightening
- Required Tools/Items: Box cutters/knife, stool/bench, air pump, electric tire pump/inflator, Jig-a-loo lubricant (or lithium grease spray), brake pads, Blue Loctite, basic toolkit.
- Tire Pressure Check:
- Place scooter on a bench/chair/box for easy tire access.
- Remove safety cap from air valve.
- Attach air hose, tighten latch, and read current PSI. Inflate to 45 PSI if below, or deflate by pressing the air valve mechanism if above, then reinflate to 45 PSI.
- Replace safety cap. Repeat for the other tire.
- Bearing Lubrication:
- Clean bearings with a wet towel, spinning the wheel to aid cleaning.
- Generously spray lubricant directly at the bearings and in the general bearing direction (they are sealed).
- Spin the wheel to disperse the lubricant effectively.
- Suspension Lubrication:
- Ensure suspension is clean.
- Spray lubricant inside the spring, on the travel shaft, and on the top and bottom pivot points.
- Lightly jump on the scooter to distribute the lubricant.
- Drum Brake Adjustment:
- Brake Handle Adjustment (First Point of Control): Locate the adjustment screw at the connection of the brake line to the brake handle. Turn counterclockwise to tighten, clockwise to loosen.
- Brake Lever Adjustment (Second Point of Control): Find the brake lever on the left side of the wheel and lift it up. Gently pull the line down to release tension. Tighten the knob if the brake is too loose.
- Release the line and lever, then check the brake on the handlebars. Adjust if too tight.
- A properly adjusted brake should have about 2 cm of space between the lever and grip.
- Screw Tightening:
- Use the included Allen key to tighten highlighted screws (refer to diagrams in manual).
- Check screws every few months due to motor vibrations.
- Consider using medium-strength threadlocker adhesive for improved stability.
- Battery Storage:
- Store between 10°C and 25°C.
- For long-term storage, maintain approximately 70% (50V) charge.
- Avoid cold spaces (unheated garages/sheds).
- Always recharge to prevent battery damage.
- Use only Daxys-approved chargers.
- Wait 30 minutes after a ride before charging.
- Keep battery away from heat/fire.
- If battery is damaged (scooter won't turn on/charge), DO NOT OPERATE and contact support.
Troubleshooting (Error Codes):
The scooter has a built-in communication system for diagnosing common issues, displaying error codes on the screen.
- E1/F1 (Brake Error): Indicates faulty brake handle or connection.
- Solution 1: Check brake handle wire connection.
- Solution 2: Replace brake handle.
- Solution 3: Replace handlebar assembly.
- E2/F2 (Throttle Error): Indicates faulty throttle or connection.
- Solution 1: Check throttle wire connection and position.
- Solution 2: Replace throttle.
- Solution 3: Replace handlebar assembly.
- E3 (Communication Error): Indicates an error in the power system running.
- Solution 1: Check connection between handlebar assembly and communication cable in the stem.
- Solution 2: Replace handlebars.
- Solution 3: Replace controller.
- E4 (Over Current Protection): Indicates a hardware fault of the controller.
- Solution 1: Check brake handle wire connection.
- Solution 2: Replace brake handle.
- Solution 3: Replace handlebar assembly.
- E5 (Under Voltage Protection): Indicates battery voltage is too low (below 30 Volts).
- Solution: Replace with a new battery.
- E6 (Over Voltage Protection): Indicates battery voltage is too high.
- Solution: Avoid sudden braking/rushing actions; power will normalize as used.
- E7 (Motor Sensor Error): Indicates a faulty motor sensor.
- E8 (Motor Phase Loss): Indicates one or more phase connectors are not properly connected or working.
- Solution 1: Check phase wire connections.
- Solution 2: Replace controller.
- Solution 3: Replace motor.
- E9 (Controller Error): Indicates a faulty controller.
- Solution: Replace controller.
General Safety and Warnings:
- Incorrect assembly, maintenance, or use can lead to component failure, loss of control, serious injury, or death.
- Read the entire manual and any subcomponent/accessory documentation before riding.
- Discontinue use and contact support if any component malfunctions during setup or use.
- Consult support or a local electric scooter shop if unsure about assembly steps.
- Road Safety & Legislation: Riders are responsible for understanding and following all local laws, rules, and regulations. Purchasing a Daxys scooter implies responsibility for safe and lawful operation. Fines for illegal or unauthorized use (including not wearing protective equipment) are the rider's responsibility.
- Education: Read the manual carefully. Contact support@panmi.com.au for uncertainties. Start slow and get used to the scooter before long rides.
- Age: Designed for adults 18 years and older. Consult a physician if the rider has disabilities or impairments.
- Protective Gear: Strongly recommended to wear protective equipment (helmets, knee/elbow pads, protective armor) at all times.
- Water and Humidity: Daxys scooters are not waterproof. Avoid extreme or prolonged exposure to water/humidity. Operating in rain or wet conditions can cause damage, loss of control, injury, or death. Water damage is not covered by warranty.
Warranty:
- DOA (Dead on Arrival): Complete replacement.
- 12 Month Warranty: Covers returns, excluding items with physical damage by the owner/end-user.
- Warranty Exclusions:
- Damage from nature/acts of God (lightning, tornadoes).
- Negligent or incorrect use.
- Commercial use.
- Modifications to any part.
- Use with aftermarket products.
- Damage from negligence, accident, abuse, misuse, flood, fire, earthquake, or other external causes.
- Operation outside permitted/intended uses or with improper voltage/power supply.
- Servicing by unauthorized personnel.
- Natural wear and tear.