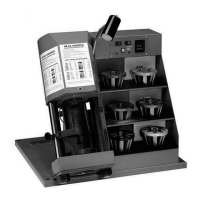
NP60 CRIMPER INSTRUCTION
IMPORTANT
-
Do not operate this equipment until you read and fully understand.this manual and its assembly instructions.
SPECIFICATION .
Physical Size:
Dimensions
-
25” Deep x
21%“’
Wide
x 21” High
Weight
-
Approximately 250 pounds
Dies: 6
Sets .520,
.670,
.830,
1.100,
I
.320,
1.730.
Other Die sizes available as optional.
Pump:
Maximum psi
-
10,000 psi
Delivery
-
240 Cubic Inches at 200 psi
-
40 Cubic Inches at 10,000 psi
Hydraulic Oil
-
IS0 32 for cold weather use
-
IS0
68 for hot weather use or
Enerpac specified equivalent
Crimper:
Output Force
-
60 Tons
Stroke
-
2-1/2”
Cylinder Effective Area
-
12.56 Square Inches
Electrical Requirements: 115
Volt AC* Single Phase
60Hz
Lubrication:
Molykote G, Gn Paste or E-Z Crimp L
on die wearing surfaces. Only lubrication required.
INSTALLATION
Unpack the machine and verify you have received
the following items.
l
NP60 Crimper
l
6 Sets of dies marked as follows:
.520
-
Red
1.100
-
Green
.670
-
Yellow 1.320
-
Black
.830
-
Blue
1.730
-
Silver
l
.750
Steel Calibration Pin
l
Pusher Plate
l
Molykote Grease or E-Z Crimp L
l
NP60 Instruction Book
l
NP60 Crimp Specifications
Location of NP60 Crimper
The Crimper should be located in a well-lighted area
on a sturdy bench or work table that is 28 to 34
inches high. Place unit as close as possible to 115
Volt AC outlet. (Avoid using extension cords if at all
possible.) If extension cord is required it should not
exceed 10 feet in length and be made of 12 gauge
wire and be properly grounded.
Set-up
The NP60 Crimper is fully assembled, calibrated and
ready to use. By following these few steps you will be
ready to crimp.
l
Check the oil in the pump reservoir to insure it is full
of oil. Fill if necessary with recommended oil only.
l
Open stem vent on the cap of the reservoir.
l
Plug unit and light into 115 Volt AC outlet.
CALIBRATION CHECK
The unit is calibrated prior to shipment but a
calibration check should be made to be certain the
crimper is operating properly.
l
Lubricate cone base with Molykote or E-Z Crimp L.
l
Place
.670
(Yellow) die set in cone. base
l
Place .750 +/- .001 diameter steel pin in die set
l
Position pusher plate on die
l
Set thumb wheel setting to 82
l
Depress “On” power switch
l
Depress “Start” button and release
l
Pusher will start down and engage the pusher
plate
l
Pressure will begin to build
l
Pump automatically shuts off at 3 seconds
l
Should more than 3 seconds elapse until pump
shuts down, the unit needs recalibration and
should be manually shut down by depressing
stop button.
l
Should less than 3 seconds elapse until pump
shuts down
-
the unit needs recalibration.
Note: Each number on the thumb wheel represents
.004”
on crimp diameter.
RECALIBRATION
If the pump shut off exceeds 3 seconds
-
l
Loosen screws on the
side
of the potentiometer
bracket and slide potentiometer upward
approximately
1/32”
l
Tighten screws
If the
pump
shuts off before 3 seconds
-
l
Loosen screws on the side of potentiometer
bracket and slide potentiometer downward
approximately
l/32”.
l
Tighten screws.
When calibration check is correct proceed to crimp
hose assembly.
 Loading...