BATTERIES & BATTERY CHARING
20 21
BATTERY INSTALLATION
Warning: It is imperative that the two batteries are
connected correctly to prevent a short circuit between the
two batteries.
BATTERY CONNECTIONS
Warning:
Your is equipped a battery pack with two maintenance
free 12 volt 12Amp/hr batteries. The batteries are linked
together by wiring cables to supply the electronic system with
24 volts of Power
1. Position battery pack onto the Scooter frame as the
diagram below.
2. Switch on your Scooter, the battery meter will now move
to show the state of charge in the batteries and your Scooter
is ready to drive 8. Switch off your Scooter, fit the seat.
Batteries are heavy (22 Kgs), always handle with
two hands. Do not allow metal tools to touch both battery
terminal together, this will cause an electrical short and may
damage the battery and injure you.
Failure to observe this warning may cause an
explosion, short circuit, fire or injury to your person.
bootie
BATTERY INSTALLATION
Warning:
It is imperative that the two batteries are
connected
correctly to prevent a short circuit between the
two
batteries.
BATTERY
CONNECTIONS
Warning:
bootie
BATTERY CHARGING
BATTERIES
Warning:
Your has a lot of power for a small Scooter.
Keeping it working to its maximum potential means that
its two batteries must be maintained with full power.
Nightly recharging, after use, will help you to give
them a longer life and will ensure your is always
ready to go when you are.
Your is fitted with two sealed maintenance-free
batteries, especially designed for motive traction use.
This means that you do not have to worry about topping
up the cells. Do not attempt to remove the
safety valves situated in the top of the battery. Failure to
observe this warning will invalidate your battery
guarantee. Your batteries
bootie
bootie
bootie
bootie are virtually
BATTERY CHARGING
BATTERIES
Warning:
bootie
bootie
bootie
bootie
FIG 23
maintenance- Free because the electrolyte is
immobilized in a special form and therefore will not leak
out, even if the battery is accidentally Overturned.
Because your batteries are sealed they are more
likely to be accepted for carriage on aircraft. Please
consult your carrier prior to departure, as they will need
advance warning that you wish them to carry batteries.
Please note: Each carrier reserves the right not to carry
what may be termed 'HAZARDOUS CARGO'.
cannot be held responsible for their final decision.
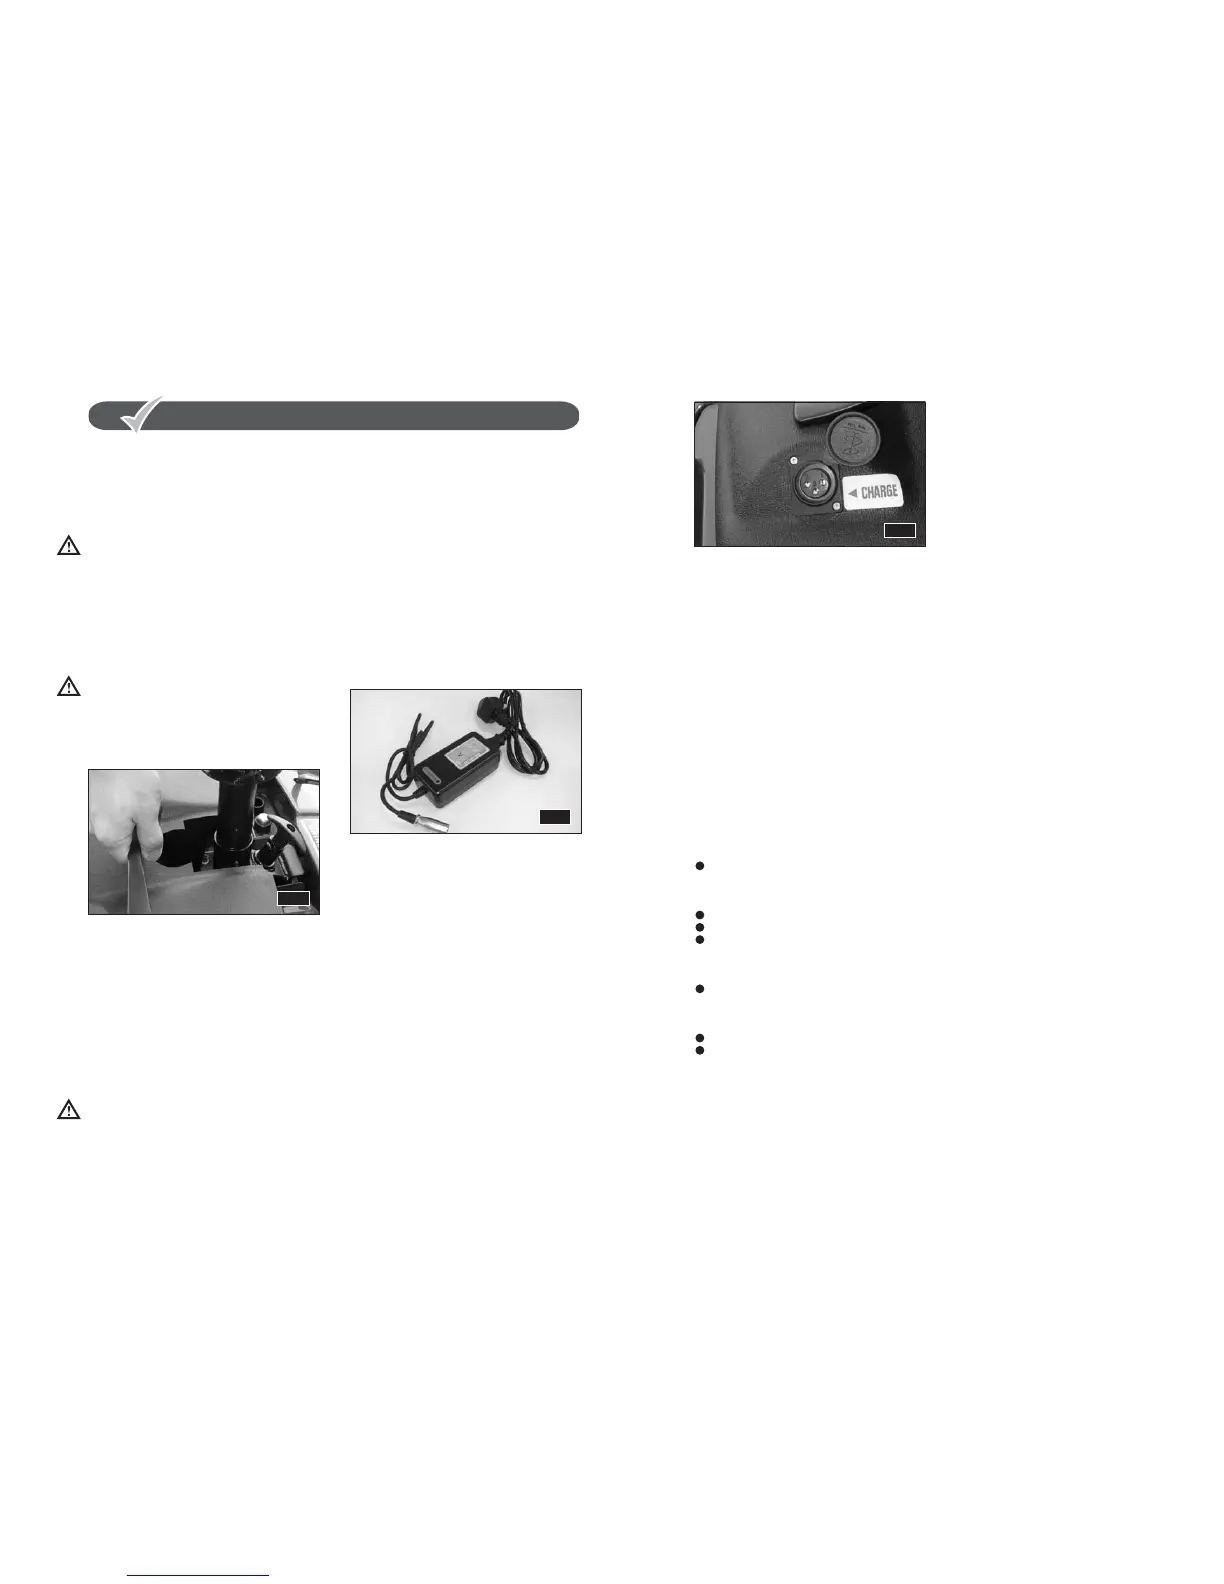
The battery charger supplied (fig 24), is special to your
and it may not be suitable for any other powered
mobility product. Only use the charger supplied with
your ; other makes of charger may permanently
damage your batteries and would invalidate the
Guarantee.
Your batteries will need to be recharged when
the battery condition indicator gauge located on
the handlebar console (Fig 7 page 8), is reading in the
far left of the green scale or into the red sector. 'Green'
indicates a full charge (to the far right), down to half
charge (to the far left of the scale). 'Red' indicates that
less than half charge is remaining in the batteries.
The batteries will have a longer life if you do not
use up all of the battery's power and recharge as soon
as the battery condition gauge enters the red sector of
the scale, rather than letting it go right over to the far
left of the red scale. To charge your batteries follow
these simple steps:
1. Switch off your and remove the key.
2. Your Charger has two leads exiting from it. One lead
has a 3-pin mains plug fitted to it. The second lead
has a 3-pin round charging connector on its end.
Connect the round 3-pin charging connector to the
3-pin charge socket, which is located in the centre rear
body cover and marked "CHARGE" (Fig 25).
Days
NOTE:
bootie
bootie
bootie
bootie
BATTERY CHARGER
CHARGING THE BATTERIES
Days
BATTERY
CHARGER
CHARGING
THE BATTERIES
NOTE:
bootie
bootie
bootie
bootie
3. Plug the 3-pin mains plug from the Charger into a
convenient wall socket and switch the wall socket on.
Note: If you need to use an extension lead for your
mains supply, make certain that it is safe and suitable for
the charge current
NOTE: Your will not drive if the charger is connected.
Orange Mains Charging.
Green Mains Charge Complete
bootie
GENERAL
Depending on the depth of discharge, the minimum time
taken to re-charge serviceable batteries fully will vary
from 4 hours up to 6 hours. Please note that recharge time will
vary between the minimum and maximum times indicated
due to the varying states of battery use.
Please be patient
(1) If GREEN Indicator is off
Check AC input .If it works normally, the battery
charger may be defective.
(2) If GREEN is working normally but Charging
Indicator (ORANGE) is off
The polarity connection may be reversed.
The output connection may be short or open.
If the Charging Indicator (ORANGE) is still off, the
battery charger may be defective.
(3) If the Charging Indicator (ORANGE) does not turn
Green (Fully Charged)
The battery is not charged normally, please stop
charging and have the battery repaired.
(4) If the Charging Indicator (ORANGE) turn Green
(Fully Charged) immediately
The battery may be in well-charged condition.
If the battery is not fully charged, it may be defective.
Please have it repaired.
1. Disconnect from the mains supply before removing
the 3-pin charge plug from the charge socket..
CHARGING STATUS INDICATION
SYMBOL LIGHT COLOUR STATE OF CHARGER
Trouble Shooting
ADVISORY NOTES
bootie
CHARGING
STATUS INDICATION
SYMBOL
LIGHT COLOUR STATE OF CHARGER
Trouble
Shooting
ADVISORY
NOTES
FIG 25
3. Do not smoke or use naked flame near your batteries
while they are being charged.
4. Do not use an extension lead unless absolutely
necessary. Use of an improper extension lead could
result in a risk of fire and electric shock.
5. Do not use the Charger if it has received a sharp blow,
been dropped or otherwise mis-used in anyway. Return
Charger to your Authorised Agent.
6. Do not dismantle the Charger, poke or drop objects
through the slots in the Charger case.
7. Do not switch off, unplug or interrupt the re-charge
cycle until the charging cycle has completed. Failure to
observe this instruction can result in overcharging of
the batteries
8. There is a drive inhibit function on your Scooter. The
Scooter cannot be driven when the Charger is plugged
into your .
9. Slight heat on the exterior while charging. Avoid
exposure to heat.
1. For longest life, your batteries should be re-charged
after use. Preferably over night.
2. If your is not used for a period of
time, a refreshing charge should be given every month.
Never leave your batteries in a discharged condition.
This is particularly important with sealed batteries as
fitted to your . If your batteries
discharge below a total terminal voltage of 12 volts (6
volts per battery), the charger supplied with your
Scooter will not operate. Please consult your
dealer.
3. If your has been stored away for
some time, re-charge your batteries before re-using it.
4. Every six months, check the connections on the
battery pack, making sure they are clean.
5. Batteries carry a limited guarantee from the original
manufacturer which is subject to a stringent wear and
tear clause. Any battery faults due to a defect in the
original manufacture will normally become obvious
within the first two months. Any gradual deterioration
in performance after this period is normally associated
with fair wear and tear, mis-use or accidental damage
and, as such, is not covered by the manufacturer's
warranty. (This does not affect your statutory rights).
Note: If one battery becomes faulty during the
guarantee period only that battery from the pair will
be replaced.
In circumstances when your Scooter is stowed in your car
etc., your batteries can be recharged away from your
Scooter with charging cable.The cable links together
your battery pack and Charger. Simply connect the
3-pin plug on your battery pack ,Connect your Charger
to a convenient wall socket, switch on,your batteries are
2. The Charger is for indoor use only:bootie
Days
bootie
bootie
bootie
Days
bootie
DO NOT EXPOSE TO RAIN OR MOISTURE.
YOUR GUIDE TO SAFE AND LASTING BATTERIES
CHARGING YOUR BATTERIES AWAY FROM YOUR
SCOOTER
bootie
Days
bootie
bootie
bootie
Days
bootie
YOUR
GUIDE TO SAFE AND LASTING BATTERIES
CHARGING
YOUR BATTERIES AWAY FROM YOUR
SCOOTER
FIG 24
 Loading...