EasyManua.ls Logo

DC HP User Manual

DC HP
2 pages
To Next Page IconTo Next Page
Page #1 background imageLoading...
Page #1 background image
HIGH POST
MODEL: HP
STEP 1
Ensure foot is fully threaded in.
Locate the post and ensure it is visually plumb.
Minimum edge distance: 2” (50 mm)
STEP 2
Remove the lock pin and extend the outer tube
until the head contacts the slab above.
Install the lock pin in the closest hole.
STEP 3
Turn the post counterclockwise until it is tight
and until there is no red showing at the visual
“safe” indicator.
1 2a
2b 3
INSTALLATION
HEAD
VISUAL “SAFE”
INDICATOR
INNER TUBE
LOCK PIN
OUTER TUBE
FOOT
Maximum spacing of High Posts not to exceed 9’ (2743 mm)
WEIGHT: 28 lbs / 12.7 kg
HEIGHT: 8’2”–13’6” / 2489–4115 mm
CLOSED HEIGHT: 7’1” / 2159 mm
When all the steps are completed, the High Post is ready for the
Speed Fence or temporary guardrail to be installed
STORAGE PIN HOLE
MIN 2”
(50mm)
Question and Answer IconNeed help?

Do you have a question about the DC HP and is the answer not in the manual?

DC HP Specifications

General IconGeneral
BrandDC
ModelHP
CategoryConstruction Equipment
LanguageEnglish

Summary

INSTALLATION

Initial Setup and Plumbness

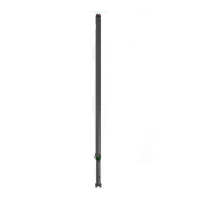
Ensure the foot is threaded, the post is plumb, and meets minimum edge distance.

Tube Extension and Locking

Extend the outer tube until the head contacts the slab above and secure with the lock pin.

Final Tightening and Safety Check

Turn the post counterclockwise until tight and verify the visual 'safe' indicator.

DISMANTLING

Post Rotation and Slab Clearance

Turn the post clockwise until the head is clear of the slab above.

Pin Removal and Tube Lowering

Remove the lock pin and lower the outer tube to its lowest position.

Storage Pin Insertion

Install the lock pin in the 'Storage Pin Hole' and ensure the foot is fully threaded.