22
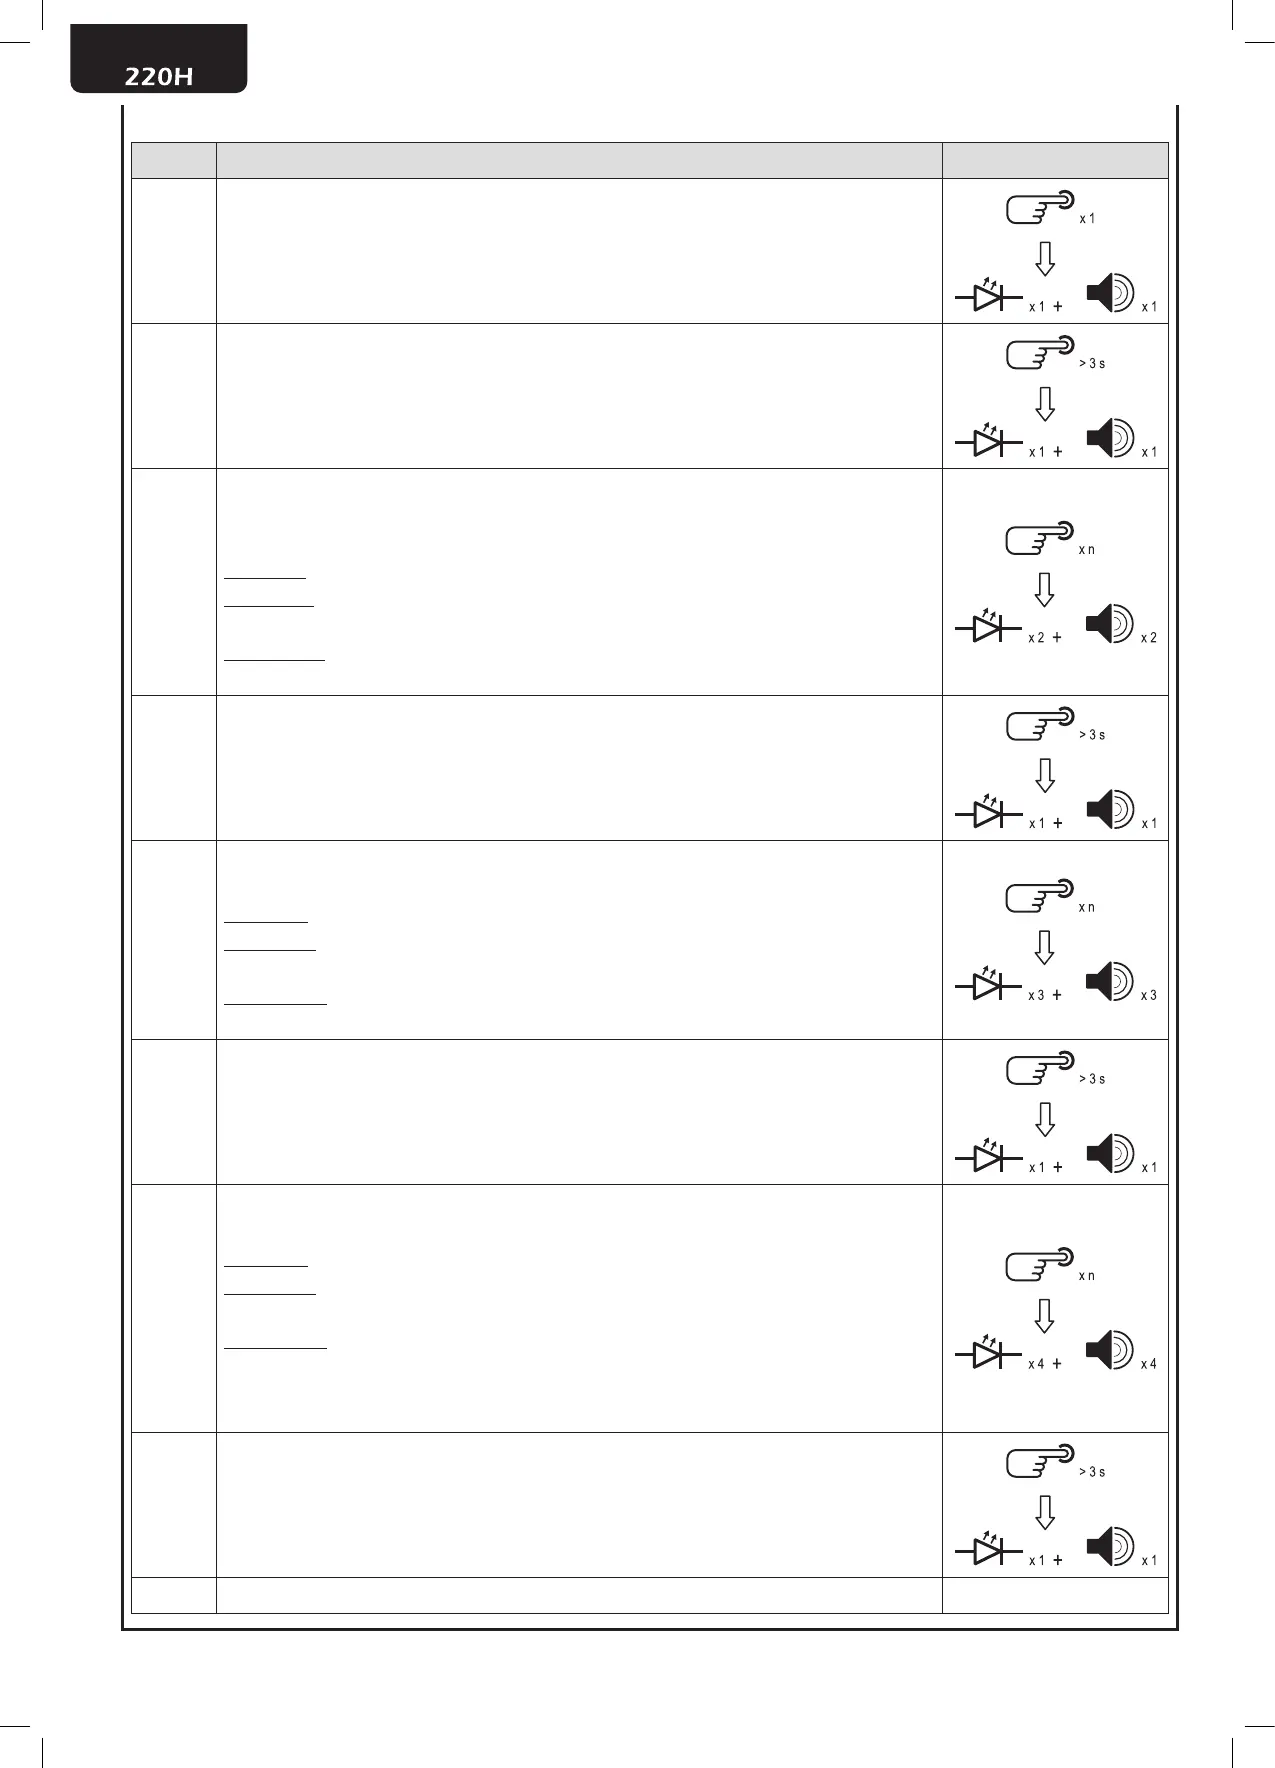
7 Timeout Programming
Phase
Description
Example
1
Press shortly the programming button of the MINI-RX. The LED on the receiver will blink and the
buzzer will perform one beep every 2 seconds.
2
Hold down the programming button of the MINI-RX for more than 3 seconds. The LED on the
receiver will perform another blink and the buzzer another acoustic warning.
3
For the “Motor Control” mode go to step 5.
Press the programming button a number of times equal to the hours of activation you want to
program:
1 pressure -> 0 Hour
2 pressures -> 1 Hours
…
10 pressures -> 9 Hours
The receiver will blink 2 times and the buzzer will perform 2 beeps at each button pressure.
4
Conrm the hours of operation by holding down the button programming of the MINI-RX for
more than 3 seconds. The receiver will perform a blink and an acoustic warning (long).
5
Press the programming button a number of times equal to the minutes of activation you want
to program::
1 pressure -> 0 minute
2 pressures -> 1 minutes
…
60 pressures -> 59 minutes
The receiver will blink 3 times and the buzzer will perform 3 beeps at each button pressure.
6
Conrm the minutes of operation by holding down the button programming of the MINI-RX for
more than 3 seconds. The receiver will perform a blink and an acoustic warning (long).
7
Press the programming button a number of times equal to the seconds of activation you want
to program:
1 pressure -> 1 second
2 pressures -> 2 seconds
…
59 pressures -> 59 seconds
The receiver will blink 4 times and the buzzer will perform 4 beeps at each button pressure.
(NOTE: If you try to set a time of 0 seconds, the MINI RX will set a default time of 60 seconds in
the Light Control mode and 240 seconds in the Motor Control Mode).
8
Conrm the seconds of operation by holding down the button programming of the MINI-RX for
more than 3 seconds. The receiver will perform a blink and an acoustic warning (long).
9 End
 Loading...