S P A Z I O
Operatinginstructionsandwarnings
12
“TROUBLE-SHOOTING” table
MALFUNCTION CAUSES / SOLUTIONS
When the opening or closing
command is activated the gate
leaf fails to move and the opera-
tor’s electric motor fails to start.
The operator is not appropriately powered; check all connections, fuses and power supply
cable conditions and replace or repair if necessary. If the door does not close check that
photocells work appropriately.
When the opening command
is activated, the motor starts
but the door fails to move
Make sure that the motor does not push in the opposite direction, the limit switch electrical
connections might be reversed
The gate moves by fits and
starts, it is noisy, it stops at
half run or it does not start
The door does not move smoothly; unlock the motor and eliminates any obstacle from
rotating points.
The operator force might be insufficient for the door features; make sure the chosen ope-
rator model is fit.
ensureproperworkingSPAZIOmustbesuitably positionedin
relationtothedoor.DEASystemrecommendedmeasuresare
showninF3p.45.Theoperatormustbechosenaccordingto
thedoortoautomateandslidingproperties,weightandwidth/
heightofthedoormustbeassessed.elementstobeconsidered.
WARNINGTheuseoftheproductunderunusualcondi-
tionsnotforeseenbythemanufacturercancreatesituations
ofdanger,andforthisreasonalltheconditionsprescribedin
theseinstructionsmustberespected.
4.5 Instructions for risk-free operation
4.5.1 Transport
TheSPAZIOgateoperatorisalwaysdeliveredpackedinbo-
xesthatguaranteetheproductadequateprotection.Carefully
readanywarningsorinstructionsforstorageandhandlingpro-
videdonthebox.
4.5.2 Installation,assemblyanddisassembly
Forasatisfyinglayingoftheproductitisimportanttodefinethe
entireautomaticopeninglayout(seealso“Completeclosingas-
sembly”);morespecifically,afteryouhavecarefullyassessedthe
featuresoftheplace,definemodelandcorrectpositioningand
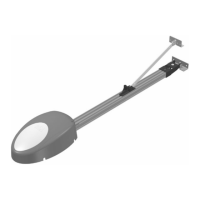
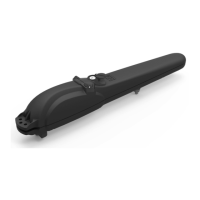
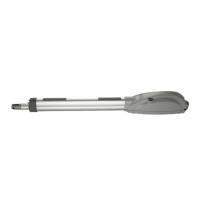
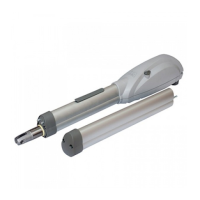
thenassembleSPAZIO(seeF3page47):
•Fitthescrewsinthealuminium-profileslot
•Join the aluminium profiles with the appropriate connecting
rods(DONOTscrewthenutstoostrongly)
•Fastenthealuminiumguiderailtothemotorbasebyinserting
thecentering“tab”andwrapthechainoverthedraftpinion.
•Putunderlighttensionthechainbyoperatingontheindicated
nutandfastenproperlybyusingthelocknut
•Anchorthemetalbrackettothewallaligningittothecenterof
thedoorbyusingappropriatebushingstoanchorthescrews
andpositioningitatrightheight
•BolttherailtotheceilingbyusingtheM6nutasshimbetween
the aluminium-profile and the metal bracket. Cut and
discardunusedportionofthebrackets.
•Screworrivetthedraftbrackettothedoorwithappropriate
screws/rivets.
•Adjustlimitswitchcams(seeF4pages45-46),completewiring
(seewiringdiagram)andthenprogramthebuilt-incontrol
boardasspecifiedbelow.
WARNING All installation, maintenance, cleaning or
repairoperationsonanypartofthesystemmustbeperfor-
medexclusivelybyqualifiedpersonnelwiththepowersupply
disconnectedworkinginstrictcompliance withtheelectrical
standardsandregulationsinforceinthenationofinstallation.
4.5.3 Starting
Theinstallationoftheproductdemandsmasonryand/orwel-
dingandelectricalconnectionoperationsusingadequateequi-
pment for the job in complete respect of accident-prevention
standardsandregulationsinforceinthenationofinstallation.
Ensurethedoortobeautomatedisingoodworkingcondi-
tions,properlycounterbalancedandthatthewholestructureis
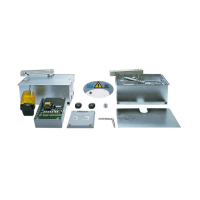
solid.Theproductisequippedwithabuilt-incontrolboard:see
itsinstructions.(Seeparagraph5.1and5.2)
4.5.4 Use
Theproductisintendedtobepartofaseriesofequipmentthat
makeupthedoorautomation.DEASystemassumesthatitwill
alwaysbeusedincompliancewiththestandardsandregula-
tionsinuse.
AllSPAZIOmodelsareequippedwithanunlockingsystem:just
turnthereleasehandleinthedirectionshowninF9page48;
nowifnoobstructionshinderitsmovement,thegatecannow
movefreely.Thedoorwillbelockedagainautomaticallywith
thefirsttravelthusreturningtheoperatortoitsnormalworking
conditions.
4.5.5Adjustment
SPAZIOispresetwith limitswitches whoseoperationmust
beadjustedatthejobsite.Inordertoadjustthelimitswitch
camsloosenfixingscrew“B”,andturncams“A(Green)”and
“C (Red)” until their respective micro-switches are activated,
thenfastenscrewsintheirnewposition.(seeF4pages45-46
andfollowtheinstructionsgiveninparagraph5.2).
Otheradjustmentscanbemadedirectlyonthecontrolbo-
ardthatcontrolsdirectlymotorspeedandcanpreservetorque
evenwhenoperatingatlowrate,itcancontroldurationofany
slowdownspeedthatmayhavebeenselectedandanti-crush
safetysensibilityaswellasotherparametersasdescribedinpa-
ragraphs5.1and5.2.
WARNING To avoid premature failureofthe operator
program the control board appropriate slow down speed.
4.5.6 Maintenanceandrepair
Goodpreventivemaintenanceandregularinspectionensure
longworkinglife(seealso“Warranty”).Consultthe“TROUBLE-
SHOOTING”tablewheneveranomaliesareobservedinorder
tofindthesolutiontotheproblemandcontactDEASystemdi-
rectlywheneverthesolutionrequiredisnotprovided.
Theinspection/maintenanceoperationstoberoutinelysche-
duledinthe“completeautomatismmaintenanceregister”are:
INTERVENTIONTYPE PERIODICITY
Chain and rotating joints lubrication 6 months
Check screws screwdown 6 months
Check chain tension 6 months
WARNING All installation, maintenance, cleaning or
repairoperationsonanypartofthesystemmustbeperfor-
medexclusivelybyqualifiedpersonnelwiththepowersupply
disconnectedworkinginstrictcompliancewiththeelectrical
standardsandregulationsinforceinthenationofinstallation.
 Loading...