Do you have a question about the Decathlon RACK 900 and is the answer not in the manual?
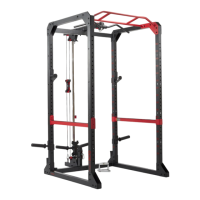
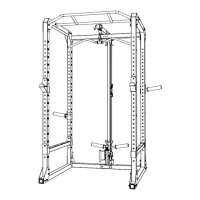
Dimensions and weight capacity of the Rack 900.
Icons indicating maximum load capacities for different uses.
Essential safety guidelines to prevent injury and ensure proper use.
Critical warnings about exceeding weight limits and using safety features.
Identification and quantities of hardware and initial components.
Identification and quantities of further components for assembly.
Identification and quantities of remaining components.
Initial assembly of the base structure of the rack.
Installation of the main vertical support posts.
Connecting the top horizontal support beams.
Adding the horizontal stabilizers at the top.
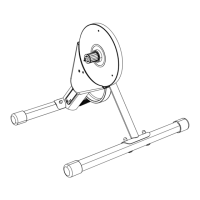
Constructing the lower part of the pulley mechanism.
Threading and attaching the resistance cables and pulleys.
Fitting the adjustable safety pins/catches.
Installing the spotter arms for added safety.
Guidance on securing the rack to the floor for stability.
Advice on obtaining suitable screws for floor anchoring.
Visual representations of different exercises that can be performed.
Visual summary of safety measures and maintenance steps.
Pre-exercise advice, owner's duty, and product usage guidelines.
Guidelines for safe and effective exercise execution.
Details of the product's commercial warranty terms and conditions.
| Type | Squat Rack |
|---|---|
| Material | Steel |
| Adjustable Height | Yes |
| Pull-up Bar | Yes |
| Color | Black |
| Compatible with | Standard barbells and weight plates |
| Safety | Safety bars included |
| Included Accessories | J-hooks |
| Max Load Capacity | 200 kg (bar support) / 150 kg (pull-up bar) |