EasyManua.ls Logo

Defender HA00793 - User Manual

Defender HA00793
2 pages
Print Icon
To Next Page IconTo Next Page
Loading...
IMPORTANT!
Please read the following instructions carefully before installing your key safe. Always wear goggles or other suitable
eye protection before starting to drill.
CONTENTS
1 x Defender Combination Key Safe
4 x Thunderbolts for securely fixing your key safe
1 x Combination protector card
1 x Installation Template
1 x Instruction Sheet
BEFORE INSTALLING THE KEY SAFE
Choose your own combination for the key safe. It is recommended that you do not use a number combination that can be easily guessed.
Avoid numbers linked to your telephone number or birthday. Do not use a bank card PIN number as this may breach your financial security
should someone determine the combination to your key safe. Use a unique number that only you will know.
Record it on the Combination Protector Card included; this should be safely stored so that in the unlikely event that you forget your
combination it can be located and used to access your keys.
WARNING:
Please note that if you forget your combination gaining access to your key safe is not covered by your warranty. There are no
master codes so the ONLY way to open the key safe is by using suitable tools and brute force.
There are no user serviceable parts so under no circumstances should you remove the screws on the inside cover of the lid.
Your warranty will be void if this cover is tampered with or opened.
SETTING YOUR COMBINATION
COMBINATION KEY SAFE
Secure Combination Dial Key Safe Product Code: HA00793
defendersecurityproducts.co.uk
YOUR KEY SAFE
On the front of the key safe there are 4 dials numbered 0 to 9. There is also a small black lever.
The key safe is shipped from the factory with 0-0-0-0 as a preset combination. This means that the key safe will only open when
0000 is showing on the dials. The key safe will open as soon as the lever is pulled down.
Step 1:
To set the combination for the first time, slide the black shutter down to expose the dials.
Ensure 0000 is showing on the dials (preset code). Push the lever down to open the
key safe (Figure 1). The door of the key safe is spring loaded and conveniently hinged so it
will open automatically.
Step 2:
Once the key safe is open, the RESET button should be visible on the back of the key safe
door. Push the small lever from position A (Figure 2) to position B.
Step 3:
Once the lever is in position B, you will feel it lock into place. Rotate the 4 combination dials
to the combination of your choice. Make sure the dials are properly and clearly aligned
along the centre line.
Step 4:
Push the lever back up and right into position A. You will feel it lock back in place, signifying
the entered code is now set.
DO NOT CLOSE THE KEY SAFE DOOR UNTIL YOU HAVE TESTED THE COMBINATION!
See below for TESTING YOUR COMBINATION.
With the safe still OPEN - scramble the 4 combination dials and then re-enter your NEW combination.
Test the ‘open’ lever is free to move down and that is easily activates the key safe locking latch on top of the door.
If it does then you can close the key safe door and then use the ‘open’ release slide latch to re-open it. If it does not, repeat the
above from Step 2.
Figure 1
Shutter
Open Lever
Figure 2
Reset Button
(in position A)
Move lever here to
reset the combination
(position B)
Question and Answer IconNeed help?

Do you have a question about the Defender HA00793 and is the answer not in the manual?

Summary

Key Safe Setup and Operation

Initial Safe Information

Details the preset combination, dials, lever, and advice on choosing a new combination.

Setting and Testing Combination

Step-by-step guide to setting a new combination and testing it before closing the safe.

Key Safe Installation and Security

Installation Requirements and Positioning

Lists necessary tools and guidance on selecting a suitable, hidden location for the safe.

Fixing and Securing the Safe

Explains how to mark, drill, and securely fix the key safe to the wall using provided fixings.

Important Information and Warranty

Safety Warnings and Precautions

Crucial instructions before installation and warnings about forgetting combinations and tampering.

Changing Your Combination

Guidance on how to regularly reset the combination for continued security.

Limited Warranty Details

Outlines the product warranty terms, coverage, and exclusions for defects and misuse.

Overview

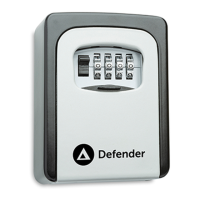
The Defender Combination Key Safe (Product Code: HA00793) is a secure device designed to store keys, accessible via a user-defined four-digit combination. It is intended for wall mounting and comes with the necessary hardware for installation.

Function Description:

The key safe features four numbered dials (0-9) on its front, along with a small black lever. To open the safe, the correct four-digit combination must be entered on the dials, and then the black lever must be pulled down. The key safe is shipped from the factory with a preset combination of "0-0-0-0". Once opened, the door is spring-loaded and will open automatically. The primary function is to provide secure storage for keys, allowing access only to those who know the combination.

Important Technical Specifications:

  • Combination: Four-digit, user-definable.
  • Mounting: Wall-mounted using four thunderbolts (supplied).
  • Dimensions (implied): Designed to fit across at least two bricks for maximum security.
  • Drill Bit Requirement for Installation: 5mm masonry drill bit.
  • Drill Hole Depth: At least 50mm.
  • Socket Size for Thunderbolts: 8mm.
  • Warranty: One year limited warranty covering defects in material and workmanship.

Usage Features:

Setting the Combination:

  1. Slide the black shutter down to expose the dials.
  2. Ensure the preset code "0-0-0-0" is showing.
  3. Push the black lever down to open the key safe door.
  4. Locate the RESET button on the back of the key safe door and push the small lever from position A to position B.
  5. Rotate the four combination dials to your desired new combination, ensuring they are properly aligned along the centre line.
  6. Push the lever back up and right into position A. This action sets the new code.
  7. Crucially, before closing the door, test the new combination. Scramble the dials, then re-enter the new combination. Test that the 'open' lever moves freely and activates the locking latch. If it works, close the door. If not, repeat the setting process from Step 2.

Changing the Combination:

To change the combination after initial setup, first enter the current combination to open the door. Then, follow the same steps as outlined for "Setting Your Combination." Regular combination changes are advised for enhanced security.

Installation:

The key safe is designed for secure wall mounting.

  1. Preparation: Gather necessary tools: 4 thunderbolts (supplied), power drill, extension lead (or heavy-duty battery-operated drill), 5mm masonry drill bit, goggles, marker/pencil, installation template, tape measure, ratchet, extension, and an 8mm socket or 8mm socket attachment for a power drill.
  2. Positioning: Choose a discreet location, hidden from view (e.g., behind dustbins, plants, drain pipes, or on the side/rear of the property).
  3. Fixing Location: Select a flat brick wall area. Avoid drilling into mortar, as it can crack or allow the safe to be pried off. Ideally, position the safe across two or more bricks for maximum security.
  4. Marking: Use the installation template to mark four hole positions on the wall.
  5. Drilling: Drill the four holes to a depth of at least 50mm. A useful tip is to mark 50mm on the drill bit with tape to ensure correct depth and prevent over-drilling.
  6. Inserting Thunderbolts & Fitting: Position the key safe over the drilled holes. Insert the thunderbolts through the holes and hand-tighten them. Using an 8mm socket/ratchet/power drill, carefully tighten the bolts. The bolts are self-tapping, ensuring a secure fit. Do not overtighten, as this can distort the key safe's shape or cause the thunderbolts to bind, potentially affecting its proper operation.

Maintenance Features:

  • No User Serviceable Parts: The device is not designed for internal user maintenance. Removing screws from the inside cover of the lid will void the warranty.
  • Warranty: A one-year limited warranty covers defects in material and workmanship. This warranty is limited to repair or replacement at Defender Security Products' option. It does not cover damages from modification, abuse, misuse, wear and tear, improper installation, application, storage, or fault/negligence by parties other than Defender Security Products. Labor costs for removal or reinstallation are not covered. Repaired or replaced products are warranted for the remainder of the original warranty term or 90 days, whichever is longer.

Important Warnings and Considerations:

  • Goggles/Eye Protection: Always wear appropriate eye protection when drilling.
  • Combination Security: Choose a unique combination that is not easily guessed (avoid phone numbers, birthdays, or bank card PINs).
  • Combination Record: Record your chosen combination on the supplied Combination Protector Card and store it safely in case you forget it.
  • Forgotten Combination: Forgetting your combination is NOT covered by the warranty. There are no master codes, and the only way to open the safe without the combination is through suitable tools and brute force.
  • Distortion during Installation: If the wall is not flat or if the thunderbolts are overtightened, the key safe may distort, preventing it from closing or opening properly. This is not a fault of the key safe and is not covered by warranty. Care must be taken to choose an even wall location and ensure fittings are not overtightened.

Defender HA00793 Specifications

General IconGeneral
BrandDefender
ModelHA00793
CategorySafes
LanguageEnglish