Note
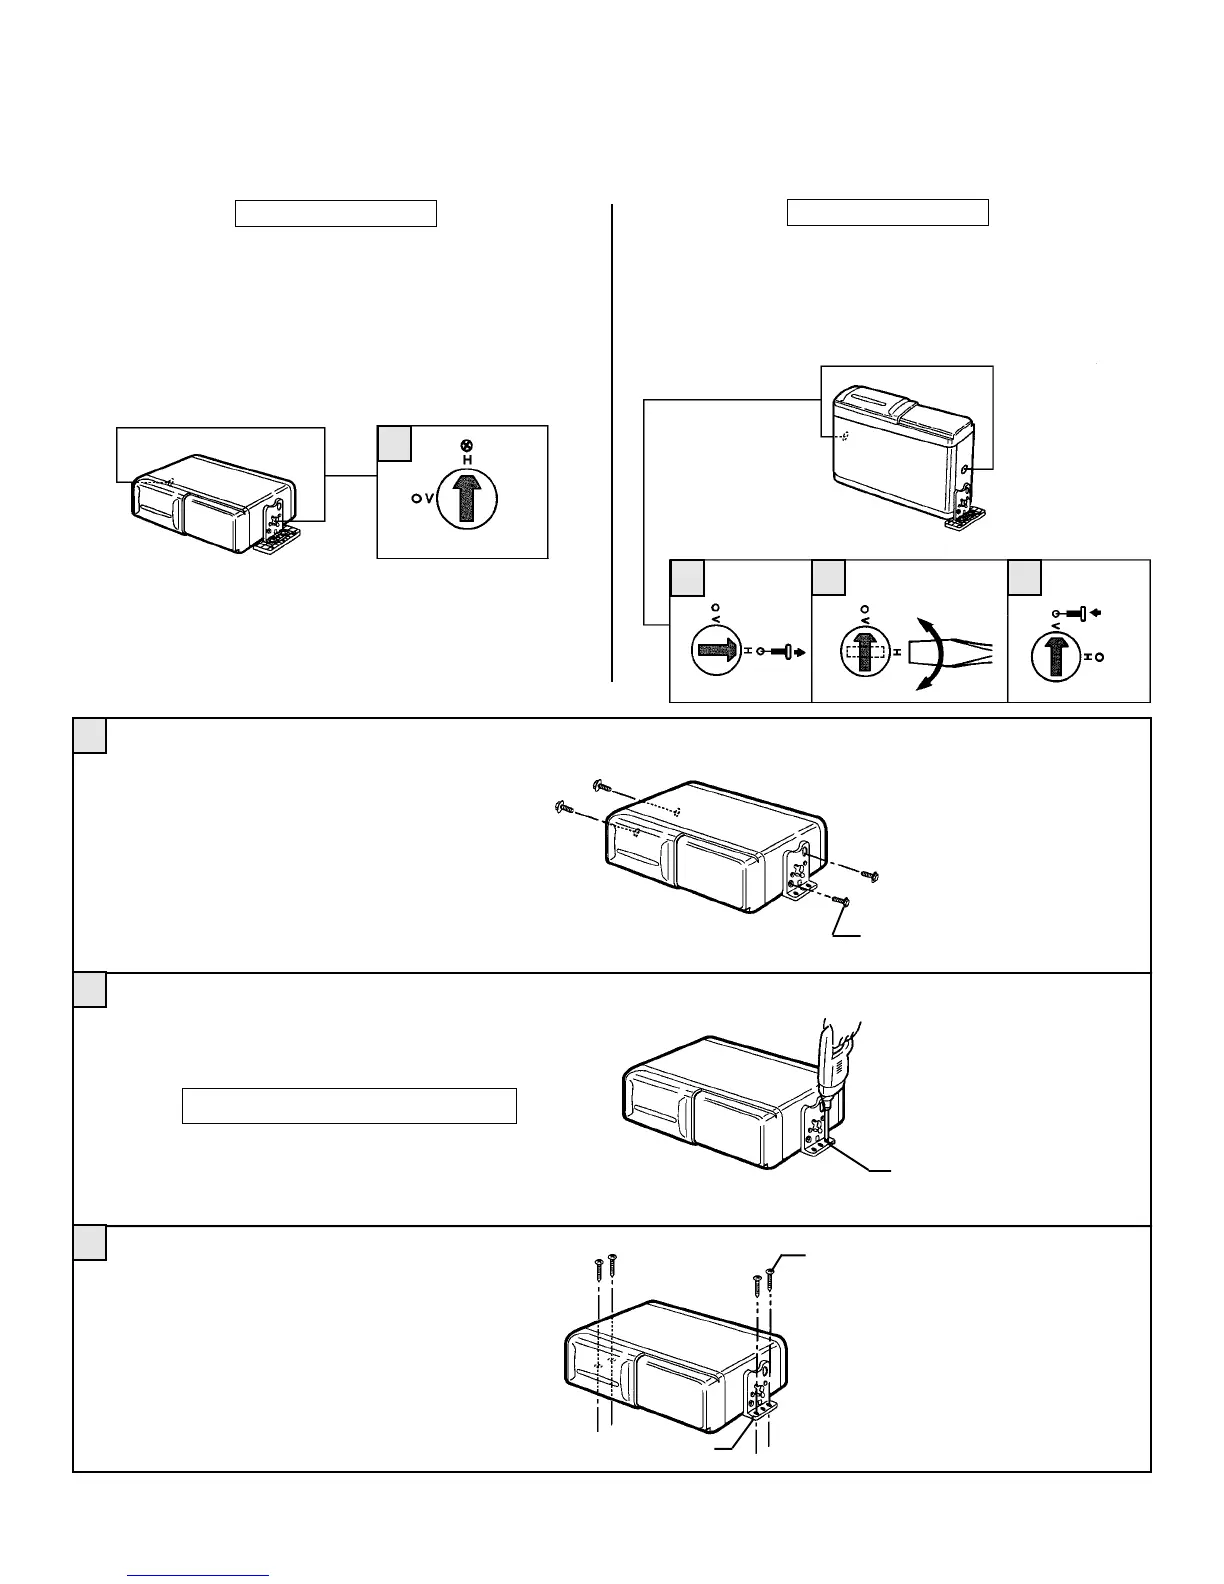
The unit is shipped with the springs installed for horizontal installa-
tion.
Drill holes 4mm in diameter.
Hexagonal bolt with washer base
(M5 x 8)
Procedure for Horizontal Installation
1
2
3
Bracket (R)
1
Attach bracket (L) and bracket (R) to each side of the unit,
using the hexagonal bolts with washer base (M5 x 8).
Determine the mounting location, and drill four mounting
holes.
Secure the unit in place, using four self-tapping screws
(M5 x 12).
Use RTV (silicone sealer) on screw threads or around
the holes to prevent moisture intrusion.
4
INSTALLATION (1)
Horizontal Installation
The unit can be installed vertically or horizontally. The position of the built-in anti-vibration springs (left and right side), must correspond
to the mounting position chosen. If the springs are not set correctly for the type of installation chosen, the anti-vibration compensation will
not be effective.
2
It is necessary to change the spring attachment position.
1) Remove the lock screws on the side of the set using a Phillips
screwdriver.
2) Turn the spring attachment to the (V) mark side using a screw-
driver.
3) Replace the removed screws on the (V) mark side.
Vertical Installation
Self-tapping screw (M5 x 12)
1
3
Never mount the unit near the fuel tank.