Do you have a question about the Delfield 6051-S and is the answer not in the manual?
Location and importance of the serial number tag for parts and service.
How to register, verify, and download warranty information online.
Lists the certifying bodies for the models, such as NSF and UL.
Guidelines for unit placement, clearance, and floor support for optimal refrigeration.
Importance of leveling for door alignment, strain, and shelf stability.
Recommendations for securing units on casters and waiting period after tilting.
Connecting the unit to the correct power source and circuit.
Location and function of the power disconnect switch for unit operation.
Step-by-step instructions for reversing doors on standard hinges.
Specific steps for door reversal on models equipped with re-hinging option.
How temperature alarms function and factory set points for refrigerators and freezers.
Location and adjustment of the temperature control knob for refrigerators.
Location and adjustment of the temperature control knob for freezers.
Function of the power switch and its effect on the unit's operation.
How the energy saver switch controls door perimeter heat for condensation.
How the control cycles components to maintain temperature and initiate defrost.
Diagnosis and fix for error code E-1 related to the box temperature sensor.
Diagnosis and fix for error code E-2 related to the coil temperature sensor.
Diagnosis and fix for error code E-6 indicating a defective control potentiometer.
Diagnosis and fix for error code E-13 related to controller-display communication.
Guidelines for cleaning and protecting stainless steel surfaces.
Recommended frequency and methods for cleaning the condenser coil.
How to clean and maintain door gaskets for proper sealing.
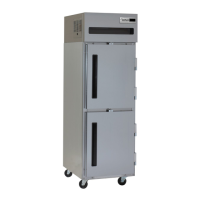
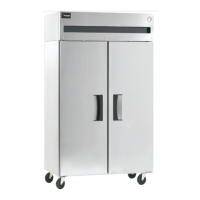
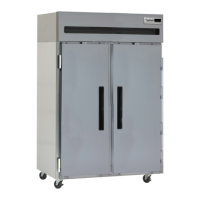
The Delfield 6000XL & 6100XL Series Reach-In units are commercial refrigeration and freezer appliances designed for indoor use, offering reliable temperature control and food storage. These units are intended for professional kitchen environments, emphasizing proper installation, operation, and maintenance to ensure optimal performance and longevity.
The primary function of the Delfield 6000XL & 6100XL Series is to provide consistent and controlled temperature environments for storing food products. These units utilize an electronic temperature control system that continuously monitors both the box temperature and the evaporator coil temperature. This system ensures that the internal temperature remains within the desired range, preventing spoilage and maintaining food quality.
The electronic temperature control also features a self-check mechanism. If an error occurs, the digital display will switch from a temperature readout to an error code (e.g., E1, E2, E6, E13). Even with an error, the refrigeration and control system is designed to continue functioning, though possibly not at optimal performance. In such cases, contacting Delfield Service is recommended.
For freezers, the control system includes an initial defrost cycle upon start-up or reconnection of power, during which the display will read "DEF." This ensures the evaporator coil is clear of frost before the freezing cycle begins. Refrigerators also have a defrost cycle that activates as needed to clear accumulated frost, with the display showing "dEF" during this period.
The units are equipped with a power disconnect switch and an energy saver switch. The power switch allows for complete disconnection of the unit, while the energy saver switch controls the amount of heat applied to the door perimeter. This helps manage condensation and energy consumption.
Installation and Placement: The units are designed for indoor use only and require a floor strong enough to support their weight, which can be up to 1500 pounds when fully loaded. Proper air circulation is crucial both inside and outside the cabinet for efficient refrigeration.
Leveling and Stability: A level cabinet is essential for proper door alignment, reduced strain on the cabinet, and stable contents. Units with legs have adjustable bullet feet for leveling. Units with casters require a level floor, as no adjustments are available. For units on casters, the front wheels must be locked during use to ensure stability. If the unit needs to be laid on its side or back for any reason, it should remain upright for at least 24 hours before start-up to allow compressor oil to return to the sump, preventing compressor failure and unit damage.
Electrical Connection: Users should refer to the amperage data on the specifications page, the serial tag, and local electrical codes to ensure the unit is connected to the correct power source. A protected circuit with the appropriate voltage and amperage is required for either line cord connection or permanent wiring.
Temperature Control: The electronic temperature control knob allows users to adjust the internal temperature. For colder temperatures, the knob should be turned clockwise; for warmer temperatures, counter-clockwise. Turning the knob fully counter-clockwise will turn off the refrigeration system. Adjustments should be made in small increments (no more than one dial number at a time), allowing 8 hours for temperature stabilization before further adjustments.
Power and Energy Saver Switches: The power disconnect switch must be in the "on" position for the unit to operate. For freezers, turning the switch off and then back on will initiate a defrost cycle. The energy saver switch, located next to the thermostat knob, can be toggled between "ON" (least heat applied to door perimeter) and "OFF" (increased heat, visible as a red portion on the rocker switch) to manage condensation.
Defrost Cycles:
Door Reversal Procedures: Instructions are provided for reversing doors on both standard edge-mount hinge models and models ordered with a re-hinging option. This involves carefully removing hinges, rotating components, drilling new holes (if applicable), and reattaching the door to ensure proper closure and gasket seal.
General Cleaning:
Condenser Coil Cleaning: Regular cleaning of the condenser coil is crucial for proper refrigeration performance. It is recommended every 90 days, or every 30 days if there is significant debris, dust, or grease accumulation.
Gasket Maintenance: Gaskets require regular cleaning with warm soapy water to prevent mold and mildew buildup and maintain elasticity. Full-strength cleaning products should be avoided as they can make gaskets brittle and prevent proper seals. Sharp tools or knives should not be used to scrape or clean gaskets, as this can tear them. Gaskets are "Dart" style and can be easily replaced by pulling them out of the groove in the door and pressing new ones into place.
Doors/Hinges Maintenance: Over time and with heavy use, door hinges may become loose, causing the door to sag. It may be necessary to tighten the screws that mount the hinge brackets to the frame. Loose or sagging doors can damage both the doors and hinges, potentially requiring qualified service agents.
Drain Maintenance: Each unit has an internal drain that removes condensation from the evaporator coil to an external condensate evaporator pan. Users should regularly check that the drain tube is connected from the evaporator housing to the condensate evaporator drain pan. If excessive water accumulates inside the unit or underneath it, the drain tube may be loose, disconnected, or blocked. The unit's leveling is important for proper drainage. All drain lines should be kept free of obstructions, especially food products, to prevent water backup and overflow.
Fluorescent Light Bulb Replacement: Delfield recommends that fluorescent light bulbs be recycled rather than disposed of.
| Category | Refrigerator |
|---|---|
| Model Number | 6051-S |
| Brand | Delfield |
| Number of Sections | 1 |
| Door Type | Solid |
| Exterior Material | Stainless Steel |
| Interior Material | Aluminum |
| Refrigerant | R290 |
| Voltage | 115V |
| Shelves | 3 |
| Door Swing | Right |