Do you have a question about the Deli 888T and is the answer not in the manual?
Explains the meaning of warning symbols used in the manual.
Details important safety instructions to follow.
Lists all items included in the printer package.
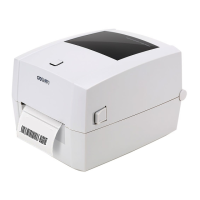
Identifies and labels the printer's external and internal parts.
Displays the physical measurements of the printer.
Step-by-step guide to loading a paper roll into the printer.
Instructions for feeding folded label paper from the back.
How to use an external bracket for large paper rolls.
Guide for installing thermal transfer ribbons for DL-888T models.
Steps for connecting the printer to a power source.
Instructions for connecting the printer via USB.
Overview of the printer's buttons, indicators, and status lights.
Covers power, paper feed, and printing test procedures.
Guidance on label positioning and detection methods.
Instructions for cleaning the printer's print head.
Guide for cleaning internal components like sensors and rollers.
This document serves as a user manual for a thermal label printer, model 888T, providing essential information for its installation, operation, and maintenance. It is designed to guide users through various technical aspects and ensure safe and efficient use of the device.
The manual begins by outlining important safety precautions that must be observed to prevent personal injury or machine damage. It emphasizes the importance of following warning symbols and instructions, such as avoiding the use of incompatible power outlets or adapters, refraining from pulling the power cord to unplug the device, and not handling the power cord with wet hands. Users are cautioned against bending the power cord excessively or placing heavy objects on it, as this could lead to fire. In case of smoke, unusual smells, or noise, users are instructed to immediately unplug the printer and contact the dealer for repairs. The printer should always be placed on a stable, flat surface to prevent damage or injury from falling. Users are also advised against disassembling, repairing, or modifying the printer themselves, and should instead contact the dealer for any necessary services. It is crucial to keep water or other objects out of the printer, and to turn off and unplug the device if this occurs, then call for service. The manual stresses the importance of discontinuing use if the printer malfunctions to prevent fire or electric shock.
Beyond safety, the manual provides general operational guidelines. It recommends leaving sufficient space around the printer for operation and maintenance. The printer should be kept away from water, direct sunlight, strong light, and heat sources, and should not be used or stored in areas with high temperatures, high humidity, or heavy pollution. Users are advised to avoid placing the printer in locations subject to vibrations and shocks. The printer's power adapter should be connected to a properly grounded electrical outlet, and it's recommended to avoid sharing the same outlet with large appliances or devices that could cause voltage fluctuations. For extended periods of non-use, the power supply should be disconnected. To maintain print quality and extend the printer's lifespan, using recommended or equivalent quality printer paper is suggested. Power should always be shut off before plugging or unplugging interfaces to prevent damage to the printer's control circuits. The manual should be kept in a proper place for future reference. The document also notes that specifications, accessories, and procedures are subject to change due to continuous product improvement.
The printer supports Bluetooth functionality, enhancing its connectivity options.
The thermal label printer is designed for printing labels, offering both direct thermal and thermal transfer printing methods. It supports various media types, including continuous paper, gap detection, black mark detection, and thermal head temperature detection. The printer can handle standard paper/fold paper or roll paper, and cut or continuous roll labels. It features a paper feed button which also acts as a status indicator. The top cover can be released to access the internal components for media installation and maintenance. Key internal components include a paper roll holder, latch, adjustable paper guide, rubber roller, tape supply shaft, tape recovery shaft, and a movable paper detector. The printer also has a USB port, power connector, and power switch.
Installation of media is a core usage feature. For paper rolls, users are instructed to open the top cover, adjust the paper roll holder to the width of the paper, insert the roll, and secure it by pressing down the latch. The paper is then pulled through the paper guide, which is adjusted to the paper width, and the top cover is closed until it clicks. Excess paper can be torn off using the cutting blades. For folding paper, it is placed at the back of the printer with the printing side up, inserted into the external paper roll inlet, and then pulled through to the front of the printer, with the paper guide adjusted accordingly. An external paper roll bracket can be installed for larger rolls or folding paper, fixed on both sides with locking pins.
For thermal transfer printing (DL-888T model only), ribbon installation is detailed. The top cover is opened, and the printing support brackets automatically open. The ribbon recovery core is passed through the print support set, and both ends of the ribbon supply and recovery cores are installed onto their respective shafts, ensuring the notches align and lock. The ribbon pick-up shaft gear is then turned counterclockwise to tighten the ribbon before closing the top cover.
Power connection involves ensuring the printer's power switch is off, connecting the power adapter to the printer, then the power cord to the adapter, and finally plugging the power cord into the power supply. The manual emphasizes using the original power adapter to prevent damage. If the printer is not used for a long time, the power cable should be unplugged. In case of power interruption or data cable disconnection during printing, any unprinted content will not be printed or reprinted, but partially transmitted data will be reprinted once connections are restored. The printer also features a "boot positioning" function for self-adhering labels ≤80 mm in height, which displays a blank paper positioning function after the first print to identify label height.
Interface connection is straightforward, typically using a USB B-Type cable. Users are instructed to turn off the printer, plug the communication cable into the corresponding connectors, and then connect the USB B-Type cable to the USB interface.
The operation panel includes a power switch and a paper feed button. To power on, the switch is moved to the "On" position, and the indicator light illuminates. To power off, the switch is moved to "Off." The paper feed button allows users to feed paper according to its type: a single press feeds a whole page of label paper, while pressing and holding feeds a fixed length of continuous paper. The paper feed button also functions to pause and resume printing tasks, with the indicator light turning white (blue, green, red) when paused.
The manual provides a detailed description of indicator light statuses, correlating different colors (blue, pink, red, yellow, white) and blinking patterns with printer conditions such as ready for operation, RAM test failed, print head overheated, no or low printer ribbon, position sensor not in place, out of paper, voltage too low or too high, paper jam, and printer paused.
Basic functions include power ON/OFF and paper feeding. A self-test page can be printed to confirm hardware version, parameter settings, and print quality. This is done by ensuring power is connected, paper is installed, the printer is off, and the top cover is shut. Users then press and hold the paper feed button, turn on the power, and release the button when printing begins. Printing with a Windows driver involves installing the driver, setting the correct port, and using the "Print Test Page" function.
Label printing training is provided for situations like initial setup, after cleaning the sensor, reusing the printer after a break, changing paper rolls, or when the printer struggles to recognize symbols due to environmental changes. Labels can be manually positioned by pressing and holding the paper feed button for 3 seconds in Ready Mode until the power indicator blinks twice. This activates label detection mode, which can also be performed via printer tool software. After detection, the top cover should be reopened, and test label paper reloaded to avoid waste. The "Reprint After Error" function, disabled by default, can be enabled through the printing tool software.
The manual includes a dedicated section on cleaning the printer to address degraded print quality caused by dust, foreign substances, or adhesive materials. Users are cautioned to turn off the printer and wait 2-3 minutes for the print head to cool down before cleaning. Care must be taken not to touch the heated portion of the print head to avoid damage from static electricity or other factors, and to prevent scratching or damaging the print head.
For cleaning the print head, the top cover is opened, and a cleaning pen or a cotton swab dipped in diluted alcohol (or isopropanol) is used to clean the print head from the center outwards. The printer should not be used until the alcohol has completely evaporated and the print head is dry (typically 1-2 minutes).
Cleaning the sensor, roller, and paper path involves opening the top cover and removing the paper roller. Dust and foreign materials are removed using a dry cotton cloth or cotton swabs. Adhesive substances or pollution are wiped off with an alcohol-soaked cotton cloth or swabs. Similar to the print head, the printer should not be used until all cleaned parts are completely dry. This maintenance is recommended if print quality deteriorates or paper detection performance decreases.
| Technology | Thermal Transfer |
|---|---|
| Print Resolution | 203 dpi |
| Print Speed | 127 mm/s |
| Connectivity | USB |
| Print Method | Thermal Transfer |
| Interface | USB |
| Maximum Print Length | 300 mm |
| Label Types | Continuous |
| Max Label Length | 300 mm |
| Power Source | AC Adapter |