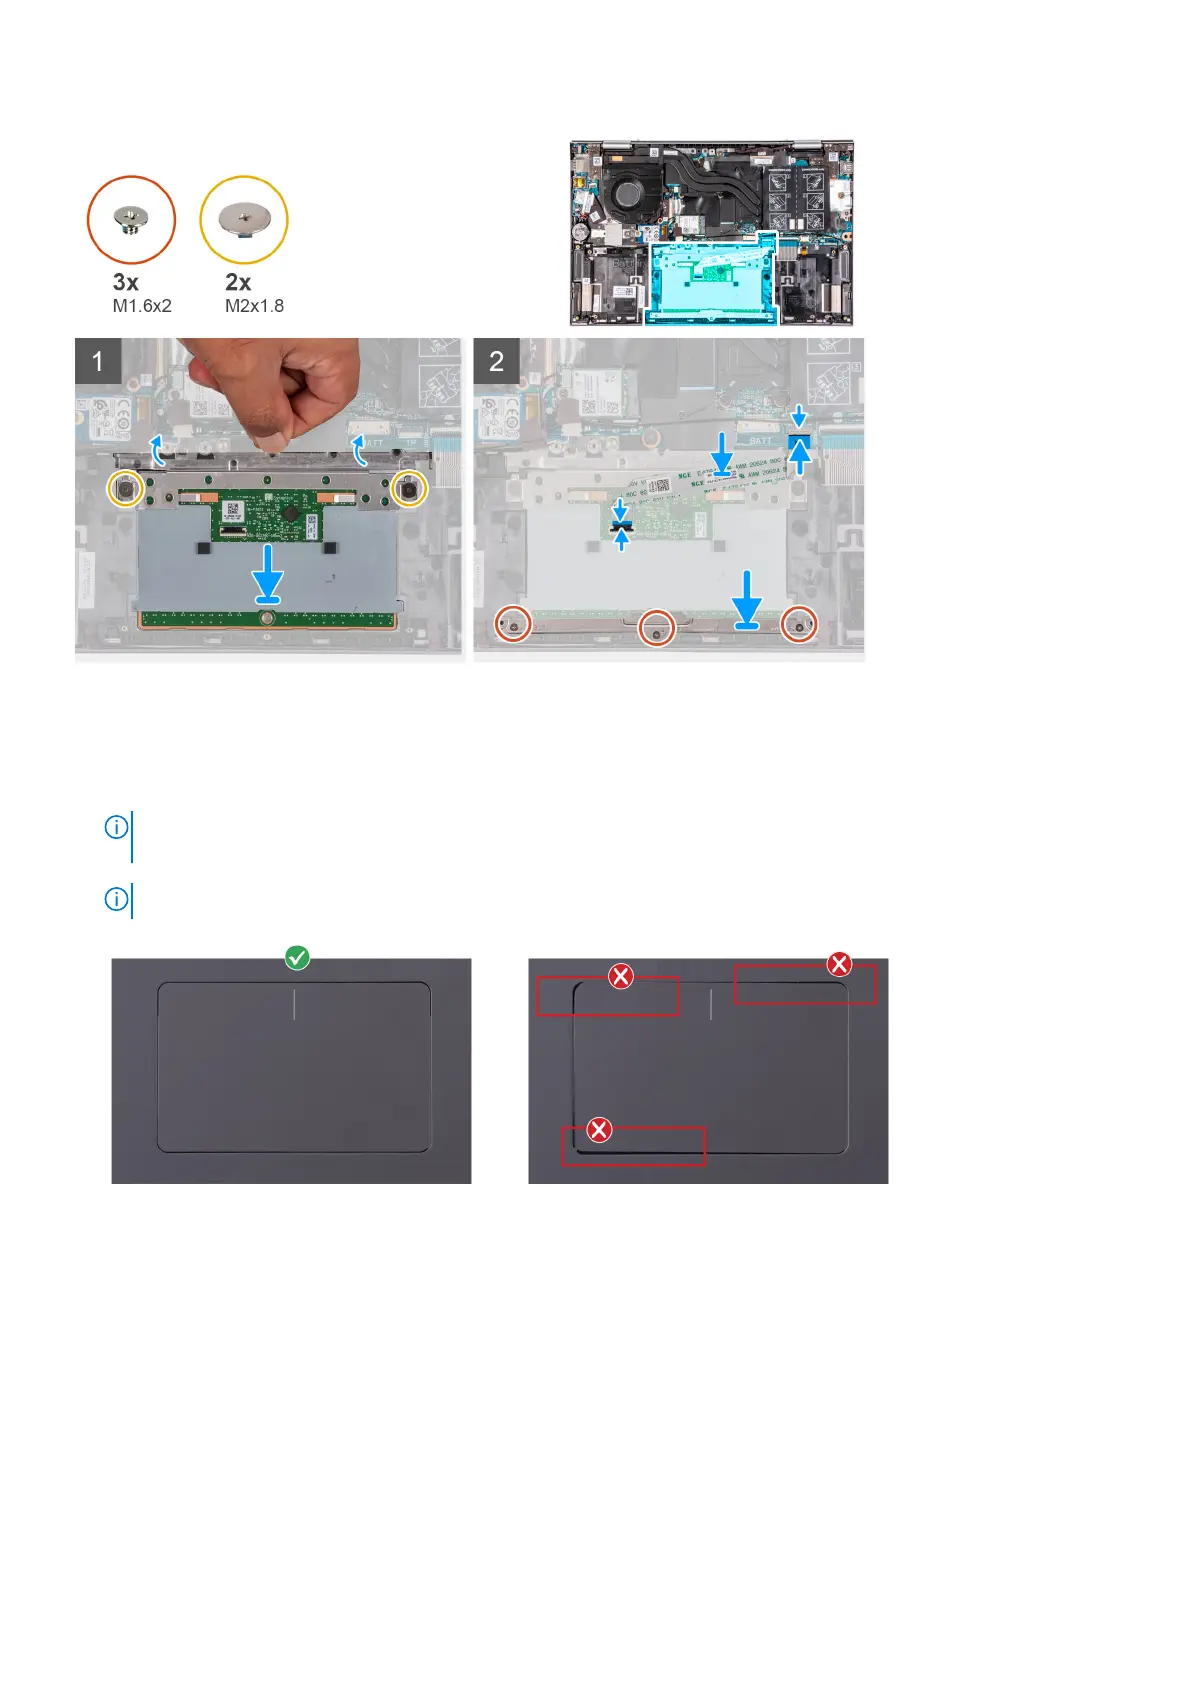
Steps
1. Lift the transparent flap and slide the touchpad into the slot on the palm-rest and keyboard assembly.
2. Lift the transparent flap and replace the two screws (M2x1.8) that secure the touchpad to the palm-rest and keyboard
assembly.
NOTE:
Ensure that the touchpad is aligned with the guides available on the palm-rest and keyboard assembly, and the
gap on either sides of the touchpad is equal.
NOTE: The following image shows the proper alignment of touchpad on your computer.
3. Slide the touchpad cable into the connector on the touchpad and system board and close the latch to secure the cable.
4. Place the touchpad bracket into the slot on the palm-rest and keyboard assembly.
5. Replace the three screws (M1.6x2) that secure the touchpad bracket to the palm-rest and keyboard assembly.
Next steps
1. Install the battery.
2. Install the base cover.
3. Follow the procedure in After working inside your computer.
44
Removing and installing components