Installing System Components 55
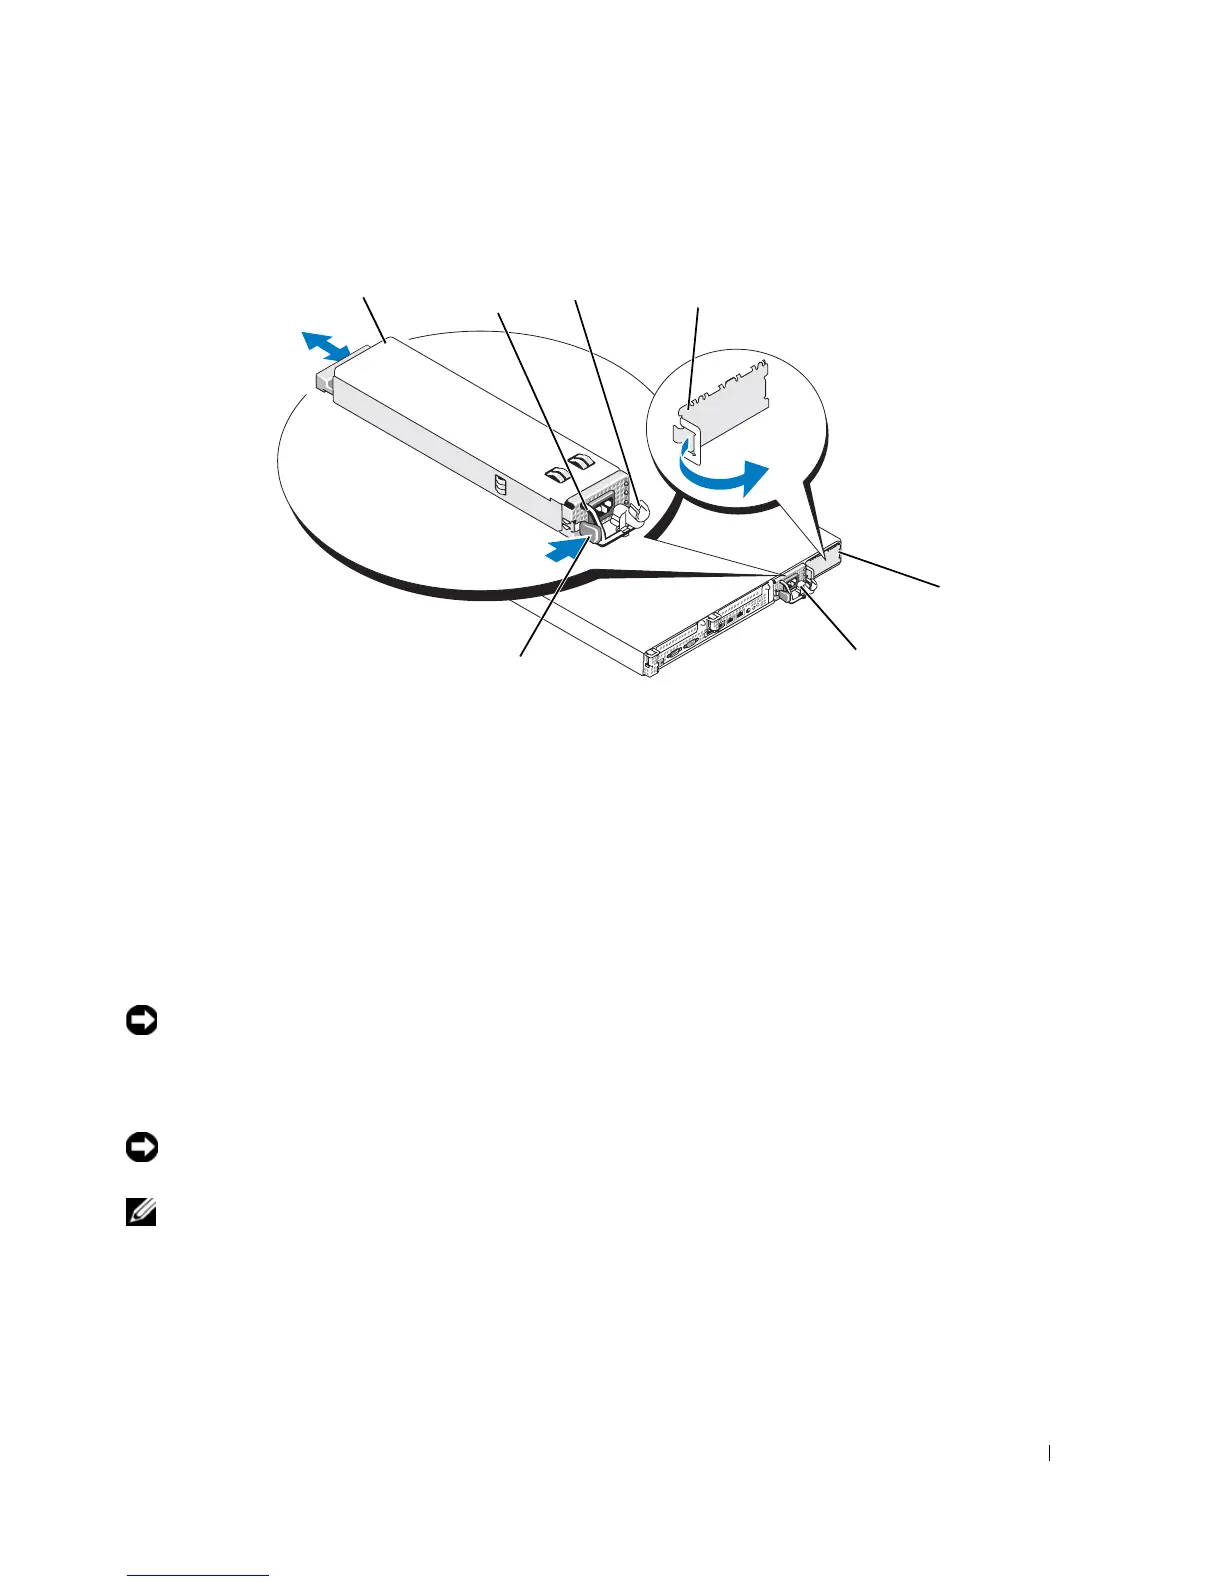
Figure 3-7. Removing and Installing a Power Supply
Replacing a Power Supply
1
If you are adding a second power supply, remove the power supply blank. See "Removing a Power
Supply" on page 54.
2
Holding the power-supply handle, slide the new power supply into the chassis until it is fully seated and
contacts the system chassis. See Figure 3-7.
NOTICE: On a rack system, you may need to temporarily unlatch and lift the cable management arm. For
information about the cable management arm, see the system’s Rack Installation Guide.
3
Insert the power cable through the cable retention bracket, connect the power cable to the power supply,
and plug the cable into a power outlet.
NOTICE: For more information about the power cable retention bracket, see the Getting Started With Your
System guide.
NOTE: After installing a new power supply in a system with two power supplies, allow several seconds for the
system to recognize the power supply and determine its status. The power-supply status indicator turns green to
signify that the power supply is functioning properly (see Figure 1-4).
1 power-supply 2 power-supply handle 3 cable retention bracket
4 power supply blank 5 power-supply bay 2 (optional) 6 redundant power supply bay 1
7 locking tab
2
1
5
6
4
3
7