Installing System Components 81
4
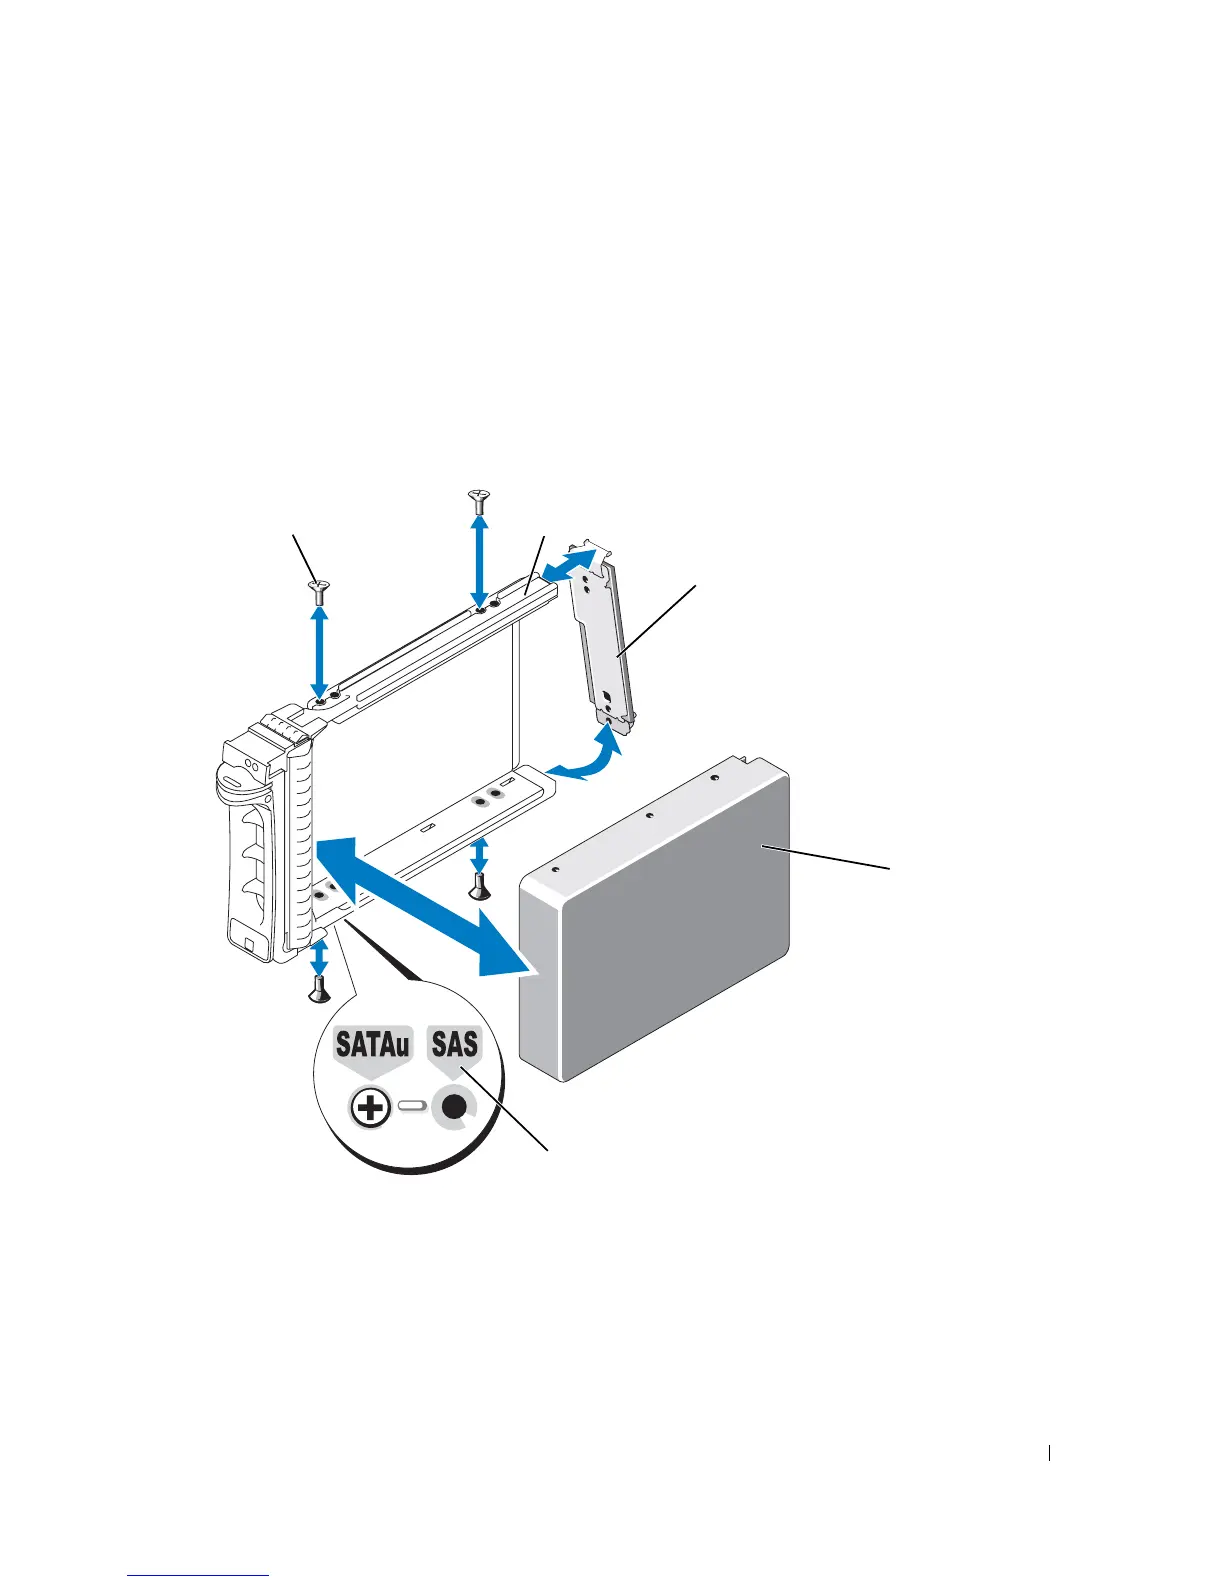
Attach the interposer card to the rear of the SATA hard drive:
a
Angle the top of the interposer card into the inside top carrier rail so that the tabs on the interposer
card bracket attach to the slots on the inside of the carrier rail.
See
Figure 3-21.
b
Rotate the bottom end of the card toward the hard drive to seat the connector.
See
Figure 3-21.
c
Push the bottom end of the card towards the hard drive until the latch on the card bracket clicks into
place.
Figure 3-21. Installing a SATA Hard Drive and Interposer Card Into a SATAu Drive Carrier
1 screws (4) 2 SATAu drive carrier 3 interposer card (SATA only)
4 SATA hard-drive 5 hole labels
1
4
5
3
2
 Loading...