Do you have a question about the Dell Venue7 3740 and is the answer not in the manual?
Lists required operating systems, SD card, disabling anti-virus, and Dell drivers/flashing tools for tablet flashing.
Instructions for flashing the A195 image to the tablet, including downloading tar packages and using the flash tool.
Steps to enable fastboot mode using the xFSTK Downloader by selecting specific tabs and settings.
Download specific OTA zip files for Wi-Fi/LTE, copy to SD card, and insert into the tablet.
Download kernel source, Android AOSP, and GCC, then copy and run the build script.
Prepare device for fastboot, download necessary tools, configure environment, and flash images.
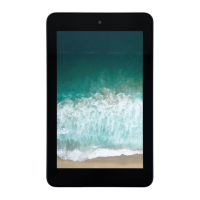
This document, the Dell Open Source Guide, provides instructions for downloading, building, and flashing the appropriate kernel for Dell Venue 7 3740 and Venue 8 3840 tablet devices. It serves as a comprehensive guide for users interested in modifying or restoring their tablet's software, particularly focusing on open-source aspects.
The guide begins by outlining the necessary prerequisite system setup. Users need a computer running either Windows 7 or Windows 8.1 in desktop mode. A micro-SD card of 1GB or higher is also required, indicating that some processes may involve transferring files to the tablet via external storage. A crucial step before proceeding with any flashing operations is to disable all anti-virus software on the computer to prevent interference. The guide also instructs users to download and install specific Dell drivers and flashing tools, including IntelAndroidDrvSetup1.5.0.exe, P708T_Driver_V1.0.0.msi, iSocUSB-Driver-Setup-1.0.4.zip, and XFSTK_downloader_1.5.1.zip. These tools are essential for the communication between the computer and the tablet during the flashing process.
A critical warning is highlighted: users must first flash the A195 image to the tablet if their tablet's current build number is not "YTP802A119500" or "YTP802A519500". This initial flash is a foundational step for many subsequent operations. Another significant warning states that flashing the A195 image will result in the loss of all data on the tablet device, emphasizing the importance of backing up data beforehand.
The first major section, "A. Flash A195 image to the tablet," details the process of installing the base A195 image. This involves downloading and extracting a tar package specific to either the A195 Wi-Fi or A195-LTE model. Users then open the "xFSTK-Downloader" tool and configure it. This includes selecting the "MRD AO/BO + MOOR AO + CRC" tab and setting the GP Flag to "0x80000007" in the "Download Options" tab. Firmware files, specifically dnx_fwr_PRQ.bin and for_product_ifwi_PRQ.bin, need to be selected from the SW Image directory, along with dnx_osr_PRQ.bin and droidboot.img.POS.bin for the operating system.
The physical steps for flashing are also clearly laid out. Users must power off the tablet device by long-pressing the power key for more than 15 seconds. After clicking "Begin Download" in the Flash Tool, which initiates a 60-second waiting period, users are instructed to long-press the volume up button and then plug in the USB cable. Once the flash process starts, the volume up button can be released. The Flash Tool will indicate "Success: FW+OS Download Completed!" upon successful completion. Following this, the tablet automatically switches to fastboot mode. The final step in this section involves double-clicking a specific batch file (either P802_flash_device_wifi_only.bat or P802_flash_device_lte.bat) in the SW image folder to flash the OS system image. After this, the device reboots automatically.
The guide then presents two alternative paths for users: "B. Rooting and bootloader unlocking process using OTA package" or "C. Build the kernel image from the kernel sources and flash kernel image." A note warns that flashing an OTA package with an unsigned kernel will prevent the device from receiving future OTA notifications.
Section B focuses on rooting and bootloader unlocking using an OTA package. The first step is to enable fastboot mode, which involves a similar process to the initial A195 flash: opening "xFSTK Downloader," selecting the "MRD AO/BO + MOOR AO + CRC" tab, and setting the GP Flag to "0x80000007." However, for this process, specific firmware files (fwr_dnx_PRQ_ww27_001.bin and IFWI_MERR_PRQ_UOS_TH2_YT2_ww27_001.bin) are used, and the Operating System option is kept as "N/A." After turning off the tablet and clicking "Begin Download," users press the volume up button and plug in the USB cable. The guide notes that if it's the first time connecting the tablet to the PC, driver installation may take some time. A dialog box will appear, which users should acknowledge by pressing "OK." Once firmware flash is complete, the tool will show "Success: FW+OS Download Completed!"
To proceed with rooting, users reboot the tablet into fastboot mode by pressing the power and volume down buttons simultaneously. They then download the relevant OTA package (YTP802A119600-f-2014-07-16-22_OSS.zip for Wi-Fi or YTD802A519600-f-2014-07-16-16_OSS.zip for LTE) and copy it to a micro-SD card, which is then inserted into the tablet. After powering off the tablet and entering fastboot mode, users select "recovery" from the list using the volume down button and confirm with the power button. This leads to an Android icon lying down with an exclamation mark. To access the recovery menu, users hold the power button and briefly press the volume up button. From the recovery menu, they select "apply update from external storage" and then choose the OTA package from the SD card. After a few minutes of messages and updates, a menu appears, and users select "reboot system now." This process completes the bootloader unlocking and grants root access.
Section C, "Build the kernel image from the kernel sources and flash kernel image," provides instructions for advanced users who wish to compile their own kernel. This involves downloading the kernel source package (A195/dell_venue_kernel.tgz) and Android AOSP 4.4 source codes from android.com, following detailed download instructions. Users set up a directory structure, initialize and sync the repository, and then download GCC for Linux-x86. The GCC directory is then copied to the appropriate location within the AOSP structure.
The kernel source package is extracted into the AOSP directory. Users then navigate to the "linux" directory within AOSP, copy the "prebuilts" directory into it, and run the kernel build script (./kernel_build.sh). After the build process, users verify the creation of the boot.img kernel image.
The next part of Section C covers flashing boot.img and droidboot.img. First, the device needs to be in fastboot mode. Users download adb.exe, fastboot.exe, AdbWinApi.dll, and AdbWinUsbApi.dll from the "Flash Tool/fastboot" directory. Environment variables need to be configured to include the path to these tools. In a command prompt window, users type fastboot devices to confirm the device is recognized. They then download droidboot.img and A195/boot.img (or use their self-built boot.img) and place them in the directory containing the built boot.img. Finally, they execute fastboot flash boot boot.img, fastboot flash fastboot droidboot.img, and fastboot reboot. After the device reboots, users are instructed to check the "Kernel version" information in "Settings -> About tablet" to confirm the image was properly flashed.
The final section, "D. Unbricking Process," offers a solution for users who encounter issues during OTA updates or when flashing new firmware and boot images. It simply directs them back to the "Flash A195 image to the tablet" section, indicating that re-flashing the base A195 image is the method to unbrick the tablet.
Overall, the guide is highly technical and assumes a certain level of familiarity with command-line operations, file system navigation, and flashing tools. It provides detailed, step-by-step instructions for both basic and advanced software management of Dell Venue 7 3740 and Venue 8 3840 tablets, with a strong emphasis on open-source kernel building and rooting. The warnings about data loss and OTA notifications are crucial for users to understand the implications of these processes.
| Operating System | Android 4.4 (KitKat) |
|---|---|
| Display Size | 7.0 inches |
| Display Type | IPS LCD |
| Display Resolution | 1280 x 800 pixels |
| Processor | Intel Atom Z3460 |
| RAM | 1 GB |
| Internal Storage | 16 GB |
| Rear Camera | 5 MP |
| Front Camera | 0.3 MP |
| Wireless | Wi-Fi 802.11 b/g/n |
| Bluetooth | Bluetooth 4.0 |
| Weight | 290 g |
| Connectivity | Micro-USB |