EasyManua.ls Logo

DeLonghi EC 270 - User Manual

DeLonghi EC 270
6 pages
Print Icon
To Next Page IconTo Next Page
Loading...
12
Read this manual thoroughly before installing and
using the appliance.
This is the only way to ensure the best results and
maximum safety for the user.
DESCRIPTION
The terminology below will be used repeatedly on the
following pages.
A ON/OFF button with indicator light
B Coffee button with coffee ready light
C Steam button with steam ready light
D Cup warmer shelf
E Removable water tank with lid
F Steam knob
G Steam/hot water spout
H Cappuccino maker
I Cappuccino nozzle
J Coffee spout
K Cup grille
L Drip tray water level indicator
M Drip tray
N One-cup ground coffee or pod filter
O Two-cup ground coffee filter
P Filter holder
Q Measure with presser
TECHNICAL SPECIFICATION
Mains voltage: 220-240V~50/60Hz
Absorbed power: 1100W
Pressure: 15 bar
Water tank capacity: 1,05 litres
Size LxHxP 208x330x380 mm
Weight: 4,8 kg
The appliance complies with the following EC
directives:
73/23/EEC of 19.2.1973 "Low Voltage Directive",
including the modified directive 93/68/93 68 EEC
89/336/EEC of 03.05.1989 "EMV directive"
including the modified directive 92/31/EEC
SAFETY WARNINGS
This machine has been manufactured to “make
coffee” and "heat drinks". Use with care to avoid
scalds from the water and steam jets or through
incorrect use.
Never touch hot parts.
After removing the packaging, make sure the
product is complete.
If in doubt, do not use the appliance and contact a
qualified professional.
The packing elements (plastic bags, polystyrene
foam, etc.) should be kept out of reach of children as
they are a safety hazard.
This appliance is intended for domestic use only.
Any other use is considered improper and thus
dangerous.
The manufacturer cannot be held responsible for any
damage caused through incorrect, wrong or
unreasonable use.
Never touch the appliance with wet or damp hands
or feet.
Should the appliance break or not function correctly,
turn it off and do not tamper with it.
If it requires repair, contact an authorised service
centre only and ask for original spare parts to be
used.
Failure to respect the above could reduce the safety
of the appliance.
The power cable for this appliance must not be
replaced by the user as this operation requires the
use of special tools.
If the cable is damaged or requires replacing,
contact an authorised service centre only to avoid all
risks.
Do not allow the appliance to be used by persons
(including children) with psychological, physical or
sensory impairments or with inadequate experience
or knowledge, unless closely supervised and
instructed by someone responsible for their safety.
Children must be supervised to ensure they do not
play with the appliance.
Materials and accessories coming into contact with
food conform to EEC directive 1935/2004.
Question and Answer IconNeed help?

Do you have a question about the DeLonghi EC 270 and is the answer not in the manual?

Overview

This document describes a coffee machine designed to make espresso and heat drinks. It is intended for domestic use only, and the manufacturer emphasizes careful use to avoid scalds from water and steam jets.

Function Description:

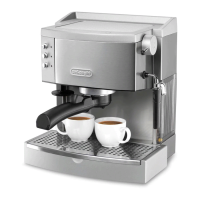
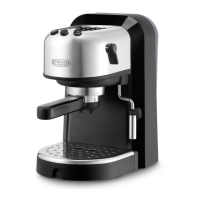
The coffee machine is equipped with an ON/OFF button with an indicator light, a coffee button with a coffee ready light, and a steam button with a steam ready light. It features a cup warmer shelf, a removable water tank with a lid, a steam knob, a steam/hot water spout, a cappuccino maker with a cappuccino nozzle, and a coffee spout. For convenience, it includes a cup grille, a drip tray with a water level indicator, and a drip tray. The machine can use either a one-cup ground coffee or pod filter, or a two-cup ground coffee filter, both held by a filter holder. A measure with a presser is provided for accurate coffee dosing.

Important Technical Specifications:

  • Mains voltage: 220-240V~50/60Hz
  • Absorbed power: 1100W
  • Pressure: 15 bar
  • Water tank capacity: 1.05 litres
  • Size (LxHxP): 208x330x380 mm
  • Weight: 4.8 kg The appliance complies with EC directives 73/23/EEC ("Low Voltage Directive," including modified directive 93/68/93 68 EEC) and 89/336/EEC ("EMV directive," including modified directive 92/31/EEC). Materials and accessories in contact with food conform to EEC directive 1935/2004.

Usage Features:

Before first use, the manual stresses the importance of reading it thoroughly to ensure optimal results and maximum safety. Users should never touch hot parts or immerse the appliance in water as it is an electrical appliance. If the appliance breaks or malfunctions, it should be turned off and not tampered with; repairs should only be carried out by an authorized service centre using original spare parts. The power cable must not be replaced by the user.

Installation:

The appliance should be placed on a work surface away from taps and sinks. The mains voltage must match the rating plate, and the appliance must be connected to an efficiently earthed socket with a minimum current rating of 10 A. The manufacturer is not liable for incidents caused by inadequate earthing. If the plug does not match the socket, a qualified electrician should replace it. The appliance should not be installed in environments where the temperature may reach 0°C or lower to prevent damage from freezing water.

Making Espresso Coffee:

  1. Filling the Water Tank: Remove the lid and pull out the tank, then fill it with fresh, clean water, ensuring not to exceed the MAX level. Replace the tank, pressing lightly to open the valve. Alternatively, the tank can be filled directly with a jug without removing it. It is normal for water to collect under the tank, which should be dried regularly. Never use the appliance without water and always top up when the level drops to a few centimetres from the bottom.
  2. Preheating the Coffee Unit: To achieve espresso coffee at the correct temperature, the machine must be preheated. Turn the appliance on by pressing the ON/OFF button (which lights up), and attach the filter holder without ground coffee. Place a cup under the filter holder (the same cup to be used for coffee). Wait for the "coffee ready" light on the coffee button to come on, then immediately press the coffee button. Run off water until the light goes out, then stop the flow by pressing the button again. Empty the cup. Wait for the "coffee ready" light to come on again and repeat the operation.
  3. Using the Filter Holder for Ground Coffee: After preheating, place the ground coffee filter in the filter holder, ensuring correct insertion. Use the smallest filter for one coffee and the largest for two. For one coffee, use one level measure (about 7 grams) of ground coffee. For two coffees, use two loosely filled measures (about 6+6 grams). Fill the filter gradually to prevent overflow. Before filling, ensure no coffee residues remain from the last use.
  4. Pressing the Ground Coffee: Distribute the ground coffee evenly and press lightly with the presser. Correct pressing is crucial for good espresso; excessive pressing results in slow delivery and dark froth, while too light pressing leads to rapid delivery and skimpy, light-coloured froth.
  5. Attaching the Filter Holder: Remove any excess coffee from the rim and attach the filter holder firmly to the appliance to prevent leaks.
  6. Heating Cups: Place cups under the filter holder spouts. It is recommended to heat cups by rinsing them with hot water or placing them on the cup warmer shelf for 15-20 minutes.
  7. Brewing Coffee: Ensure the "coffee ready" light is on. Press the coffee button. Once the desired quantity is obtained, interrupt the flow by pressing the same button again.
  8. Removing the Filter Holder: Rotate the handle from right to left. Never remove the filter holder while the appliance is delivering coffee to avoid splashes.
  9. Disposing of Used Coffee: Block the filter in place using the lever in the handle, then empty the grounds by turning the filter holder upside down and tapping it.
  10. Turning Off: Press the ON/OFF button to turn off the machine.

Making Espresso Coffee Using Pods and the One-Cup Filter:

  1. Preheat: Preheat the appliance as described in "Preheating the Coffee Unit," ensuring the filter holder is attached for hotter coffee. Use pods conforming to the ESE standard (indicated by the "E.S.E." symbol on the pack).
  2. Insert Filter and Pod: Place the one-cup or pod filter in the filter holder, ensuring correct insertion. Insert a pod, centring it as much as possible on the filter, following the pod pack instructions for positioning.
  3. Attach Filter Holder: Attach the filter holder firmly to the appliance.
  4. Brewing: Proceed as described for ground coffee (points 5, 6, and 7 above).

Making Cappuccino Coffee:

  1. Prepare Espresso: Prepare espresso coffees as described, using sufficiently large cups.
  2. Activate Steam: Press the steam button.
  3. Prepare Milk: Fill a recipient with about 100 grams of milk per cappuccino. The milk must be at refrigerator temperature (not hot). The recipient size should accommodate the milk doubling or tripling in volume. Semi-skimmed milk at refrigerator temperature is recommended.
  4. Position Milk: Place the recipient with milk under the cappuccino maker.
  5. Steam Production: Wait for the "steam ready" light on the steam button to come on, indicating the boiler has reached the ideal temperature for steam.
  6. Frothing Milk: Immerse the cappuccino maker about 5 mm into the milk and rotate the steam knob anticlockwise. The milk will increase in volume and become creamy.
  7. Heating Milk: Once the milk has doubled in volume, immerse the cappuccino maker deeply and continue heating until the desired temperature (60°C is ideal) is reached. Interrupt steam delivery by rotating the steam knob clockwise and pressing the steam button. To turn off the appliance, press the ON/OFF button.
  8. Serve: Pour the frothed milk into the cups with espresso coffee. Sweeten to taste and sprinkle with cocoa powder if desired. Note: To make coffee again after frothing milk, wait for the appliance to cool down. If it's too hot (both coffee and steam lights on), the coffee will burn. To cool, place a container under the boiler outlet, press the coffee button, and run off water until the "steam ready" light goes off. Stop the flow by pressing the coffee button again. A maximum of 60 seconds of steam delivery is recommended.

Hot Water Production:

  1. Turn On: Turn the appliance on by pressing the ON/OFF button (which lights up).
  2. Position Recipient: Place a recipient under the cappuccino maker.
  3. Dispense Hot Water: When the "coffee ready" light comes on, press the corresponding button and simultaneously turn the steam knob anticlockwise. Water will come out of the cappuccino maker.
  4. Stop Flow: To interrupt the flow of hot water, rotate the steam knob clockwise and press the coffee button again. To turn off the appliance, press the ON/OFF button. A maximum run-off of 60 seconds is recommended.

Maintenance Features:

Before cleaning the outside, turn off the appliance, unplug it, and allow it to cool.

Cleaning and Maintenance of the Filter:

Approximately every 300 coffees, or when coffee drips or doesn't come out of the filter holder, clean the ground coffee filter holder:

  1. Remove the filter from the filter holder.
  2. Remove the filter cap by unscrewing it in the direction indicated by the arrow.
  3. Remove the frother from the container by pushing it from the cap end.
  4. Remove the gasket.
  5. Rinse all components and clean the metal filter thoroughly in hot water using a brush. Ensure the holes are not blocked; if necessary, clean with a pin.
  6. Replace the filter and gasket on the plastic disk as shown, ensuring the pin on the plastic disk is inserted into the hole in the gasket.
  7. Replace the assembly in the steel filter container, ensuring the pin is inserted into the hole in the support.
  8. Finally, screw on the cap. Failure to clean as described invalidates the guarantee.

Cleaning the Boiler Outlet:

Approximately every 300 coffees, the boiler outlet must be cleaned:

  1. Ensure the appliance is not hot and unplugged from the mains.
  2. Using a screwdriver, unscrew the screw fixing the espresso boiler outlet.
  3. Clean the boiler with a damp cloth.
  4. Clean the outlet thoroughly in hot water using a brush. Ensure the holes are not blocked; if necessary, clean with a pin.
  5. Rub the boiler outlet while rinsing under the tap.
  6. Replace the espresso boiler outlet, ensuring the gasket is correctly positioned. Failure to clean as described invalidates the guarantee.

Other Cleaning Operations:

  1. Do not use solvents or abrasive detergents; a soft damp cloth is sufficient.
  2. Regularly clean the filter holder cup, filters, drip tray, and water tank. The drip tray has a red indicator that becomes visible when it needs emptying. To empty, remove the cup grille, empty the water, and clean the tray with a cloth. Replace the drip tray, ensuring the indicator is correctly positioned. Clean the tank using a brush to reach the bottom. Important: Never immerse the appliance in water. It is an electrical appliance.

Descaling:

Descaling is recommended approximately every 200 coffees. Use a commercially available product specifically for descaling espresso coffee machines. If unavailable, proceed as follows:

  1. Fill the tank with one litre of water.
  2. Dissolve 2 spoonfuls (about 30 grams) of citric acid (obtainable from chemists' or drug stores).
  3. Turn the appliance on by pressing the ON/OFF button (which lights up) and wait for the coffee ready light to come on.
  4. Ensure the filter holder is not attached and position a recipient under the boiler outlet.
  5. Press the coffee button and run off half the solution in the tank. To stop delivery, press the coffee button again.
  6. Leave the solution to work for about 15 minutes, then run off the rest of the water in the tank.
  7. To eliminate residues of solution and scale, rinse the tank well, fill with clean water, and replace it.
  8. Press the coffee button and run off the water until the tank is completely empty.
  9. Press the coffee button again and repeat operations 7 and 8. Damage to the coffee machine caused by scale is not covered by the guarantee unless descaling is performed regularly as described.

Important Information for Correct Disposal:

At the end of its working life, the product must not be disposed of as urban waste. It must be taken to a special local authority differentiated waste collection centre or to a dealer providing this service. Disposing of a household appliance separately avoids possible negative environmental and health consequences from inappropriate disposal and enables the recovery of constituent materials, leading to significant savings in energy and resources. The product is marked with a crossed-out wheeled dustbin as a reminder of the need for separate disposal of household appliances.

DeLonghi EC 270 Specifications

General IconGeneral
BrandDeLonghi
ModelEC 270
CategoryCoffee Maker
LanguageEnglish

Related product manuals