EasyManua.ls Logo

DeLonghi ESAM04110S - User Manual

DeLonghi ESAM04110S
14 pages
Print Icon
To Next Page IconTo Next Page
Loading...
6
SOMMARIO
1. IMPORTANT SAFEGUARDS ..........................7
1.1 Short cord instructions .................................8
2. INTRODUCTION ..........................................8
2.1 Symbols used in these instructions ...............8
2.2 Letters in brackets .........................................8
2.3 Troubleshooting and repairs ..........................8
2.4 Video instruction manual available on: ........8
3. DESCRIPTION.............................................8
3.1 Description of the appliance ..........................8
3.2 Description of control panel ..........................9
4. PRELIMINARY CHECKS................................9
4.1 Checking the appliance .................................9
4.2 Installing the appliance .................................9
4.3 Connecting the appliance ..............................9
4.4 Using the appliance for the rst time ............9
5. TURNING THE APPLIANCE ON.................... 10
6. TURNING THE APPLIANCE OFF .................. 10
7. SETTING AUTOOFF STANDBY ................ 10
8. SETTING TEMPERATURE ........................... 10
9. ENERGY SAVING ....................................... 10
10. MAKING COFFEE ....................................... 11
10.1 Selecting the coee taste ............................11
10.2 Selecting the quantity of coee in the cup .. 11
10.3 Adjusting the coee mill .............................11
10.4 Tips for a hotter coee:................................11
10.5 Making coee using coee beans ...............11
10.6 Making coee using pre-ground coee .......12
11. MAKING CAPPUCCINO .............................. 12
11.1 Cleaning the cappuccino maker after use ....13
12. HEATING WATER ...................................... 13
13. CLEANING................................................ 13
13.1 Cleaning the coee maker ...........................13
13.2 Cleaning the coee grounds container ........13
13.3 Cleaning the drip tray ..................................13
13.4 Cleaning the inside of the machine .............14
13.5 Cleaning the water tank ..............................14
13.6 Cleaning the coee spouts ..........................14
13.7 Cleaning the pre-ground coee funnel .......14
13.8 Cleaning the infuser ....................................14
14. DESCALING .............................................. 14
15. SETTING WATER HARDNESS ...................... 15
15.1 Measuring water hardness ..........................15
15.2 Set water hardness ...................................... 15
16. TECHNICAL SPECIFICATION ....................... 15
17. MEANING OF LIGHTS DURING NORMAL
OPERATION .............................................16
18. MEANING OF THE ALARM LIGHTS .............. 17
19. TROUBLESHOOTING ................................. 18
Question and Answer IconNeed help?

Do you have a question about the DeLonghi ESAM04110S and is the answer not in the manual?

Summary

1. IMPORTANT SAFEGUARDS

General Safety Precautions

Provides essential safety guidelines to prevent hazards during appliance operation.

4. PRELIMINARY CHECKS

5. TURNING THE APPLIANCE ON

6. TURNING THE APPLIANCE OFF

8. SETTING TEMPERATURE

10. MAKING COFFEE

Selecting Coffee Taste and Quantity

Adjusts coffee taste selection and quantity knobs for desired coffee strength and volume.

Preparing Coffee with Pre-Ground Coffee

Instructions for making coffee using pre-ground coffee, with specific quantity limits.

Grinding Adjustment and Hotter Coffee Tips

Details grinding adjustment and provides tips for achieving hotter coffee.

Preparing Coffee with Whole Beans

Step-by-step guide for making coffee using whole coffee beans.

11. MAKING CAPPUCCINO

12. HEATING WATER

13. CLEANING

14. DESCALING

15. SETTING WATER HARDNESS

17. MEANING OF LIGHTS DURING NORMAL OPERATION

18. MEANING OF THE ALARM LIGHTS

Alarm Light Indicators and Troubleshooting Guidance

Details the meaning of alarm lights and provides corresponding actions for resolving issues.

19. TROUBLESHOOTING

Overview

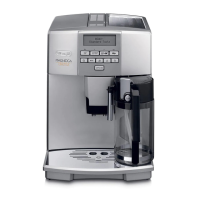
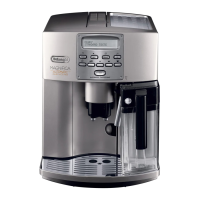
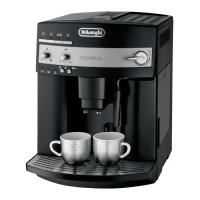
This document outlines the functions, usage, and maintenance of an automatic coffee maker, model ESAM04110.

Function Description

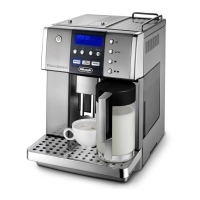
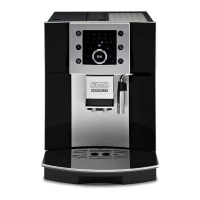
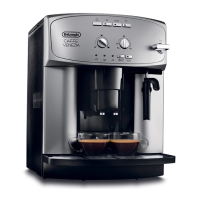
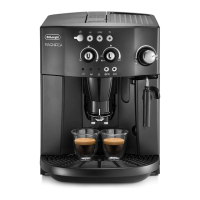
The ESAM04110 is an automatic coffee maker designed to prepare various coffee beverages, including espresso and cappuccino. It features an integrated coffee mill, allowing users to use fresh coffee beans. The machine also supports the use of pre-ground coffee.

Key functions include:

  • Coffee Preparation: The appliance can make one or two cups of coffee at a time. Users can select the desired coffee taste (mild, standard, strong) by adjusting the coffee taste selection knob, which controls the quantity of coffee beans ground. The quantity of coffee in the cup can also be adjusted using a dedicated knob.
  • Grinding Adjustment: The coffee mill's grinding adjustment knob allows users to fine-tune the fineness of the coffee grind. This adjustment should be made only when the coffee mill is in operation and can impact coffee strength and delivery speed.
  • Pre-ground Coffee Function: For convenience, the machine can use pre-ground coffee. A dedicated funnel is provided for this purpose. When using pre-ground coffee, only one cup can be made at a time, and it's crucial not to overfill the funnel to prevent blockages.
  • Cappuccino Preparation: The appliance features a cappuccino maker (steam spout) for frothing milk. This allows users to prepare creamy cappuccinos.
  • Hot Water Delivery: The machine can also dispense hot water, useful for warming cups or preparing other hot beverages.
  • Automatic On/Off and Stand-by: The appliance performs an automatic preheat and rinse cycle upon turning on and an automatic rinse cycle upon turning off. It also has an auto-off (stand-by) function, which can be programmed to switch off after a set period of inactivity (15, 30 minutes, 1, 2, or 3 hours).
  • Temperature Setting: Users can adjust the water temperature for coffee preparation (low, medium, high, maximum) to suit their preference.
  • Energy Saving Mode: An ECO button activates or deactivates an energy-saving mode to reduce power consumption.

Usage Features

Before first use, it is recommended to make 4-5 cups of coffee or cappuccinos to achieve satisfactory results. The appliance should be installed with adequate space around it for heat dissipation and away from water sources. It must be connected to a properly earthed socket with a minimum current rating of 10A.

When using the appliance for the first time, the water tank should be filled, and a preliminary rinse cycle performed by turning the steam/hot water knob. The machine will automatically turn off after this initial setup.

To turn the appliance on, press the power button. The machine will perform an automatic preheat and rinse cycle, indicated by flashing lights. Once the lights remain steady, the appliance is ready for use. To turn it off, press the power button again; it will perform a final rinse cycle before shutting down. For extended periods of non-use, the main switch on the back of the appliance should be set to the "0" position.

For optimal coffee temperature, it is suggested to perform a rinse cycle before making coffee or to warm the cups with hot water. When making coffee with beans, ensure the beans container is filled and the coffee spouts are lowered as close to the cup as possible for a creamier result. The delivery can be interrupted or increased within 3 seconds of completion by pressing the coffee buttons.

When preparing cappuccino, milk should be placed in a container, and the steam function activated. The cappuccino maker is then immersed in the milk, and the steam/hot water knob is turned to the "I" position to froth the milk. For best results, use skimmed or partially skimmed milk at refrigerator temperature. After frothing, the steam/hot water knob must be returned to the "0" position before removing the container to prevent burns. If making another coffee immediately after steaming, the machine may be too hot, indicated by flashing lights; it will need to cool down, which can be expedited by opening the steam/hot water knob to release water.

Maintenance Features

Regular cleaning is essential for the optimal performance and longevity of the coffee maker. The following parts require routine maintenance:

  • Cappuccino Maker: Clean after each use to prevent milk residue buildup. This involves delivering a little hot water, allowing it to cool, then disassembling and washing its parts with warm water and a sponge. Ensure all holes are clear.
  • Coffee Grounds Container and Drip Tray: The machine will indicate when the coffee grounds container is full (flashing light). Both the grounds container and drip tray should be emptied and cleaned regularly. It's important to empty the grounds container whenever the drip tray is removed, even if it appears not full, to prevent clogging. The drip tray has a red level indicator to show when it needs emptying.
  • Water Tank: Clean monthly with a damp cloth and mild washing-up liquid.
  • Coffee Spouts: Clean with a sponge or cloth, and use a toothpick to clear any blocked holes.
  • Pre-ground Coffee Funnel: Check monthly for blockages and clean with a brush if necessary.
  • Infuser: Clean at least once a month. The infuser can only be removed when the machine is correctly turned off. To clean, open the service door, remove the drip tray and grounds container, then press two red release buttons to pull out the infuser. Soak it in water for about 5 minutes, rinse under the tap, and then reinsert it, ensuring it clicks into place and the red buttons snap out.
  • Inside of the Machine: Check internal parts monthly for coffee deposits and clean with a brush, sponge, or vacuum cleaner.

Descaling:

The appliance will indicate when descaling is required by a flashing light. Only De'Longhi descaler should be used, following the instructions on the descaler pack. The descaling procedure involves emptying the water tank, filling it with diluted descaler, placing a container under the hot water spout, and initiating the descaling program. The machine will perform a series of rinses and pauses. After the descaler solution is used, the tank should be emptied, rinsed, refilled with clean water, and a final rinse cycle performed.

Water Hardness Setting:

The machine's descaling frequency can be adjusted based on local water hardness. A "TOTAL HARDNESS TEST" indicator paper is provided to measure water hardness, which will show 1, 2, 3, or 4 red squares corresponding to different hardness levels. The water hardness setting can then be programmed into the machine via the control panel.

DeLonghi ESAM04110S Specifications

General IconGeneral
Water Tank Capacity1.8 liters
Coffee Grounds Container Capacity14 servings
Pump Pressure15 bar
Power1450 W
Adjustable Coffee StrengthYes
Adjustable Water HardnessYes
Removable Water TankYes
Removable Drip TrayYes
ColorSilver
Voltage220-240 V
ProgrammableYes
Adjustable Coffee TemperatureYes
Removable Brew GroupYes
Automatic CleaningYes
Automatic Shut-offYes
Coffee TypeEspresso
FeaturesBuilt-in grinder, Cappuccino system
Product TypeEspresso Machine

Related product manuals