4
ENVIRONMENTAL INFORMATION:
This unit contains fluorinated greenhouse gases covered by the
Kyoto Protocol.
Maintenance and disposal must be carried out by qualified person-
nel only. (R134a - GWP=1300)
Transport, filling, cleaning, recovery and disposal of
refrigerant should be performed by the
manufacturer's authorised Customer Services only.
The appliance should be disposed of by a specialist
centre authorised by the manufacturer only.
DESCRIPTION
A) Lid
B) Dasher
C) Removable cylinder
D) Function selector
E) Ventilation grille
F) Hollow to facilitate moving the appliance
G) Spatula
IMPORTANT:
1) Always close the lid "A" before operating the dasher.
2) Do not leave the selector in the position for
more than 1 minute.
3) After turning the appliance off from " " to
" ", always wait at least 5 minutes before tur-
ning it on again.
4) The appliance must not be laid on its side or turned upsi-
de down.
INSTRUCTIONS
ASSEMBLY AND DISSASSEMBLY
To take the appliance apart, remove the lid, then remove the das-
her from the pin in the centre of the cylinder. Then remove the
cylinder. To reassemble the appliance, insert the cylinder and
press downwards on the edge with the hands (fig. 1). Insert the
dasher then fit the lid.
OPERATION
Assemble the appliance as described in the chapter "ASSEMBLY
AND DISSASSEMBLY".
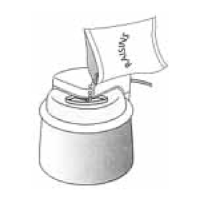
You are recommended (fig. 3) to moisten
the aluminium bottom of the appliance evenly with cotton
wool dipped in alcohol for food use taking care not to pour it
onto the central plastic area (fig. 3). Remember that alcohol is
inflammable. You should therefore perform this operation
away from flames or hot stoves. This prevents the formation of
ice between the cylinder and aluminium bottom of the
appliance, making it easier to extract the cylinder when pre-
paration is complete.
Place the ingredients required by the recipe in the cylinder and fit
the lid by turning anticlockwise.
Bear in mind that the cylinder holds a maximum of 600 g. Plug
into a suitable mains socket. Make sure there are no obstacles pre-
venting air from circulating freely through the grilles at the sides.
Once you have added all the ingredients to the cylinder, turn the
appliance on by placing the selector in the position.
Important: never use the appliance without the cylinder. Make
sure the outside surface of the cylinder is completely dry before
inserting it in the appliance.
Process the ingredients by turning the selector to the required
position.
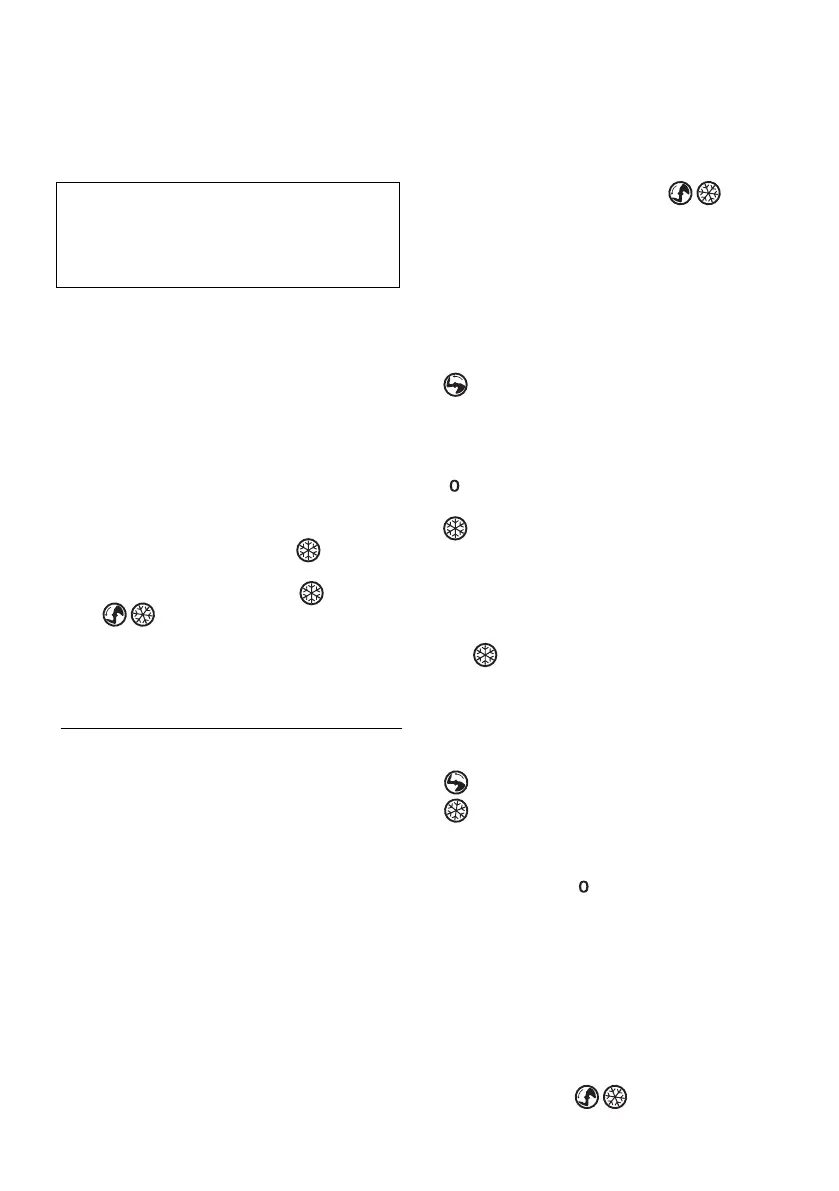
DESCRIPTION OF SELECTOR
The selector has 4 different positions:
Dasher rotation (compressor off)
Use this function to mix the ingredients during the first
phase of ice-cream preparation.
Important: you cannot add ingredients to the cylinder
while the dasher is in movement.
Appliance off.
Chilling (compressor operating)
Use this function to add or taste ingredients during pre-
paration or to stop the dasher to check the texture of the
ice-cream.
If the recipe requires ingredients to be added (pieces of
chocolate, raisins, meringues...), turn the selector to the
position for a maximum of 1 minute.
Important: you must never leave the appliance in this
position for more than 1 minute.
Leaving it in this position for longer could seriously
damage the dasher rotation mechanism.
Combined dasher rotation and chilling (compres-
sor operating)
Use this function to make the ice-cream through the
combined action of the compressor and the dasher.
When the ice-cream reaches the required texture, place
the selector in the position to turn the appliance off.
Normally each ice-cream making cycle lasts about 40
minutes.
Continuous functioning beyond this time will result in
excessively hard ice-cream and serious damage to the
dasher rotation mechanism.
Important: if you need to work the ingredients with a whisk
(e.g., to froth the egg whites, beat the eggs and sugar, etc.),
you are recommended to prepare the ingredients in a separa-
te container and then pour them into the cylinder.
You can then select the function to start making the
ice-cream.
 Loading...