
W
Wayne WebsterAug 7, 2025
What to do if the power cord is damaged on my DeLonghi NESCAFE Dolce Gusto EDG 305 Coffee Maker?
- KKevin MendezAug 8, 2025
If the power cord of your DeLonghi Coffee Maker is damaged, you should replace it.
What to do if the power cord is damaged on my DeLonghi NESCAFE Dolce Gusto EDG 305 Coffee Maker?
If the power cord of your DeLonghi Coffee Maker is damaged, you should replace it.
What to do if accessories are broken or damaged on my DeLonghi NESCAFE Dolce Gusto EDG 305?
If any accessories of your DeLonghi Coffee Maker are broken or damaged, replace them.
How to fix a capsule holder that doesn't insert correctly into the extraction head of my DeLonghi NESCAFE Dolce Gusto EDG 305 Coffee Maker?
If the capsule holder does not insert correctly into the extraction head of your DeLonghi Coffee Maker, replace the capsule holder.
What to do if parts of the housing are broken on my DeLonghi Coffee Maker?
If parts of the housing of your DeLonghi Coffee Maker are broken or damaged, such as snap connections or latches, replace the parts if necessary.
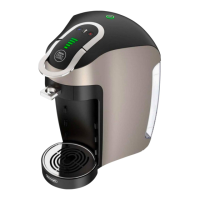
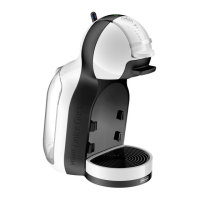
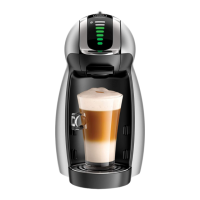
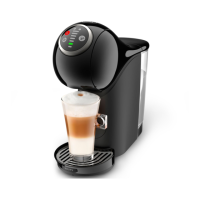
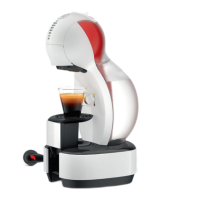
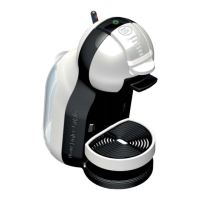
Illustrates and labels the external parts of the DeLonghi EDG 305 coffee machine.
Details and labels the internal components of the DeLonghi EDG 305 coffee machine.
Explains the information found on the De Longhi rating plate, including model and serial number details.
Visual representation of the water flow path within the coffee machine, showing key components.
Provides specifications like mains voltage, power consumption, flow rates, capacities, and operating temperatures.
Details physical dimensions, pre-heating time, pump pressure, noise level, and machine weight.
Explains the meaning of LED signals on the power button for different operating modes and fault indications.
Step-by-step guide for initial setup, including rinsing the machine before its first beverage preparation.
Instructions on how to prepare hot and cold beverages, including capsule insertion and volume selection.
Explains the auto shut-off feature and provides safety advice for handling hot capsules and opening the lever.
Procedure to empty the machine's fluid system before shipping or long-term storage to prevent damage.
A structured checklist to help diagnose and resolve common machine faults based on symptoms.
Provides essential safety warnings, general notes, and precautions for performing repairs on the machine.
Lists the necessary tools and accessories required for disassembly and repair tasks.
Instructions for removing, replacing, and deblocking the needle plate to clear blockages.
Outlines the initial steps for disassembling the coffee machine's outer housing and accessing internal components.
Step-by-step guide for removing and replacing the water tank connector, including assembly tips.
Instructions for unplugging, removing, and replacing the flowmeter component.
Procedure for disconnecting and safely replacing the water pump assembly.
Provides guidance on hose cutting, clip usage, and securing the pump assembly for correct installation.
Detailed steps for removing and replacing the NTC temperature sensor, including paste application.
Instructions for replacing the power cord and associated thermo fuses, noting country-specific wiring.
Offers advice on thermofuse handling, wire routing, and checking connections for power cord replacement.
Step-by-step guide to remove and replace the thermoblock unit, including support and fuse holder removal.
Provides guidance on mounting the NTC sensor and cutting pressure hoses for thermoblock replacement.
Instructions for safely disconnecting and replacing the electronic mainboard, noting ESD precautions.
Steps for disconnecting electrical connectors and removing the main extraction head assembly.
Advice on handling pressure hoses, cable ties, and connecting the extraction head assembly correctly.
Procedure for removing and replacing the locking handle mechanism, including lifting hooks.
Guidance on managing cables and ensuring correct fitment of the locking handle hooks and openings.
Instructions for removing and replacing the magnet, with advice on handling and alignment.
Illustrates the electrical connections and component layout for the machine's circuitry.
Presents the specialized equipment required for functional testing of the machine after repair or assembly.
Measures the time taken for the machine to reach its optimal operating temperature.
Checks the flow rate and water temperature at a specified pressure (8 bar).
Verifies the maximum operating pressure and checks for any leaks in the machine's fluid system.
Discusses legal obligations for repair centers and general requirements for ensuring machine safety and integrity.
Details the necessary test equipment and outlines general testing procedures for after-repair verification.
Specifies technician qualifications and the necessity of preparing a test report after all repair work.
Highlights crucial safety warnings related to electrical shock and the correct execution of testing procedures.
Verifies the integrity of the protective earth conductor and measures its resistance to ensure safety.
Measures the insulation resistance between electrical conductors and touchable parts of the machine.
Measures the leakage current in the protective earth conductor when the machine is powered on.
Measures the contact current of touchable metallic parts while the machine is switched on.
Step-by-step guide for descaling the coffee machine to remove mineral deposits and ensure optimal performance.
Routine cleaning instructions for the drip tray, capsule holder, water tank, and exterior surfaces.
| Type | Capsule coffee machine |
|---|---|
| Water Tank Capacity | 0.8 liters |
| Pressure | 15 bar |
| Weight | 2.5 kg |
| Compatible Pods | NESCAFÉ Dolce Gusto capsules |
| Automatic Shut-off | Yes |
| Brand | DeLonghi |
| Model | EDG 305 |
| Color | Black |
| Removable Drip Tray | Yes |
| Power | 1500 watts |
| Compatibility | NESCAFÉ Dolce Gusto |
| Product Type | Coffee Machine |