M:01:02
Electrical System and Instruments
1.
Disconnect Battery.
2.
Remove Distributor Cap (1). Fig. 2
3. Disconnect wire (2) between E.C.U. and
Distributor.
4.
Unscrew distributor retaining nut (3) and
washer (14).
5. Remove Distributor.
REFITTING - Figs. 2 and 3
Follow the marks made on dismantling, check the
Timing and adjust if required.
If in doubt as to the position of the Distributor
proceed as follows for a first approximate
setting:
—
1.
Set cylinder No. 1 to
T.D.C.
— firing stroke
(line up marks on Crankshaft Pulley (1) and
Calibrated Bracket (2) attached to the Timing
Chain cover).
2.
Line up the Rotor Arm (3) to the No. 1 Cylinder
mark on Distributor Body (4). Note that the
Distributor Spindle is driven by spiral gears and
allow for this when lowering, also make sure
Timing Adjustment Slot passes over the Fixing
Stud.
Then refit the Mixture Regulator
(Gaskets must be renewed).
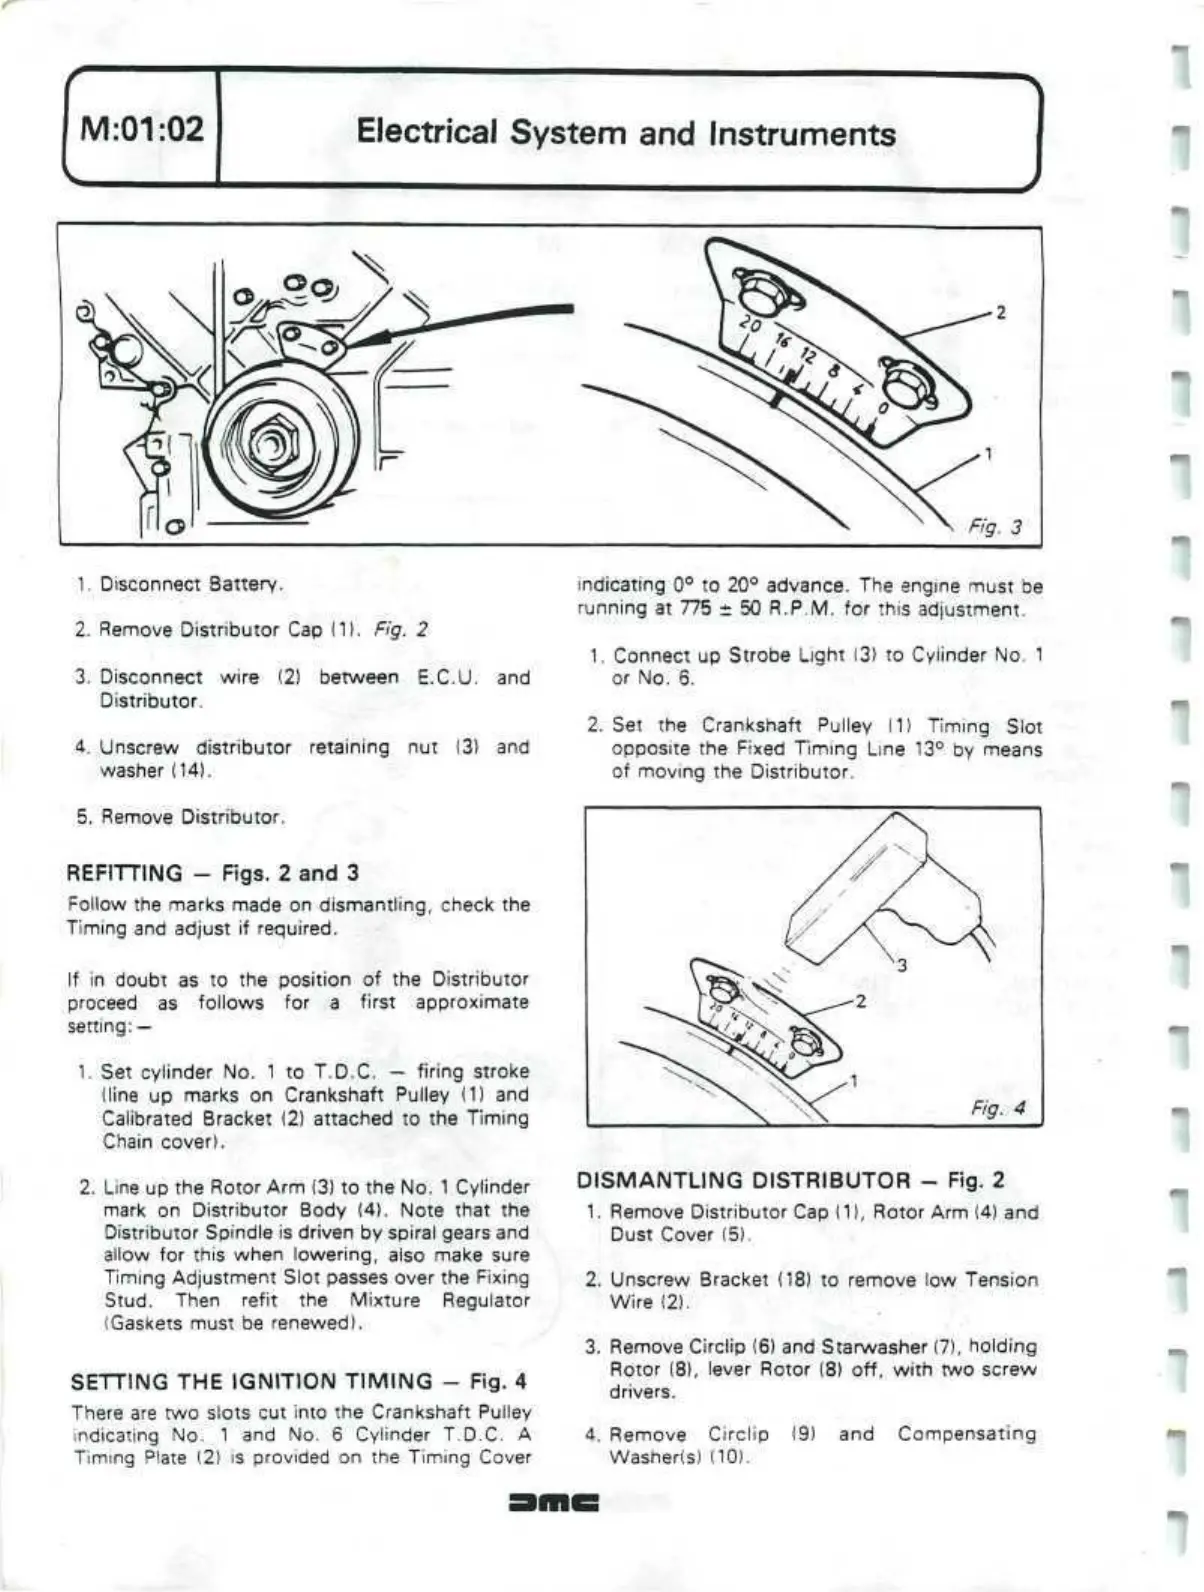
SETTING THE IGNITION TIMING - Fig. 4
There are two slots cut into the Crankshaft Pulley
indicating No. 1 and No. 6 Cylinder T.D.C. A
Timing Plate (2) is provided on the Timing Cover
indicating 0° to 20° advance. The engine must be
running at 775 ± 50 R.P.M. for this adjustment.
1.
Connect up Strobe Light (3) to Cylinder No. 1
or No. 6.
2.
Set the Crankshaft Pulley (1) Timing Slot
opposite the Fixed Timing Line 13° by means
of moving the Distributor.
DISMANTLING DISTRIBUTOR - Fig. 2
1.
Remove Distributor Cap
(1),
Rotor Arm (4) and
Dust Cover (5).
2.
Unscrew Bracket (18) to remove low Tension
Wire (2).
3. Remove Circlip (6) and
Starwasher
(7), holding
Rotor (8), lever Rotor (8) off, with two screw
drivers.
4.
Remove Circlip (9) and Compensating
Washer(s) (10).
 Loading...
