M:09:02
Electrical System and Instruments
1
I"
:'i
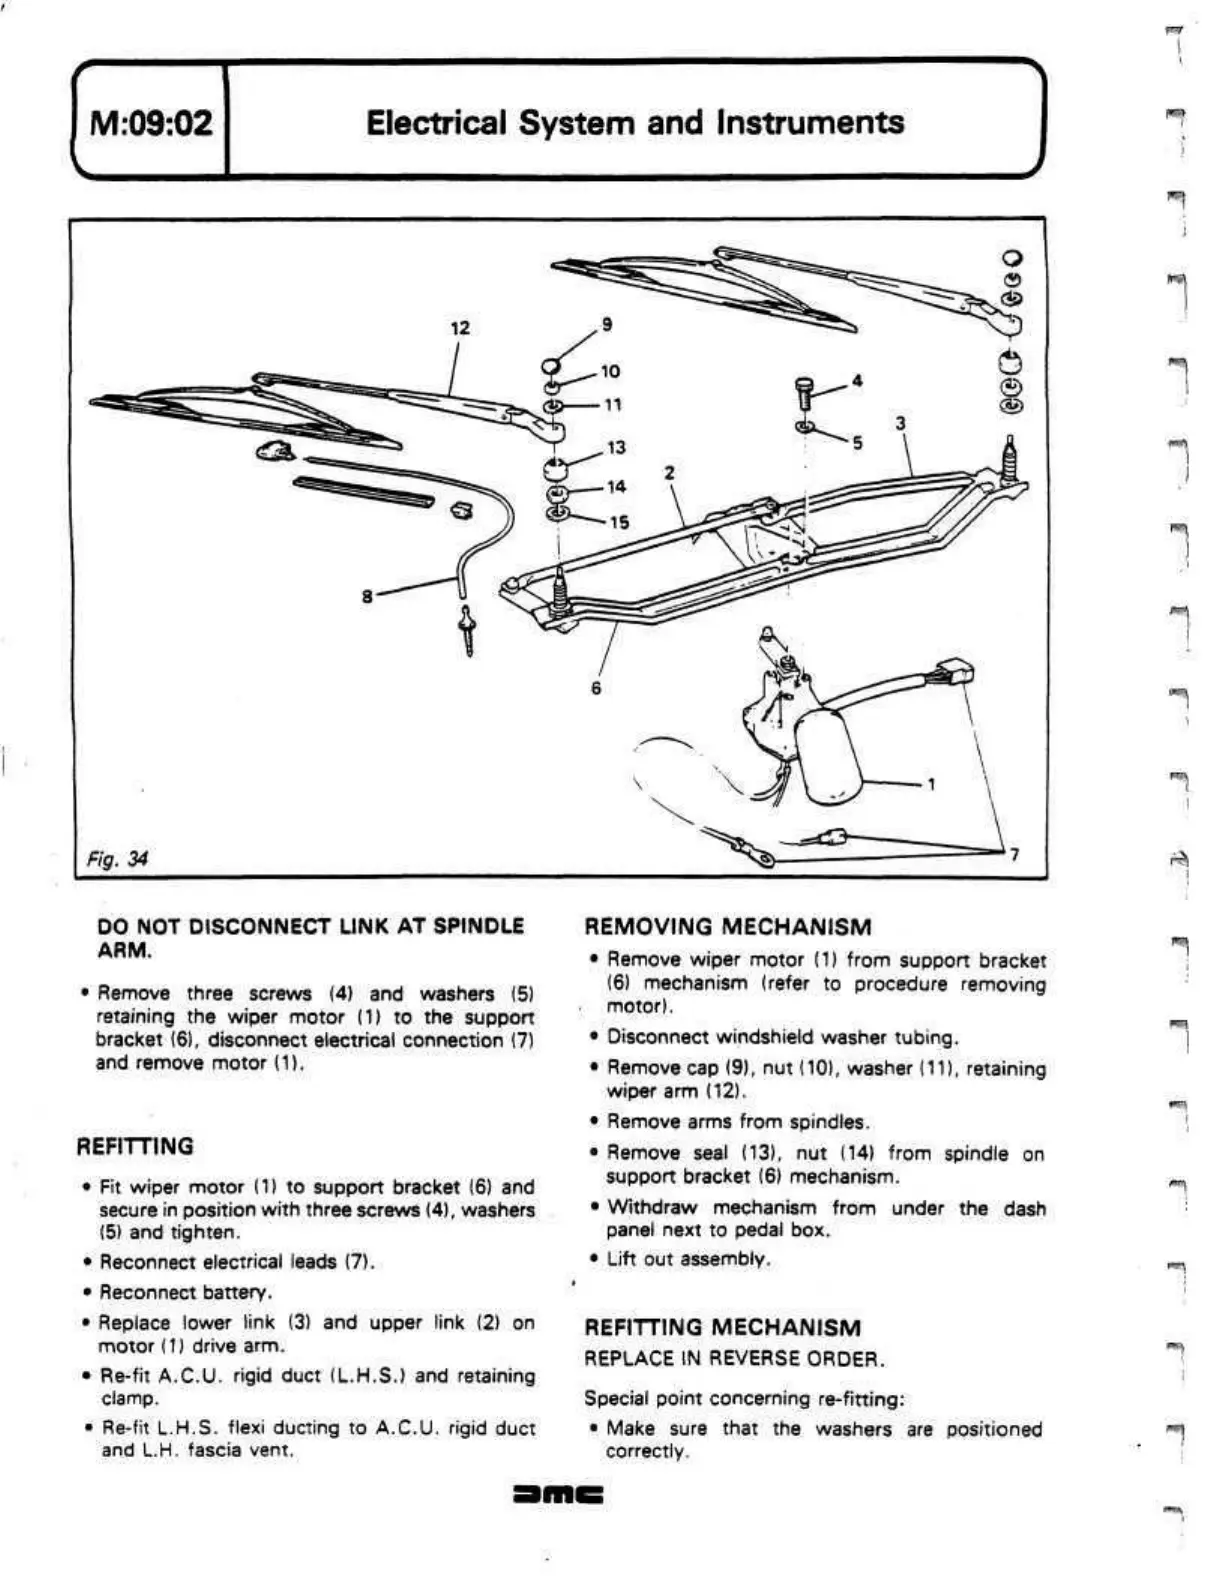
DO NOT DISCONNECT LINK AT SPINDLE
ARM.
• Remove three screws (4) and washers (5)
retaining the wiper motor (1) to the support
bracket (6), disconnect electrical connection (7)
and remove motor (1).
REFITTING
• Fit wiper motor (1) to support bracket (6) and
secure in position with three screws (4), washers
(5) and tighten.
• Reconnect electrical leads (7).
• Reconnect battery.
• Replace lower link (3) and upper link (2) on
motor (1) drive arm.
• Re-fit
A.C.U.
rigid duct (L.H.S.) and retaining
clamp.
• Re-fit L.H.S.
flexi
ducting to
A.C.U.
rigid duct
and L.H. fascia vent.
REMOVING MECHANISM
• Remove wiper motor (1) from support bracket
(6) mechanism (refer to procedure removing
motor).
• Disconnect windshield washer tubing.
• Remove cap
(9),
nut
(10),
washer (11), retaining
wiper arm (12).
• Remove arms from spindles.
• Remove seal (13), nut (14) from spindle on
support bracket (6) mechanism.
• Withdraw mechanism from under the dash
panel next to pedal box.
• Lift out assembly.
REFITTING MECHANISM
REPLACE IN REVERSE ORDER.
Special point concerning re-fitting:
• Make sure that the washers are positioned
correctly.
F
7
!
7
^
P*?.--\
 Loading...
