J
Heating and Air Conditioning
3. Disconnect pipe to actuator if not already
removed.
4.
Remove two nuts securing actuator to casing
or bracket, noting relative position of actuator
to casing.
INSTALLING VACUUM ACTUATOR
1.
Locate actuator, ensuring correct orientation,
on casing or bracket and secure with two nuts.
2.
Attach flap link rod to actuator link with
hexagon screw.
3. While ensuring that the flap is fully seated,
depress the actuator link 1 to 2 mm before
tightening the link screw.
4.
Connect vacuum pump to actuator and test
operation of flap to ensure that all flaps seat
correctly in each operating position.
5. Re-fit heater/air conditioning unit to
veh.icle.
FITTING NEW COMPRESSOR DRIVE
BELT
1.
Release two adjuster bolts.
2.
Slacken tension screw lock-nut and release
belt tension by slackening tension screw.
3. Roll belt off compressor pulley.
N .08:19
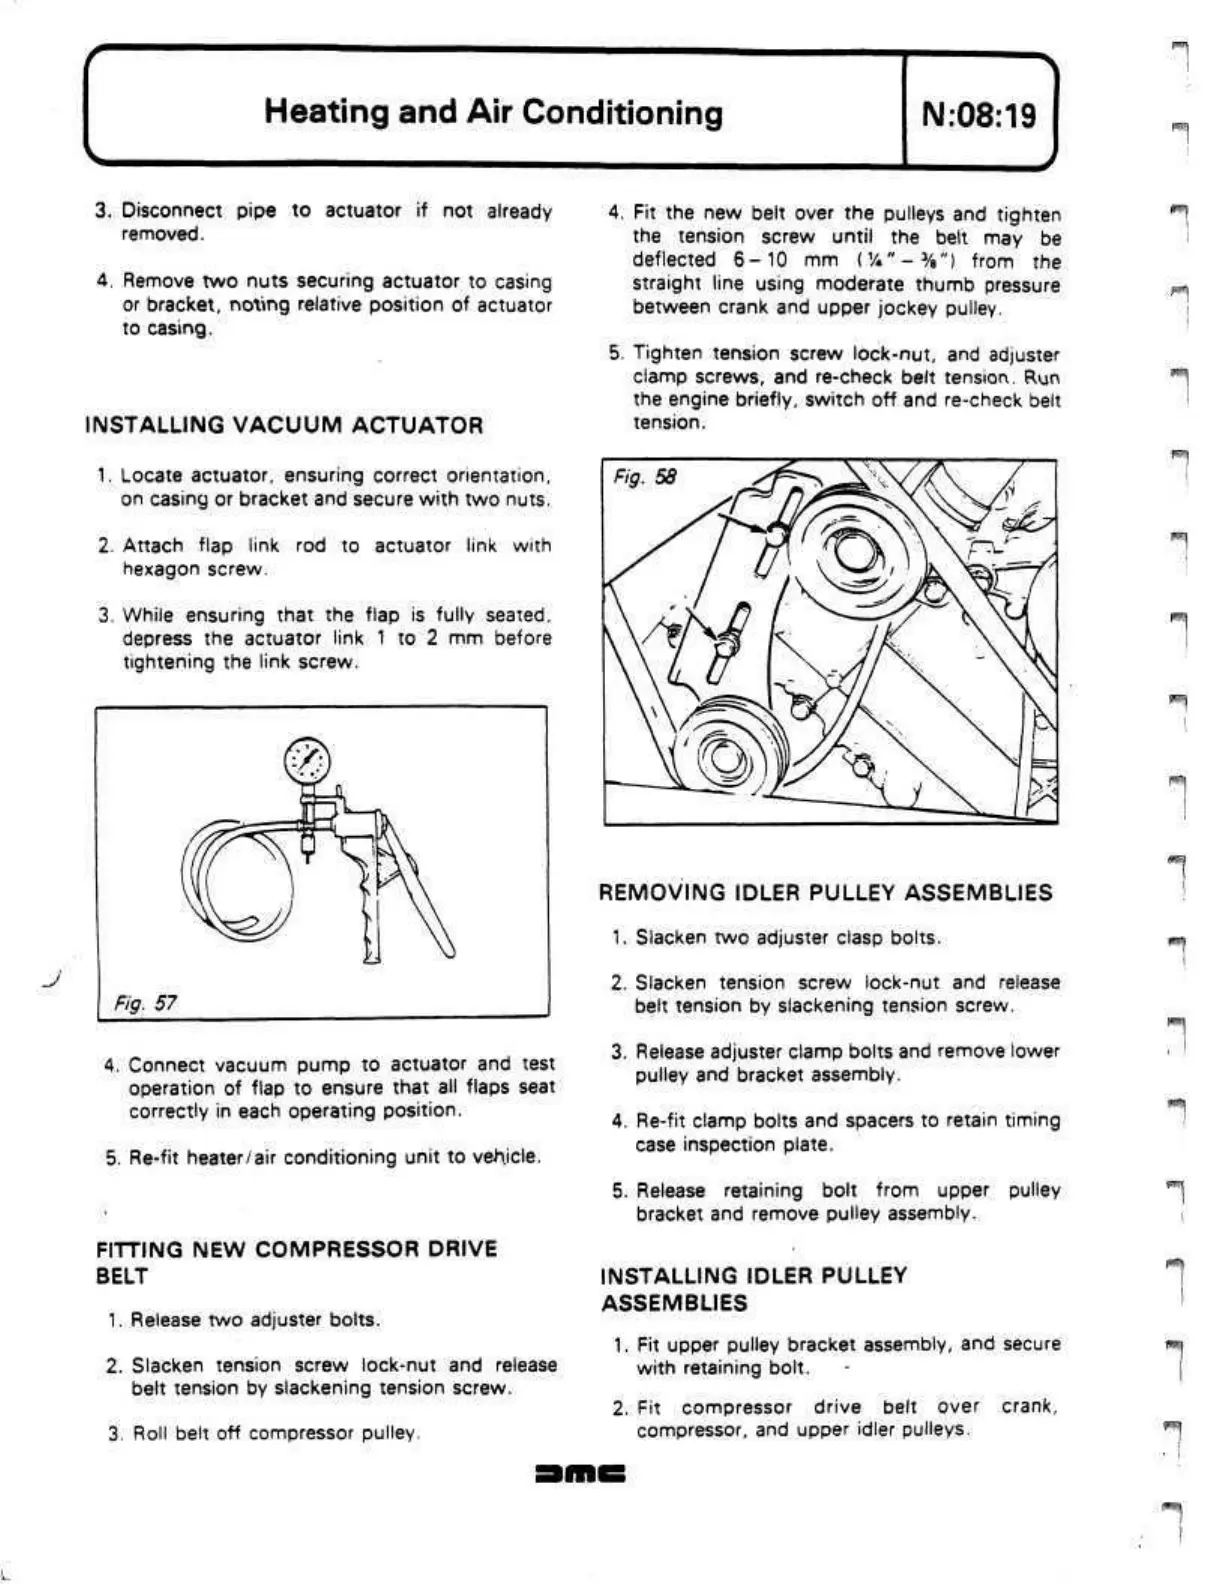
4.
Fit the new belt over the pulleys and tighten
the tension screw until the belt may be
deflected 6-10 mm
(Vi"-%")
from the
straight line using moderate thumb pressure
between crank and upper jockey pulley.
5. Tighten tension screw lock-nut, and adjuster
clamp screws, and re-check belt tension. Run
the engine briefly, switch off and re-check belt
tension.
REMOVING IDLER PULLEY ASSEMBLIES
1.
Slacken two adjuster clasp bolts.
2.
Slacken tension screw lock-nut and release
belt tension by slackening tension screw.
3. Release adjuster clamp bolts and remove lower
pulley and bracket assembly.
4.
Re-fit clamp bolts and spacers to retain timing
case inspection plate.
5. Release retaining bolt from upper pulley
bracket and remove pulley assembly.
INSTALLING IDLER PULLEY
ASSEMBLIES
1.
Fit upper pulley bracket assembly, and secure
with retaining bolt.
2.
Fit compressor drive belt over crank,
compressor, and upper idler pulleys.
!
f-!>
f
.
 Loading...
