-55^5
Steps for Clutch Removal
rtmj,
pr^
Step 1 — Insert the two pins of the front plate
spanner into any two threaded holes of the clutch
front plate. Hold clutch plate stationary. Remove
hex nut with
3
/«"
(19 mm) socket. Fig. 67
Step 2
• Remove clutch front plate using puller
(No.
32416). Align puller center bolt to
compressor shaft. Thumb tighten the three
puller bolts into the threaded holes.
• Turn center bolt clockwise with
%"
(19 mm)
socket until front plate is loosened. Fig. 68
Note:
Steps 1 and 2 must be performed before servicing
either the shaft seal or clutch assembly.
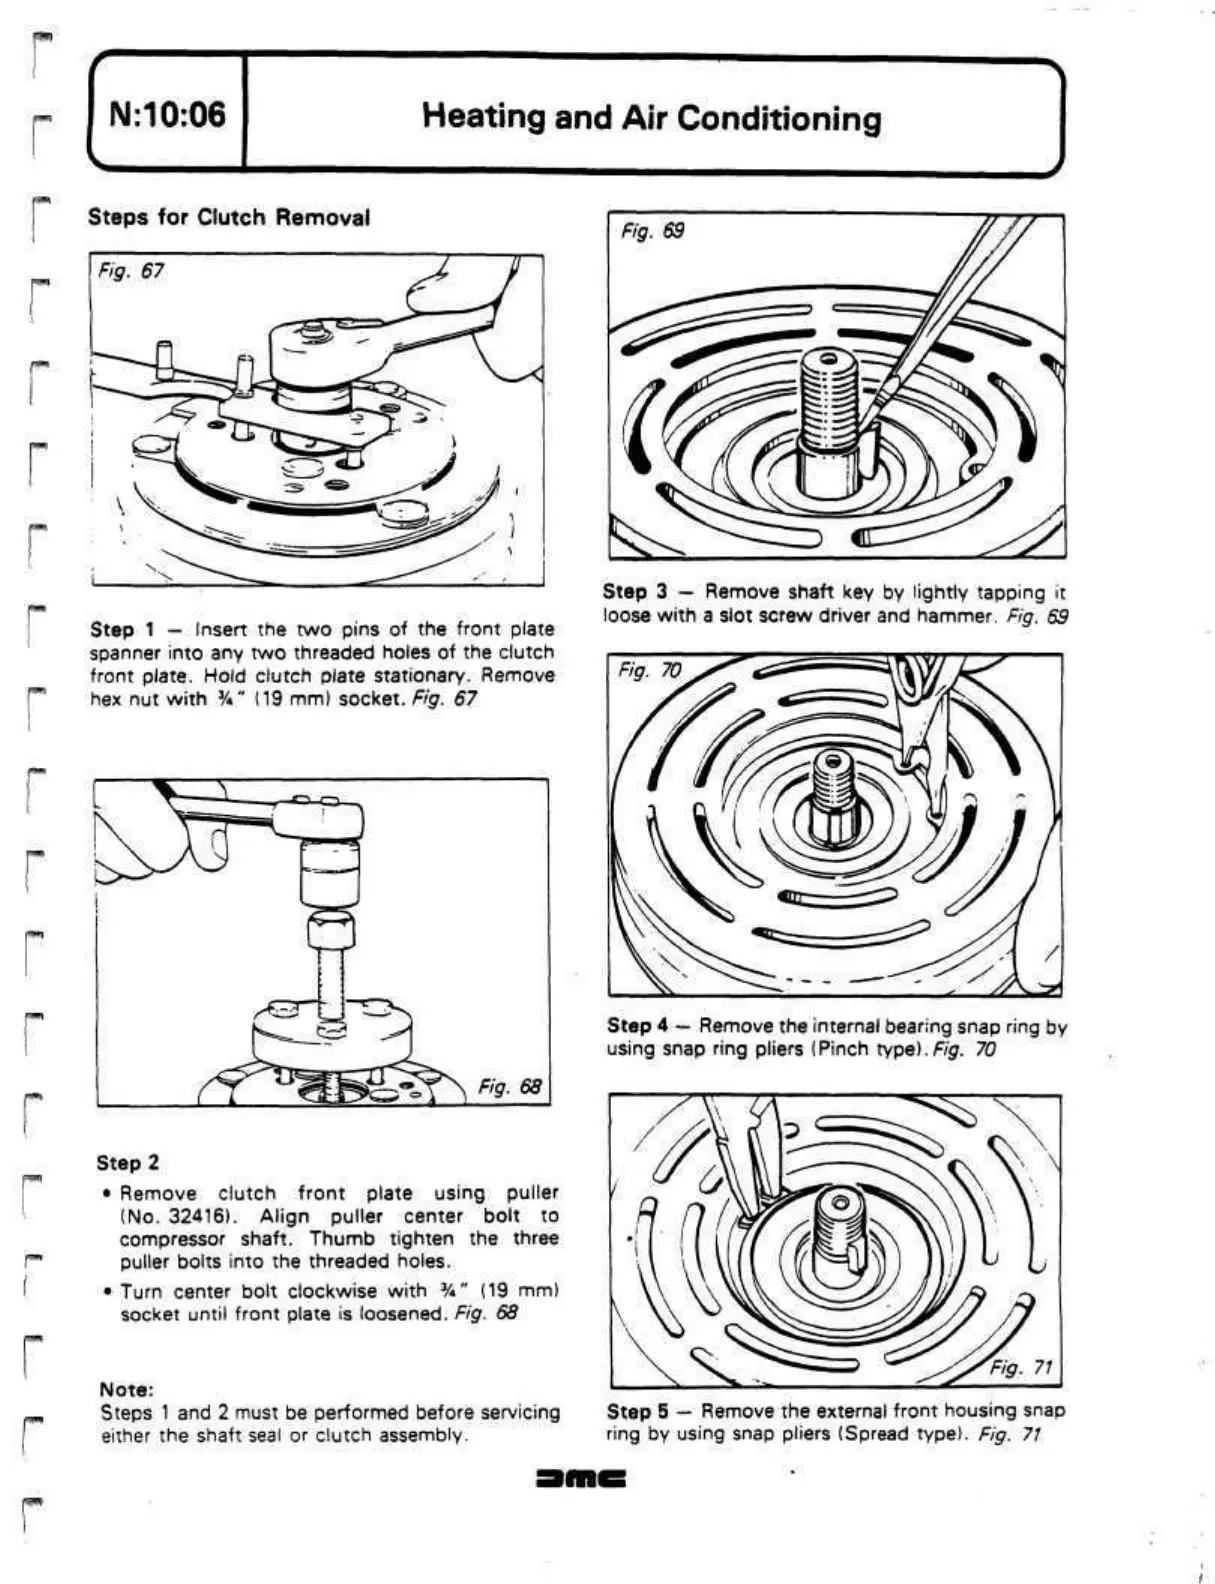
Step 3
—
Remove shaft key by lightly tapping it
loose with a slot screw driver and hammer. Fig. 69
Step 4
—
Remove the internal bearing snap ring by
using snap ring pliers (Pinch
type).Fig.
70
Step 5 — Remove the external front housing snap
ring by using snap pliers (Spread type). Fig. 71