EasyManua.ls Logo

Delta Children Paw Patrol User Manual

Delta Children Paw Patrol
12 pages
To Next Page IconTo Next Page
Page #1 background imageLoading...
Page #1 background image
Paw Patrol Playhouse
PH86531PW
PLAYHOUSE
WARNING:
THIS ITEM REQUIRES ASSEMBLY BY AN ADULT BECAUSE OF
SMALL PARTS AND SHARP POINTS. CARE SHOULD BE
TAKEN UNPACKING AND ASSEMBLY OF THIS PRODUCT.
PHILLIPS SCREWDRIVER REQUIRED
Colors and styles may vary slightly.
Accessories not included.
CASITA DE JUEGOS
ADVERTENCIA:
ESTE ARTÍCULO DEBE SER ENSAMBLADO POR UN ADULTO DEBIDO
A SUS PEQUEÑAS Y PUNTIAGUDAS PIEZAS. SE DEBE TENER
CUIDADO EN EL DESEMPAQUE Y MONTAJE DE ESTE PRODUCTO.
CABANE POUR ENFANTS
AVERTISSEMENT:
CET ARTICLE DOIT ÊTRE ASSEMBLÉ PAR UN ADULTE EN RAISON DES
PETITES PIÈCES ET D'ENDROITS POINTUS. UNE ATTENTION DOIT
ÊTRE PORTÉE AU DÉBALLAGE ET À LASSEMBLAGE DE CE PRODUIT.
SE REQUIERE DESTORNILLADOR PHILLIPS
Los colores y los estilos pueden variar ligeramente
Los accesorios no están incluidos
TOURNEVIS PHILLIPS REQUIS
Les couleurs et les styles peuvent varier légèrement
Les accessoires ne sont pas inclus
SCAN ME
for video instructions
Question and Answer IconNeed help?

Do you have a question about the Delta Children Paw Patrol and is the answer not in the manual?

Delta Children Paw Patrol Specifications

General IconGeneral
BrandDelta Children
ModelPaw Patrol
CategoryBaby & Toddler Furniture
LanguageEnglish

Summary

Playhouse Assembly and Safety Warnings

General Safety Warnings

Important warnings regarding assembly, sharp parts, and adult supervision for the playhouse.

Required Tools

Specifies the need for a Phillips screwdriver for assembly.

Playhouse Parts Identification

Main Components

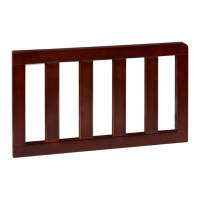
Identification of major structural and decorative parts for the Paw Patrol Playhouse.

Hardware and Accessories

Lists screws and other hardware required for assembling the playhouse.

Playhouse Stickers and Application

Sticker Identification

Visual guide to all available Paw Patrol stickers for the playhouse.

Sticker Application Instructions

Guidelines for applying stickers to individual parts before assembly for best results.

Initial Playhouse Assembly Steps

Step 1: Attaching Periscope Brackets

Attaching part M to part C using screws AA.

Step 2: Connecting Base Frame

Connecting parts B to part A to form the base structure.

Step 3: Expanding Base Frame

Adding part A to the two part B pieces to enlarge the base.

Step 4: Attaching Front Panel

Placing part C onto part A to form the front of the playhouse.

Mid-Assembly Wall and Roof Connections

Step 5: Attaching Side Walls

Inserting parts E and D into part C, sliding down to snap into place.

Step 6: Securing Front Panel to Base

Placing part C into part A and swinging it up to rest into place.

Step 7: Attaching More Side Walls

Inserting parts E and D into part C and sliding down to snap into place.

Step 8: Attaching Roof Supports

Sliding parts F into parts D and E.

Roof Assembly and Securing

Step 9: Adding Gable Ends

Placing part G into parts F, D, and E, sliding down.

Step 10: Adding Gable Ends

Placing part H into parts F, E, and D, sliding down.

Step 11: Securing Roof Underside

Screwing two BB screws on the underside of parts G & H.

Step 12: Final Panel Snap-in

Pressing down on corners to ensure side panels are snapped in.

Door and Window Assembly

Step 13: Attaching Door Top

Placing the top of part J into part E.

Step 14: Attaching Door Bottom

Sliding the bottom of part J into part B.

Finishing Touches and Accessories

Step 15: Snapping in Windows

Snapping both part K's into both part C's.

Step 16: Wedging Parts

Wedge both part L's into parts C and E.

Periscope and Roof Finalization

Step 17: Attaching Periscope Bracket

Screw periscope bracket into part D using CC screws.

Step 18: Storing Periscope

Snap periscope into periscope bracket for easy storage.

Step 19: Verifying Roof Screws

Ensure BB screws are installed on the underside of the roof (G & H).

Product Usage and Placement

Correct Orientation

The playhouse must always be kept in an upright position for safe use.

Incorrect Orientations

Illustrations showing incorrect placement, on its side or roof, to be avoided.

Important Safety and Consumer Information

General Safety Precautions

Key safety advice for assembly, use, and potential hazards like choking or burns.

Consumer Care Contact

Contact details and website for Delta Children's Products for support.

Related product manuals