EasyManua.ls Logo

Delta Childrens Products 64015 User Manual

Delta Childrens Products 64015
17 pages
To Next Page IconTo Next Page
Page #1 background imageLoading...
Page #1 background image
©2010 DELTA ENTERPRISE CORP.
Conforms to
ASTM F1169 & F1821
Safety Standards
Customer Service:
Web Site: www.deltachildrensproducts.com
Delta Children’s Products
114 West 26th Street
New York, NY 10001
Tele.212-645-9033
THIS PRODUCT IS NOT INTENDED FOR INSTITUTIONAL OR COMMERCIAL USE.
If you have any questions or missing parts, contact us. DO NOT return product parts to the store
from where it was purchased before contacting Delta Children’s Products Customer Service.
.
Make sure that all preassemble parts are tight. The appearance of your product may be different
from that pictured in this booklet.
To register your product for important safety alerts and updates to your product
please visit http://deltaenterprise.com/register.asp
ADULT ASSEMBLY REQUIRED
DUE TO THE PRESENCE OF SMALL PARTS
DURING ASSEMBLY, KEEP OUT OF REACH OF
CHILDREN UNTIL ASSEMBLY IS COMPLETE.
READ ALL INSTRUCTIONS BEFORE
ASSEMBLY AND USE.
KEEP INSTRUCTIONS FOR FUTURE USE.
DECEMBER 9, 2010, 64015-R3
FTY
REV
STYLE No: 64015
A
COLOR
Question and Answer IconNeed help?

Do you have a question about the Delta Childrens Products 64015 and is the answer not in the manual?

Delta Childrens Products 64015 Specifications

General IconGeneral
BrandDelta Childrens Products
Model64015
CategoryBaby & Toddler Furniture
LanguageEnglish

Summary

Parts and Hardware Identification

Crib Components

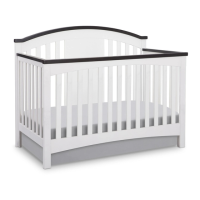
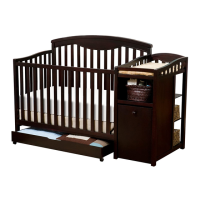
Lists and identifies all parts included in the crib assembly kit.

Hardware Components

Lists and identifies all hardware fasteners and tools required for assembly.

Crib Assembly

Step 1: Attach Back Rail

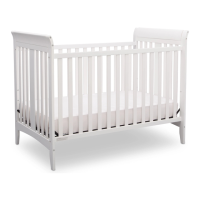
Connects the back rail to the left and right rear legs using pins, bolts, and barrel nuts.

Step 2: Attach Crib Ends

Attaches the left and right crib ends to the assembly from Step 1 using bolts.

Step 3: Install Mattress Support

Secures the mattress support base to the crib frame using bolts.

Mattress Support Adjustment

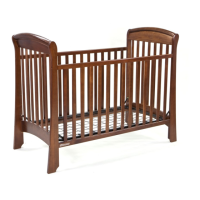
Details the three adjustable positions for the mattress support based on child's growth.

Fall Hazard Warning

Warns about the fall hazard when a child can pull to a standing position.

Step 4: Attach Front Rail

Connects the front rail to the left and right front legs using pins and bolts.

Step 5: Connect Assemblies

Attaches the front assembly (Step 4) to the rear assembly (Step 3) using bolts.

Step 6: Store Instructions

Instructs to store the assembly booklet in the mattress support pouch and parts safely.

Safety Warnings

Refers to Page 2 for important safety information related to the crib.

Toddler Bed Conversion

Step 1: Remove Front Rail

Details the removal of the front rail previously installed during crib assembly.

Step 2: Attach Stabilizer Bar

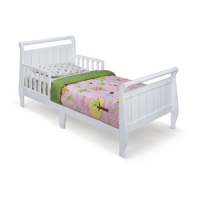
Installs the stabilizer bar to convert the crib into a toddler bed configuration.

Step 3: Final Toddler Bed Setup

Ensures mattress is at lowest position and stabilizer bar is installed for toddler bed use.

Toddler Bed Guardrail Information

Provides information on the availability of a separate toddler bed guardrail.

Full Size Bed Conversion

Step 1: Prepare Headboard and Footboard

Disassembles crib and assembles the headboard and footboard components for full size bed.

Step 2: Attach Bed Frame

Connects the assembled bed frame to the headboard and footboard using bolts.

Warranty and Registration

Customer Service Contact

Provides contact details, website, and instructions for customer service inquiries and issues.

Product Registration

Details the process for registering the product for safety alerts and updates.

Related product manuals