EasyManua.ls Logo

Delta Rockwell 37-110 User Manual

Delta Rockwell 37-110
8 pages
To Next Page IconTo Next Page
Page #1 background imageLoading...
Page #1 background image
For
heavy
duty
work
use a
No.
62-413,
~
H.
P.
1725
R.
P.
M.
capacitor
motor,
60 cycle, single
phase,
115
volts,
alternating
current
only.
PM-1697
U.
S.
Poteat
No.
1,790,288;
1,967,791;
1,975,562;
~
•.
156,923
37-8:
Jointer
Instruction
Manual
Revised:
8-15-58
4" JOINTER
Instructions
MOTOR,
PULLEYS
AND
BELT
We
recommend
our
No.
60-013
~
H.
P.,
11'5
volt,
60
cycle, 1725
R.
P.
M.
bronze
bearing
motor
with
Y2"
shaft
for
medium
duty
work.
HOMECRAFf
and Maintenance
Power
Tools
No.
37-110
Operating
_
....
Each
jointer
is
inspected
and
tested
before
shipment.
These
machines
will
give
excellent
results
if
properly
used
and
maintained.
The
adjustments
for
various
operations
are
described
below;
read
and
follow
the
instructions
carefully.
The
Homecraft
4"
Jointer
is
an
accurate
machine,
ideal
for
the
home
workshop.
Its
maximum
depth
of
cut
is
~-inch.
CONSTRUCTION
FEATURES
Consult
your
Delta
dealer
for
the
correct
motor
if
the
electric
current
available
is
different
from
that
indicated
above.
The
cutter
head
of
this
jointer
runs
in
sealed
ball
bearings
which
need
no
lubrication
throughout
their
life.
It
carries
three
high
speed
steel
knives
which
are
easily
adjusted
and
securely
locked
in
their
dove-tail
grooves.
The
fence
is
finish
ground
to
increase
accuracy,
and
is
heavily
ribbed
for
rigidity
and
to
prevent
warping.
The
fence
can
be
easily locked
in
any
position
across
the
table,
and
can
be
tilted
45°
right
or
left.
It
is also
.provided
with
an
adjustable
stop
so
the
fence
can
be
returned
at
right
angles
to
the
table.
FroRt
and
,rear
tables
are
finish
ground
after"
as-
sembly
on
the
base.
This
additional
operation
assures
the
true
alignment
necessary
for
accurate
work
and
is
a
feature
usually
found
only
in
the
larger
and
more
expensive
.machines.
Speed
of
the
cutter
head
should
be
about
4000
rpm
for
best
results.
The
correct
speed
is
obtained
with
the
No.
60-013
or
62-413
motor
by
using
the
6Y2-inch
motor
pulley
No.
5650
in
conjunction
with
the
2~-inch
cutter
head
pulley
J-17-S which is
furnished
on
the
jointer.
For
any
other
motor,
order
a
pulley
of
the
correct
bore
to
fit
the
shaft,
give
the
speed
of
the
motor,
and
sper;[
that
you
want
the
right
diameter
for
running
a
2~.
ch
drive
pulley
at, 4000
rpm.
The
cutter
head
must
rotate
forward
on
top.
If
your
motor
runs
in
the
wrong
direction,
reverse
it
according
to
the
manufacturer's
instructions,
or
in
the
case
of
a
double-shaft
motor,
turn
it
end
for
end.
The
No.
49-172 V-Belt, offered for use
with
this
jointer,
has
an
outside
circumference
of
59%
inches.
It
will
accommodate
the
usual
install
a s.
Consult
your
Delta
dealer
if
you
need
a
belt
of
other
length
to
fit special
conditions.
MOUNTING
AND
ASSEMBLING
The
jointer,
shown
in
Fig.
1, is
shipped
complete
in
a
single
package
marked
No.
37-110.
It
consists
of
two
units,
the
body
and
the
fence.
The
knife
guard
and
a
wrench
for
the
lock screws
of
the
cutter
head
are
included.
The
motor
and
other
items
of
your
order
are
supplied
in
separate
packages.
In
choosing
a
location
for
the
machine,
be
sure
to
allow
clearance
in
front
of
and
behind
the
tables
for
jointing
long
pieces
.
A
portable
unit
can
be
made
by
mounting
the
jointer
and
motor
on
a 2 x 12-inch
dressed
pJank 30 inches long.
It
may
be
placed
on
any
convenient
work
table
for opera-
tion
and
stored
on
a
shelf
when
not
in
use. 2-inch blocks
must
be
inserted
under
the
jointer
base
for
such
mount-
ing,
to
raise
the
machine
so
that
the
motor
can
be
placed
directly
back
of
the
rear
table
and
to
allow
removal
of
chips.
Use
long
bolts
through
the
base, blocks
and
plank.
Question and Answer IconNeed help?

Do you have a question about the Delta Rockwell 37-110 and is the answer not in the manual?

Delta Rockwell 37-110 Specifications

General IconGeneral
BrandDelta Rockwell
Model37-110
CategoryPower Tool
LanguageEnglish

Summary

Homecraft 4" Jointer Operating and Maintenance Instructions

Construction Features

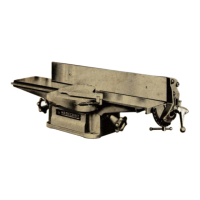
Details the construction and design aspects of the jointer, including sealed bearings and adjustable fence.

Motor, Pulleys and Belt

Specifies recommended motors, pulleys, and belt requirements for optimal speed.

Mounting and Assembling

Provides instructions for setting up and assembling the jointer and motor, including location considerations.

Operating Adjustments

Rear Table and Knife Adjustment

Details how to align the rear table and knives for precise cuts.

Depth of Cut

Fence Adjustments

Lubrication

Cutter Head Maintenance

Whetting Knives

Describes the process of sharpening knives using a stone.

Jointing Knives

Explains how to true the cutting circle of knives while the cutter head revolves.

Setting Knives

Details the correct procedure for installing and adjusting jointer knives.

Cutter Head Repairs

Outlines procedures for repairs beyond basic sharpening.

Maintenance

Operation

Jointing an Edge

Step-by-step guide for jointing the edge of a workpiece.

Use of Hands While Feeding

Proper hand placement and pressure for feeding work safely.

Jointing Warped Pieces

Method for jointing warped or dished lumber with light cuts.

Jointing Short or Thin Work

Safety advice for jointing small or thin pieces using push blocks.

Direction of Grain

Explains feeding work with the grain for smooth results.

Rabbeting

Beveling

Taper Cuts

Stop Chamfering