EasyManua.ls Logo

Delta 15757LF series - User Manual

Delta 15757LF series
6 pages
To Next Page IconTo Next Page
Loading...
SILICONE
Models/Modelos/Modèles
15757LF
Series/Series/Seria
SINGLE HANDLE LAVATORY
CENTERSET FAUCETS
LLAVES MONOCONTROL DE
MONTURA DE CENTRO PARA
LAVAMANOS
ROBINETS À ENTRAXE COURT À
UNE POIGNÉE POUR LA CUISINE
Write purchased model number here.
Escriba aquí el número del modelo comprado.
Inscrivez le numéro de modèle ici.
You may need/Usted puede necesitar/Articles dont vous pouvez avoir besoin:
3/12/2018 Rev. C
88273
88273
3/32"
(2.38 mm)
3/32"
(2.38 mm)
T
E
F
L
O
N
1
p
Specify Finish
Especifíque el Acabado
Précisez le Fini
Para instalación fácil de su llave
Delta
®
usted necesitará:
LEER TODAS las instrucciones completamente antes de
empezar.
LEER TODOS los avisos, cuidados, e
información de mantenimiento.
For easy installation of your Delta
®
faucet you
will need:
• To READ ALL the instructions completely before beginning.
To READ ALL warnings, care, and maintenance information.
Pour installer votre robinet Delta
®
facilement,
vous devez:
LIRE TOUTES les instructions avant de débuter;
LIRE TOUS les avertissements ainsi que toutes les
instructions de nettoyage et d’entretien;
www.deltafaucet.com
1-800-345-DELTA (3358)
customerservice@deltafaucet.com
?
Question and Answer IconNeed help?

Do you have a question about the Delta 15757LF series and is the answer not in the manual?

Delta 15757LF series Specifications

General IconGeneral
BrandDelta
Model Number15757LF
CategoryKitchen & Bath Fixtures
FinishChrome
ADA CompliantYes
Product TypeFaucet

Summary

Faucet Installation and Connections

Connect to Water Supplies

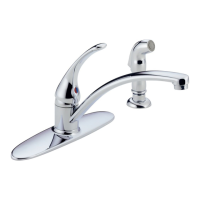
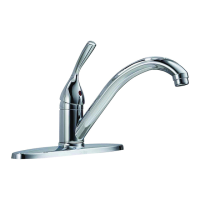
Connect faucet hoses to supply valves, hand tighten then wrench.

Mount Faucet Body to Sink

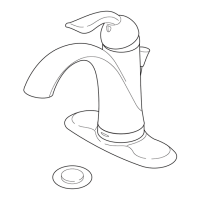
Apply silicone, insert faucet body, screw flange, ensure pivot hole faces back.

Install Pop-Up Assembly Components

Assemble stopper, flange, pivot nut, and horizontal rod for the drain.

Connect Lift Rod to Drain

Insert lift rod through faucet and connect to drain assembly strap.

System Flush and Leak Check

Flush System and Check for Leaks

Remove aerator, turn on water, flush lines for one minute, check connections.

Maintenance and Troubleshooting

Shut Off Water Supplies

Turn off water supplies before performing maintenance.

Handle Leak Troubleshooting

Check bonnet tightness; replace cartridge if leak persists.

Spout Leak Troubleshooting

Replace cartridge if faucet leaks from the spout.

Low Flow Troubleshooting

Remove and clean aerator for low flow issues.

Parts Identification

Faucet Components

Diagram showing main faucet parts and their identifying numbers.

Replacement Parts List

List of part numbers for faucet components and accessories.

Limited Warranty Information

Cleaning and Care Instructions

Guidelines for cleaning and maintaining the faucet finish.

Limited Warranty Terms

Details on warranty coverage for parts, finishes, and electronic components.

Obtaining Replacement Parts

Information on how to get replacement parts and contact customer service.

Related product manuals