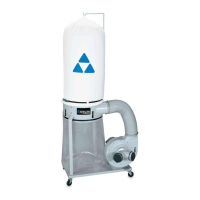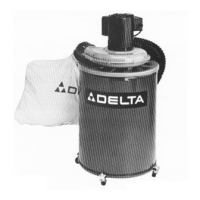
Do you have a question about the Delta 3 H.P. SINGLE-STAGE DUST COLLECTOR 50-852 and is the answer not in the manual?
| Motor Power | 3 HP |
|---|---|
| Type | Single-Stage |
| Model Number | 50-852 |
| Voltage | 230V |
| Phase | Single |
Read manual, wear eye protection, proper apparel, and maintain footing.
Keep area clean, use in safe environments, keep children away, and secure work.
Use guards, remove keys, don't force, maintain tools, disconnect for service, check parts, stay alert.
Avoid wet conditions, unplug correctly, handle plug not cord, replace damaged cords.
Do not use for flammable liquids, metal dust, fumes, or smoke. Not a toy.
Disconnect before adjustments, check openings, use bags, inspect dust bags.
Attach caster assemblies to the support stand on the underside of the base using screws.
Mount the blower and motor assembly onto the base using screws and washers.
Apply sealant to chute flange, align gasket, and mount chute to blower assembly.
Align 'U' bracket holes with drum holes and secure with screws, washers, and nuts.
Apply sealant to chute flange, align gasket, and mount drums to the chute using screws.
Secure drum support arms to drums and base, then attach dust bag retaining clips.
Hook filter bag loop onto support rod, assemble extension rod, and place into bracket holes.
Insert band through bag loops, position bag over drum lip, and fasten with clamp.
Insert dust collection bag under retaining clips and secure with locking clamp around drum.
Align dust intake port holes with blower flange, fasten with screws, and attach port caps.
Ensure correct voltage, phase, and grounding. Connect power lines to terminals and ground screw.
Remove controller cover, connect power lines to terminals and ground wire to ground screw.
Check fan rotation is clockwise. Reverse if necessary by interchanging power lines.
Remove controller cover, connect power lines to terminals and ground wire to ground screw.
Check fan rotation is clockwise. WARNING: Do not insert fingers into intake port.
Locate on/off switch on motor stand. Push button A to turn ON, button B to turn OFF.
Locate on/off switch on motor stand. Push button A to turn ON, button B to turn OFF.
Blow off motor with low pressure air to remove dust. Wear eye protection. Avoid high pressure.
Use only Delta recommended accessories for safe operation. Un-tested accessories may be hazardous.
Call 1-800-223-7278 for information on parts, service, warranty, or nearest service outlet.
Delta will repair/replace defective parts within two years. Excludes normal wear, misuse, abuse, or unauthorized repair.
List of Delta service centers across various US states with addresses and contact information.
List of Delta service centers in Canada with addresses and contact information.