Do you have a question about the Delta 44 Series and is the answer not in the manual?
Assemble diverter valve (1) with "Y" and gasket (2) as shown in illustration.
Insert valve from underneath and fasten using cone washer, friction washer, and nut.
Assemble escutcheon trim onto diverter valve, place handle, and secure with set screw.
Attach 24" hose assembly to elbow and 12" hose assembly to "Y" connections.
Insert rosette (1) and rubber washer (2) into appropriate hole in bidet bowl.
Slide rubber washer (3) & threaded nipple (4) through hole, thread onto rosette, and assemble 24" hose.
Remove bonnet, base, and gasket from cold end valve assembly.
Place assembly through mounting hole, reinstall gasket, base, bonnet, and tighten nuts.
Thread cold side hose from "Y" connector to cold side end valve assembly.
Choose hook-ups for 1/2" I.P.S. connections, such as ball nose risers or faucet connectors.
Use coupling nuts with ball nose risers and two wrenches for tightening.
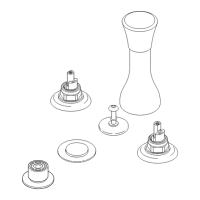
Remove stopper (1) and flange (2).
Screw nut down, push washer/gasket, remove tailpiece, apply tape, replace tailpiece.
Apply silicone to flange underside, insert body into sink, screw flange into body.
Align pivot, pull assembly, tighten nut, install rod guide assembly and horizontal rod.
Turn diverter handle clockwise to 'rim feed' position.
Turn on water, open handles for one minute to flush debris.
Check all connections for leaks and re-tighten if necessary.
Use diverter for spray/rim feed and pull lift rod knob to fill bowl.
Warranty for parts and finishes of new and recertified Delta faucets.
Warranty for electronic parts (excluding batteries) of Delta faucets.
Details what Delta will do, what is not covered, and recommended parts/plumbers.
Procedure for making a warranty claim and obtaining replacement parts.
Limits implied warranties of merchantability and fitness for a particular purpose.
Excludes special, incidental, or consequential damages, including labor charges.
Grants specific legal rights that may vary by state or province.
Clean product gently with a damp cloth and soft towel; avoid harsh abrasives.
| Brand | Delta |
|---|---|
| Series | 44 Series |
| ADA Compliant | Yes |
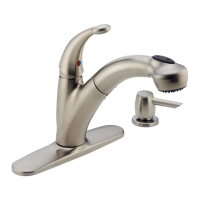
| Product Type | Faucet |
| Finish | Chrome |
| WaterSense Certified | Yes |