EasyManua.ls Logo

Delta B3596LF User Manual

Delta B3596LF
6 pages
To Next Page IconTo Next Page
Page #1 background imageLoading...
Page #1 background image
1
Write purchased model number here.
Escriba aquí el número del modelo comprado.
Inscrivez le numéro de modèle ici.
Model/Modelo/Modèle
B3596LF
Series/Series/Seria
Para instalación fácil de su llave Delta
usted necesitará:
LEER TODAS las instrucciones completamente
antes de empezar.
LEER TODOS los avisos, cuidados, e
información de mantenimiento.
Comprar las conexiones correctas para el
suministro de agua.
For easy installation of your Delta
faucet you will need:
ToREAD ALL the instructions completely
before beginning.
ToREAD ALL warnings, care, and maintenance
information.
To purchase the correct water supply hook-up.
You may need/Usted puede necesitar/
Articles dont vous pouvez avoir besoin:
SILIC
O
NE
Pour installer votre robinet Delta
facilement, vous devez:
LIRE TOUTES les instructions avant de débuter;
LIRE TOUS les avertissements ainsi que toutes
les instructions de nettoyage et d’entretien;
Acheter le bon nécessaire de raccordement.
10/12/11 Rev.C
TWO HANDLE WIDESPREAD LAVATORY FAUCET
ROBINETÀENTRAXELONGÀDEUXPOIGNÉES
POURLAVABO
LLAVE DE LAVAMANOS EXTENDIDAS DE DOS
MANIJAS
ASME A112.18.1 / CSA B125.1
ASME A112.18.2 / CSA B125.2
ICC/ANSI A117.1
®
SILICONE
65610
65610
S
ILICO
NE
Question and Answer IconNeed help?

Do you have a question about the Delta B3596LF and is the answer not in the manual?

Delta B3596LF Specifications

General IconGeneral
BrandDelta
Model NumberB3596LF
FinishChrome
Number of Handles2
Handle StyleLever
Flow Rate1.2 GPM
Drain IncludedYes
Drain TypePop-Up
Valve TypeCeramic Disc
ADA CompliantYes
WaterSense CertifiedYes
Lifetime Limited WarrantyYes
Product TypeBathroom Faucet
Spout Height5.5 inches

Summary

Faucet Installation Steps - Initial

Shut Off Water Supplies

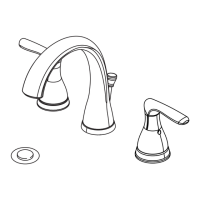
Turn off water, remove old faucet, slide valves through sink holes.

Secure End Valves

Secure end valves with washers and brackets, tighten screw.

Place Spout

Place spout with gasket, secure with bracket and nut.

Align Tabs

Align tabs on quick connects, push firmly, pull to ensure connection.

Faucet Installation Steps - Assembly

Remove Stopper and Flange

Remove stopper/flange, replace tailpiece, apply tape.

Install Pop-Up Assembly Body

Apply silicone, insert body, screw flange, tighten nut.

Install Pivot Nut and Rod

Remove pivot nut, install horizontal rod and stopper.

Attach Lift Rod to Strap

Attach horizontal rod to strap, insert lift rod, connect to drain.

Water Supply Connection and System Check

Connect to Water Supplies

Determine connection type (ball nose risers or IPS connectors), use two wrenches.

Flush System/Check for Leaks

Remove aerator, turn on handles, flush lines, check for leaks.
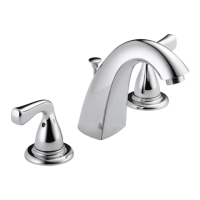
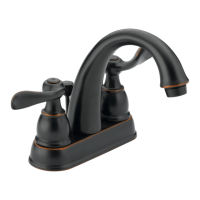
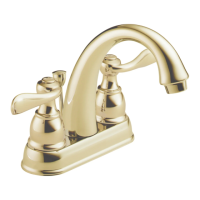
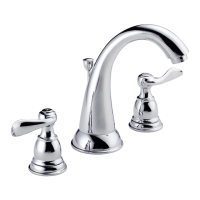
Maintenance

Cleaning and Care

Lifetime Faucet and Finish Limited Warranty

Related product manuals