15
INSTRUCTIONS FOR USE:
1. Prophy teeth to remove calculus and extrinsic stains before beginning the
whitening treatment.
2. Insert cheek retractors. Have the patient bite down and rest tongue on a tongue block.
3. Take “before” photographs and record tooth color using a shade guide arranged in
bleaching order.
4. Air-dry the gingival tissue and teeth.
5. Using the dispensing tip, apply Paint-On Dental Dam to the gingiva to isolate
gums around the selected teeth. Overlap the dental dam onto the gingival tissue
of adjacent teeth (about 0.5 mm) and light-cure for 1–2 seconds per tip width
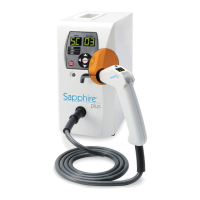
with a Sapphire
®
Plus light.
6. Once the Paint-On Dental Dam is cured, apply Lip Moisturizer provided in the kit
to the lips and mucosa, applying well beyond the vermillion border.
7. Prepare the auto-mix syringe.
- Align the wedge-shaped key on edge of the static mixer housing with the opening
in the syringe flange.
- Push the static mixing tip onto the syringe and turn 90° clockwise until it stops.
8. Dispense a portion of the LumiSmile White whitening gel into separate dappen dish.
Use the brush applicator to apply a 1–1.5 mm layer onto the labial surface of the teeth.
9. Install a sanitized Sapphire Whitening Crystal in place of the curing tip on the end of the
Sapphire Plus light pistol.
10. Position the Sapphire Whitening Crystal close to and directly in front of the teeth, using a
combination of the articulating arm and chair adjustments. Center the Sapphire Whitening
Crystal 1/4 to 1/2 inch from the teeth within the cheek retractor with the outer edges
touching (if possible).
11. Press the Optional button on the Sapphire Plus light keypad, then press 2 to select
bleaching mode. The letters BL (bleach) will appear in the Program window, the number
60 will appear in the seconds window and 60 minutes will appear on the pistol handle.
12. Press the Start or pistol activator button to start the bleaching process. The number
60 (minutes) appears in the Program window and seconds begin to count down in the
Seconds window.
13. When the Sapphire light beeps, fifteen (15) minutes have elapsed. Pause the light.
Suction off whitening gel. Check on the comfort of the patient and reapply LumiSmile
White whitening gel.
14. Unpause Sapphire Plus curing light. After the second beep, 30 min has elapsed.
STEP 3
STEP 5
STEP 8
STEP 10
STEP 12
14