Summary
13.
Final test - Customers use - Annual maintenance
14.
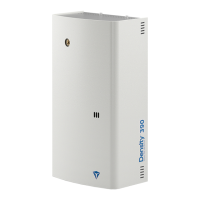
Product information
15.
Warnings
1.
Prepare for installation
Remove the lid
Components identication
Mounting holes in bottom plate
Hole for security screw
2.
Mounting
Installation on a wall
Installation in ceiling
3.
Wiring
Mains supply cable
Mains connection
Signal cables
Cable reliefs
4.
Nozzle adjustment
How to adjust the nozzle to the correct angle
5.
Backup battery
Type of battery used
Installation and connection of the backup battery
6.
Signal Inputs
Type of signals to use on this fog machine
The dierent inputs, ARM, SHOOT, PANIC, PIR
Connection examples, dierent wiring diagrams
7.
Signal Outputs
Type of signal relay outputs
How to change relay output between NO and NC
The 5 dierent relay outputs
8.
Dipswitch
Description of the 8 dipswitches
9.
Shooting time setting
How to set the shooting time
Shooting table for the 4 models
10.
Fog uid system
The Density fog rell
How to connect the fog rell
Where to place the fog rell
Reset the uid measuring system
11.
Front LED’s
Description of the 3 front LED’s
12.
Errors (RESET)
List of errors that might occur on the fog machine
How to RESET an Error
page 2/20Version 1.1.4
www.densityglobal.com | help@densityglobal.com