8
3. Area of use
Cast partial denture, combination techniques, conical crowns, positioning of snap attachments
and attachments.
4. Installation
Set the necessary voltage on the underside of the unit (110 / 220 / 240 V). Then connect the unit
to the mains supply. Stand the Paratherm on a level working surface.
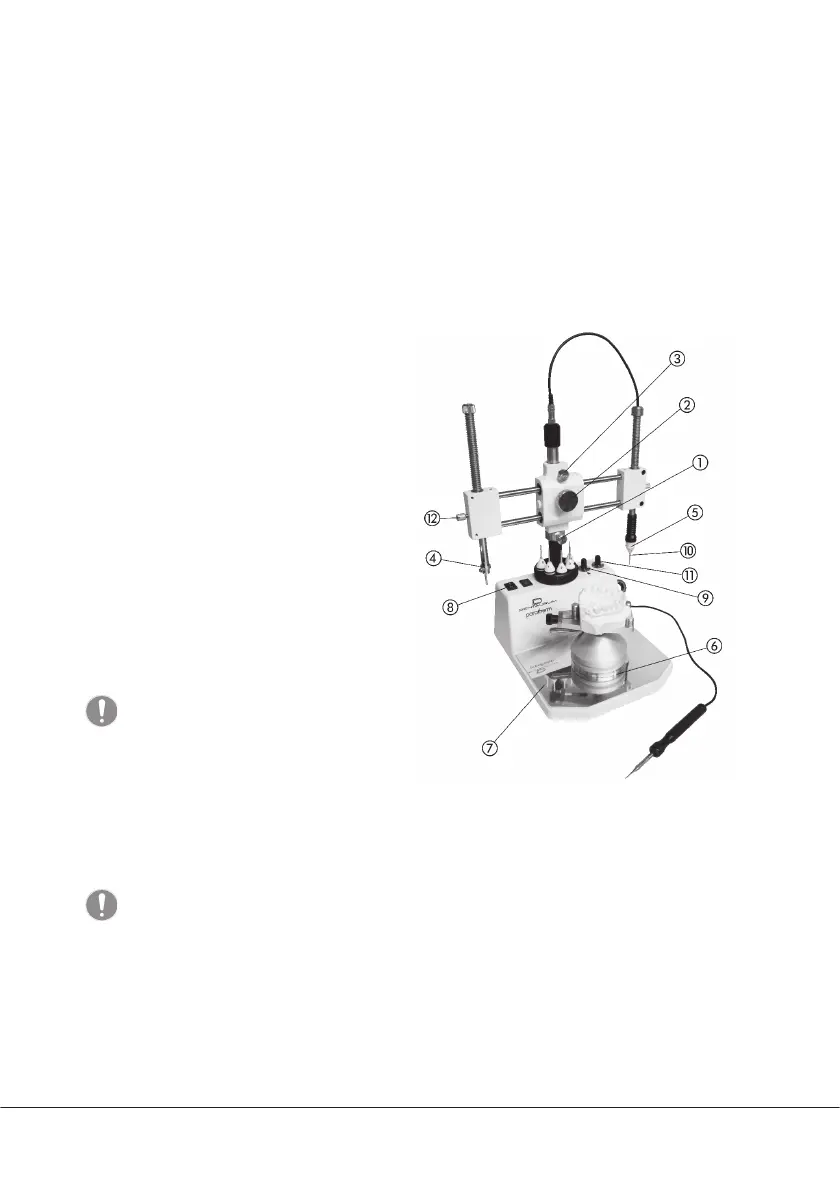
5. Operating the Paratherm
Mount the master model on the model
table already available or delivered with
the unit. Loosen the knurled screw
and raise the sliding rods to the necessary
level. Fasten with retainer ring . Clamp
the instrument, e.g. analyzing rod, in the
surveying handpiece and push the
selected blocking-out instrument into the
thermal blocking-out handpiece .
Place the model table in the most
convenient position on the work surface
Loosen the locking screws so that the
arms may be moved freely. Switch on the
thermal blocking-out handpiece and set
the desired temperature (maximum 160 °C)
on the controller .
Caution: Only change the
blocking-out instruments
whilst they are still warm.
5.1 Electric wax knife
The knife is connected by means of the socket on the rear side of the unit. Only operate the wax
knife with an inserted knife. Turn the power switch on.
Set the desired temperature on the potentiometer . Maximum temperature 280 °C.
Caution! Only change the knife whilst it is still warm.
5.2 Locking the surveying arm
Rotate the surveying handpiece forwards of the centre of the work surface and lock into position
with screws , .
Clamp the wire aid in the surveying arm and fi x the level using . With the model already clamped
into position, guide the model table onto the wire aid. Correct the level.
When ordering spare parts please quote the unit number (type plate on rear side of the unit).