ACT-5040W Quick Start Guide
ENG 2
Continuous shooting mode Timelaps mode
6 Playback mode:
6.1 Start it up to enter Video Recording mode; then press Power button for mode
selection; press WIFI button to select playback mode, and press Shutter button to
enter; (as shown below):
Playback mode
6.2 Photo Example
1. Playback Mode Icon
2.Current File Number/Total Files
3. The date of photo
6.3 Frames under Playback Mode Introduction:
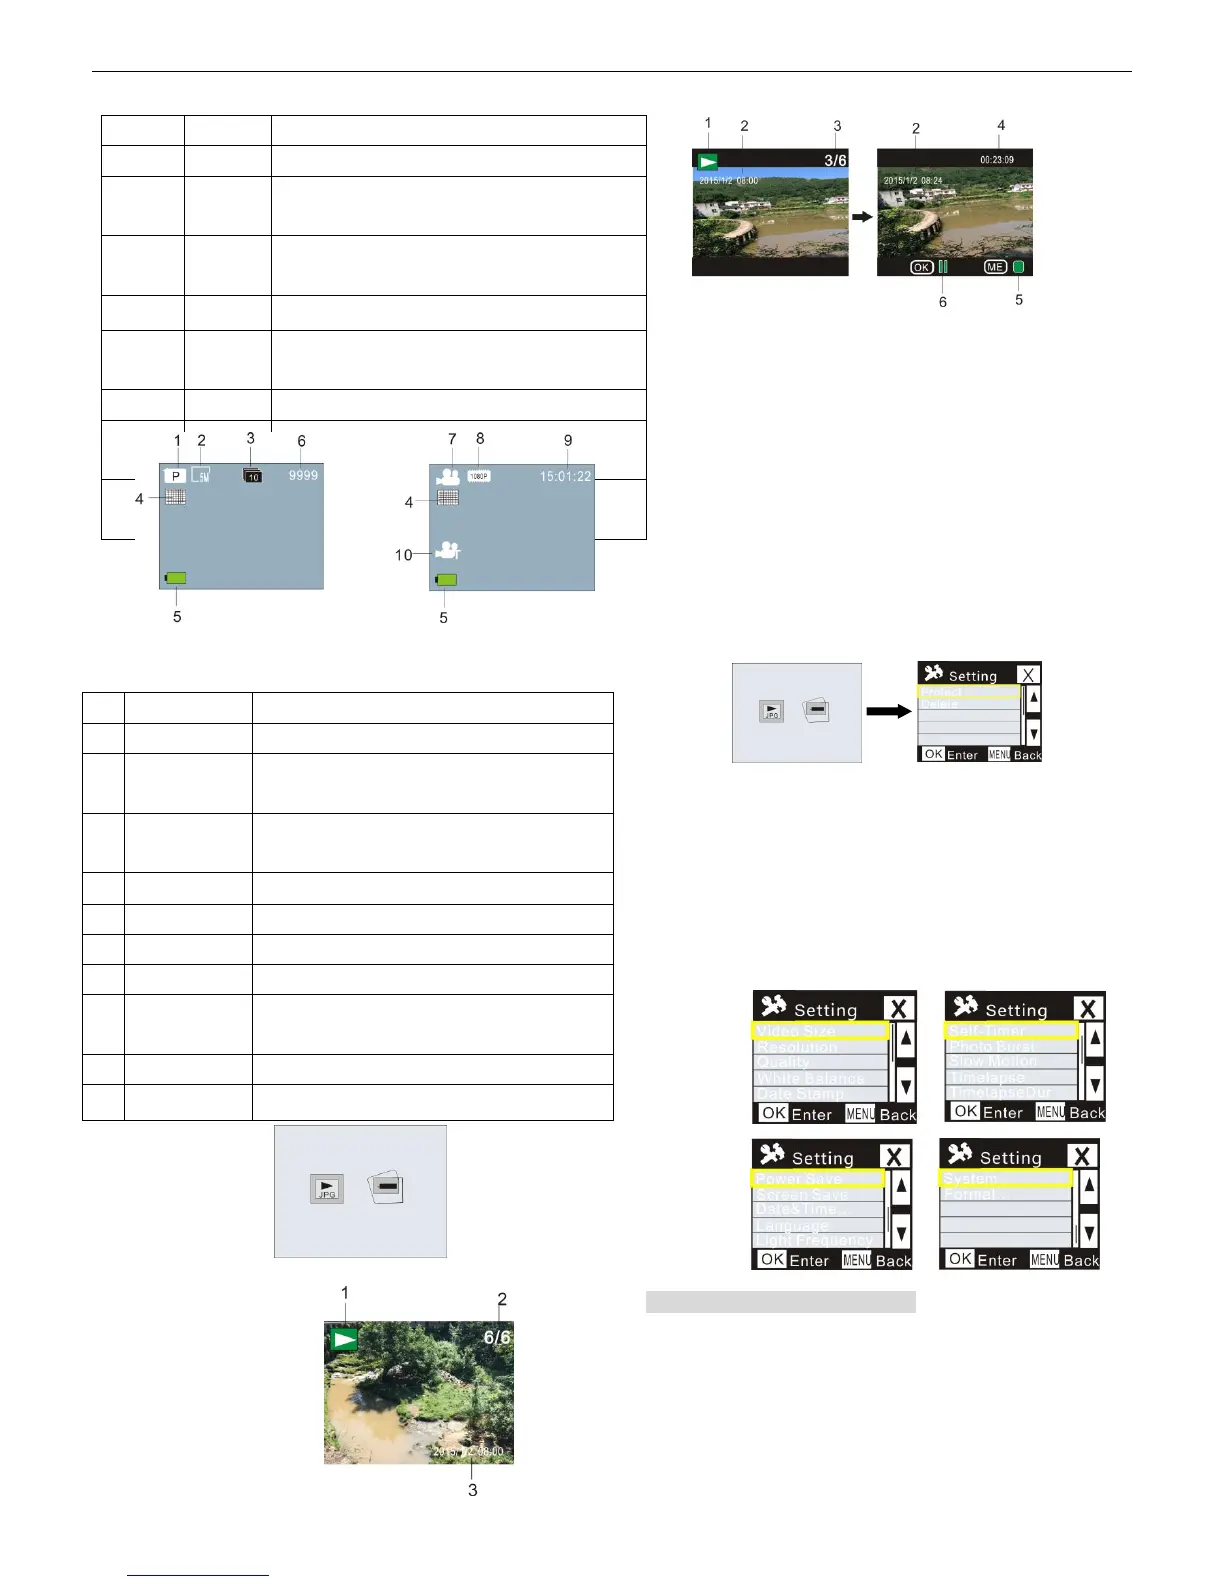
6.3.1 Frames of Video Recording File
1. Playback mode icon
2. The date for video recording
3. Current File Number/Total Files
4. Playback Timer
5. Operation Indicator Icon (Press Power Button to stop)
6. Operation Indicator Icon (Press Shutter button for Pause)
Note: Under playback mode, press WIFI button to select other photos/video recording files to
realize loop selection.
6.4 Playback Mode Menu Setting
Quit from Playback mode, and press Power button to enable the mode interface; select Setting
mode, and press Shutter button to enter Menu; then press WIFI button to select Menu; press
Shutter button again to enter Sub-menu; the chosen Item in the Menu will be displayed with
background color; press WiFi button again to select the secondary sub-menu and press Shutter
button for confirmation; press Power button to quit from Menu setting.
7. Menu Setting
Under Video Recording/Photo and Timelaps mode, press Power button to enable the mode
interface; select a mode you need to set, and press Shutter button to enable the Menu; then, press
WiFi button to select Menu, and press Shutter button to enter Sub-menu; the chosen item in the
Menu will be displayed with background color; press WiFi button again to select secondary
sub-men, and press Shutter button for confirmation; press Power button to quit from Menu
Setting.
APP (support Android and iOS)
I. Installing the APP
1. For Android, search for “DENVER ACTION CAM 2” at Play Store and install the
APP according to the prompt.
2. For iOS, search for “DENVER ACTION CAM 2” at APP Store and install the APP
according to the prompt.
II. Android APP
 Loading...