This document provides a quick start guide for the ACT-5002, detailing its appearance, key functions, and basic operational procedures. The device is a compact camera designed for various recording and capturing tasks, featuring a user-friendly interface and essential indicators for monitoring its status.
Appearance and Components
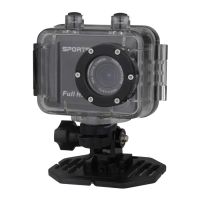
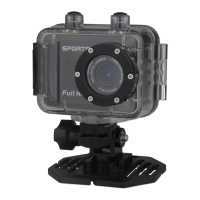
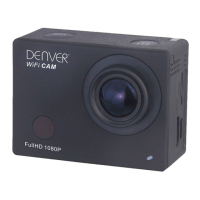
The ACT-5002 camera features a straightforward design with clearly labeled components. On the top side, there's a "Shutter/OK" button, which serves as the primary control for initiating and confirming actions, and a "Micphone" for audio input. The front of the camera prominently displays the "Lens," which is a fixed-focus lens suitable for general photography and video recording.
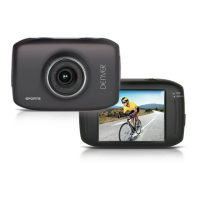
The rear of the camera is equipped with an "LCD display," providing visual feedback for menus, live view, and playback. Adjacent to the LCD, there are several indicators: a "Charger indicator" to show charging status and a "Busy indicator" to indicate when the camera is actively performing a task.
The side of the camera houses several ports and buttons. A "Reset" button is available for troubleshooting or restarting the device. A "Micro SD" slot allows for the insertion of a memory card, which is essential for storing captured media. A "Micro USB" port is used for charging and data transfer. Additionally, there are "UP" and "Down" buttons for navigation and adjustment, and a "MENU" button to access settings.
On the bottom of the camera, a "Tapped hole for tripod" is provided, enabling the camera to be mounted on a tripod or other compatible accessories for stable shooting.
Key Functions and Usage
The ACT-5002 offers a range of functions controlled by its various keys:
- Power Key: This key serves multiple purposes. It powers the device on and off and allows switching between different operational modes: video recording, capturing (photo mode), and playback.
- Shutter Key: In recording mode, this key starts and stops video recording. In capturing mode, it takes photos. During playback, it plays or pauses video files. It also functions as a menu confirmation button.
- MENU Key: This key is used to open and exit the menu. In playback mode, it stops playing video files.
- Up Key: This key has several functions depending on the mode. In menu mode, it selects menu options (page-up). In playback mode, it pauses playing video and allows for quick retreat (rewind) of video. It also controls digital zoom-in.
- Down Key: Similar to the Up key, the Down key also has multiple functions. In menu mode, it selects menu options (page-down). In playback mode, it enables fast forward of video. It also controls digital zoom-out.
Indicators
The camera provides visual indicators to keep the user informed about its status:
- Charger Indicator: This indicator lights up red when the camera is charging. It turns off once the battery is fully charged. This applies even when the camera is powered off during charging.
- Busy Indicator: This indicator lights up when the camera is actively engaged in a task, such as recording video, capturing photos, or when the automatic screen-off function is active.
Start-Up and Shutdown
- Charging the Built-in Lithium Battery: The camera is equipped with a 3.7V lithium battery. It is crucial to ensure the camera has sufficient power and to charge it promptly when the battery is low. To charge, connect the camera to a computer via the Micro USB port while the camera is shut down. The charging indicator will be on during charging and will turn off when fully charged. A full charge typically takes 2-4 hours.
- Using the Memory Card: The camera does not have built-in memory, so a Micro SD (TF) card is required for storage.
- Insertion: Insert the TF card into the card holder according to the instructions near the slot.
- Removal: Gently press the end of the memory card to eject it.
- Formatting: Before using the camera, it is mandatory to format the memory card on the camera itself.
- Startup: Press and hold the Power key for 3 seconds. The camera will display a startup screen and enter the POWER ON state.
- Shutdown: While the camera is in idle mode, press the Power key to shut it down.
- Auto Shutdown: To conserve power, the camera will automatically shut down if it remains in idle mode for a certain period. The default auto-shutdown time is 3 minutes.
- Shutdown Under Low Power: When the battery is low, the LCD will display a specific indicator. It is important to charge the battery promptly. If the battery icon turns red and flashes, the camera will automatically shut down.
Function Modes Switching
The ACT-5002 operates in three distinct modes:
- Photo Mode: For taking still photographs.
- Recording Mode: For capturing videos.
- Playback Mode: For reviewing recorded videos and photos.
After starting up the camera, use the Power key to cycle through these modes.
Photo/Recording Mode
The camera automatically enters recording mode upon startup.
- Video Recording: Press the Shutter key to start recording. Press it again to stop. Video recording automatically stops after 29 minutes.
- Photo Taking: Press the Shutter key to directly take a photo.
- Digital Zoom: In either recording or photo mode, use the Up/Down keys to digitally zoom in or out.
Screen Display in Photo Mode
The LCD display in photo mode provides various pieces of information:
- Photo mode indicator
- Three photos continuous shooting mode indicator
- Self-timer mode indicator
- Photo resolution setting
- Photo quality setting
- Available shooting count (number of photos that can be stored)
- Icon of digital zoom
- Battery state
- Face detect indicator
Screen Display in Recording Mode
The LCD display in recording mode shows:
- Video mode indicator
- Video quality setting
- Video framerate setting
- Video resolution setting
- Available time to record
- Face detect indicator
- Icon of digital zoom
- Battery state
Important Notes for Recording:
- For HD or FHD video recording, a TF high-speed card of class 4 or above is required.
- To save power, the screen will automatically turn off during recording. A short press of the Power key or Shutter key will re-enable the screen display.
To access and adjust camera settings:
- In photo, recording, or playback mode, press the Menu key to open the menu.
- Use the Up/Down keys to navigate and select menu options.
- Press the Shutter key to enter a submenu or confirm a selection.
When a menu option is selected, it will be highlighted with a blue background.
- Seamless Recording (Video Mode): Within the video mode settings, the "Seamless" menu offers options for video segmentation (e.g., 1, 3, or 5-minute segments). When a segment reaches its time limit, it automatically stops, and the next video segment starts immediately. If the memory card runs out of space, the oldest video file is automatically deleted to make room for new recordings, ensuring continuous recording.
Playback Mode
To review your captured media:
- Enter Playback Mode: Press the Power key to enter playback mode. Here, you can browse photos and videos recorded by the camera.
- Navigation: Use the Up/Down keys to move between previous and next photos or videos.
- Playing Videos: Press the Shutter button to start or pause video playback.
- Fast Forward/Rewind: During video playback, use the Up/Down keys for quick retreat (rewind) or fast forward.
- Stop Playback: Press the Menu button to stop playing a video.
Safety Warnings
The ACT-5002 contains a lithium battery, and certain precautions must be observed:
- Lithium Battery Inside: The device contains a non-removable lithium battery.
- Do Not Open: Do not attempt to open the product.
- Environmental Exposure: Do not expose the device to heat, water, moisture, or direct sunlight.
- Charging: Only charge the device using the original adapter supplied with the product.
- Waste Disposal: Electric and electronic equipment, including batteries, contain materials that can be hazardous to health and the environment. These items are marked with a crossed-out trash can symbol, indicating that they should not be disposed of with general household waste. Instead, they must be disposed of separately.
- End-User Responsibility: As an end-user, it is important to submit used batteries to appropriate and designated facilities for recycling in accordance with legislation, ensuring no harm to the environment.
- Collection Points: Many cities have established collection points where electric and electronic equipment and batteries can be submitted free of charge at recycling stations, other collection sites, or collected from households. Additional information can be obtained from your city's technical department.