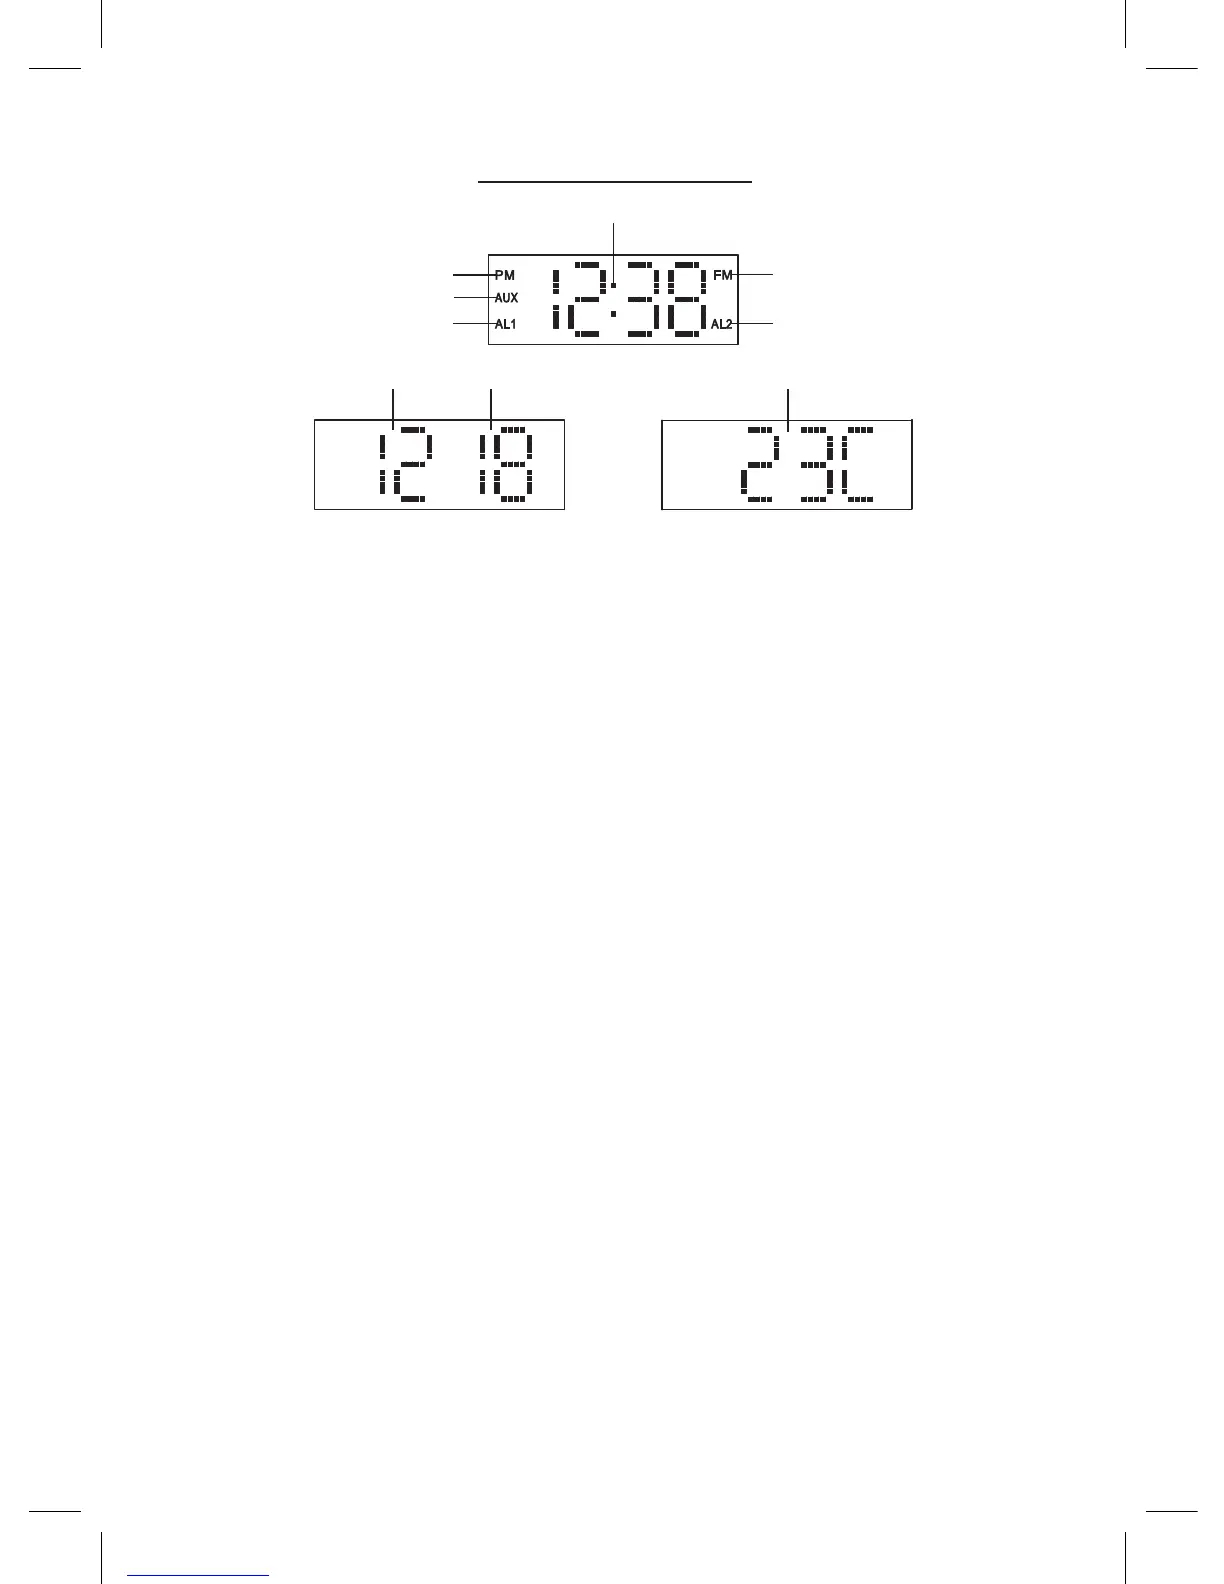
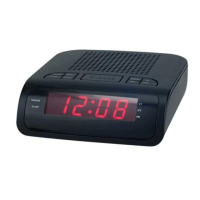
LED DISPLAY MODE
Get started
• Select a proper place for the device such as a dry, and even non
slip area where you can easily operate the device.
• Inserting the Battery (Backup)
INSTALLING/REPLACING THE BACK-UP BATTERY
This unit is equipped with a battery back-up system, requiring one
DC3V CR2032 lithium battery (not included) to maintain the time/
calendar settings and radio presets during AC power outage.
1. Unscrew and remove the BATTERY COMPARTMENT COVER.
2. Install one fresh CR2032 lithium battery into the battery
compartment following the polarity diagram on the BATTERY
COMPARTMENT COVER. Use only the specied size and type
of battery.
3. Replace the BATTERY COMPARTMENT COVER and tighten its
screw.
AC POWER CONNECTION
Plug the AC Power Adaptor into a household outlet AC source.
SETTING THE CALENDAR AND TIME
1. In standby mode, press and hold the unit button (7) or the
remote control button (12) for about 2 seconds to enter the
calendar/time set mode.
2. The year indicator will ash on the LED DISPLAY for up to 30
seconds prompting for a new entry.
3. While the display is ashing, repeatedly tap the unit buttons
(10), (11) or the remote control button (7), (11) to adjust to the
correct year. Press and hold the unit (10), (11) button or the
ENG-3
PM Indicator
AUX Indicator
ALARM 1 Indicator
FM Indicator
ALARM 2 Indicator
TIME Indicator
TEMPERATURE Indicator
MONTH Indicator
DAY Indicator