The heater must be securely xed to a wall. Screws with suitable wall xings for solid walls
are provided. If other wall types are encountered it is the installer who must choose the most
suitable xing.
SUGGESTED FIXINGS
SOLID BRICK/BLOCK: No. 10 size high temperature resistant plastic inserts, 8mm drill bit. Drill
hole 15mm deeper than plastic insert length.
PLASTERBOARD - If possible locate studding and use No. 10 woodscrews directly into the
wood, otherwise M5 rawlplug intersets are suitable.
NOTE: FOR OTHER WALL TYPES (eg. timber frame and hollow concrete)
SEEK SPECIALIST ADVICE.
If the oor is carpeted then the carpet should be slit and underlay cut away to allow the feet to
rest rmly on the oor. Carpet gripper must be locally removed so that the feet may rest in a
level position.
This appliance is heavy. The oor must be checked to ensure that it is capable of bearing the
weight of the unit, up to 165kg.
This Heater is rated IPX4
DO NOT UNDER ANY CIRCUMSTANCES ATTEMPT TO MOVE OR REPOSITION
THIS HEATER WITHOUT SEEKING EXPERT ADVICE. THE HEATER SHOULD
NEVER BE FREED FROM THE WALL WITH ENERGY CELLS INSIDE.
USE CAUTION WHEN INSTALLING THIS PRODUCT, UNPAINTED METALWORK
CAN HAVE SHARP EDGES.
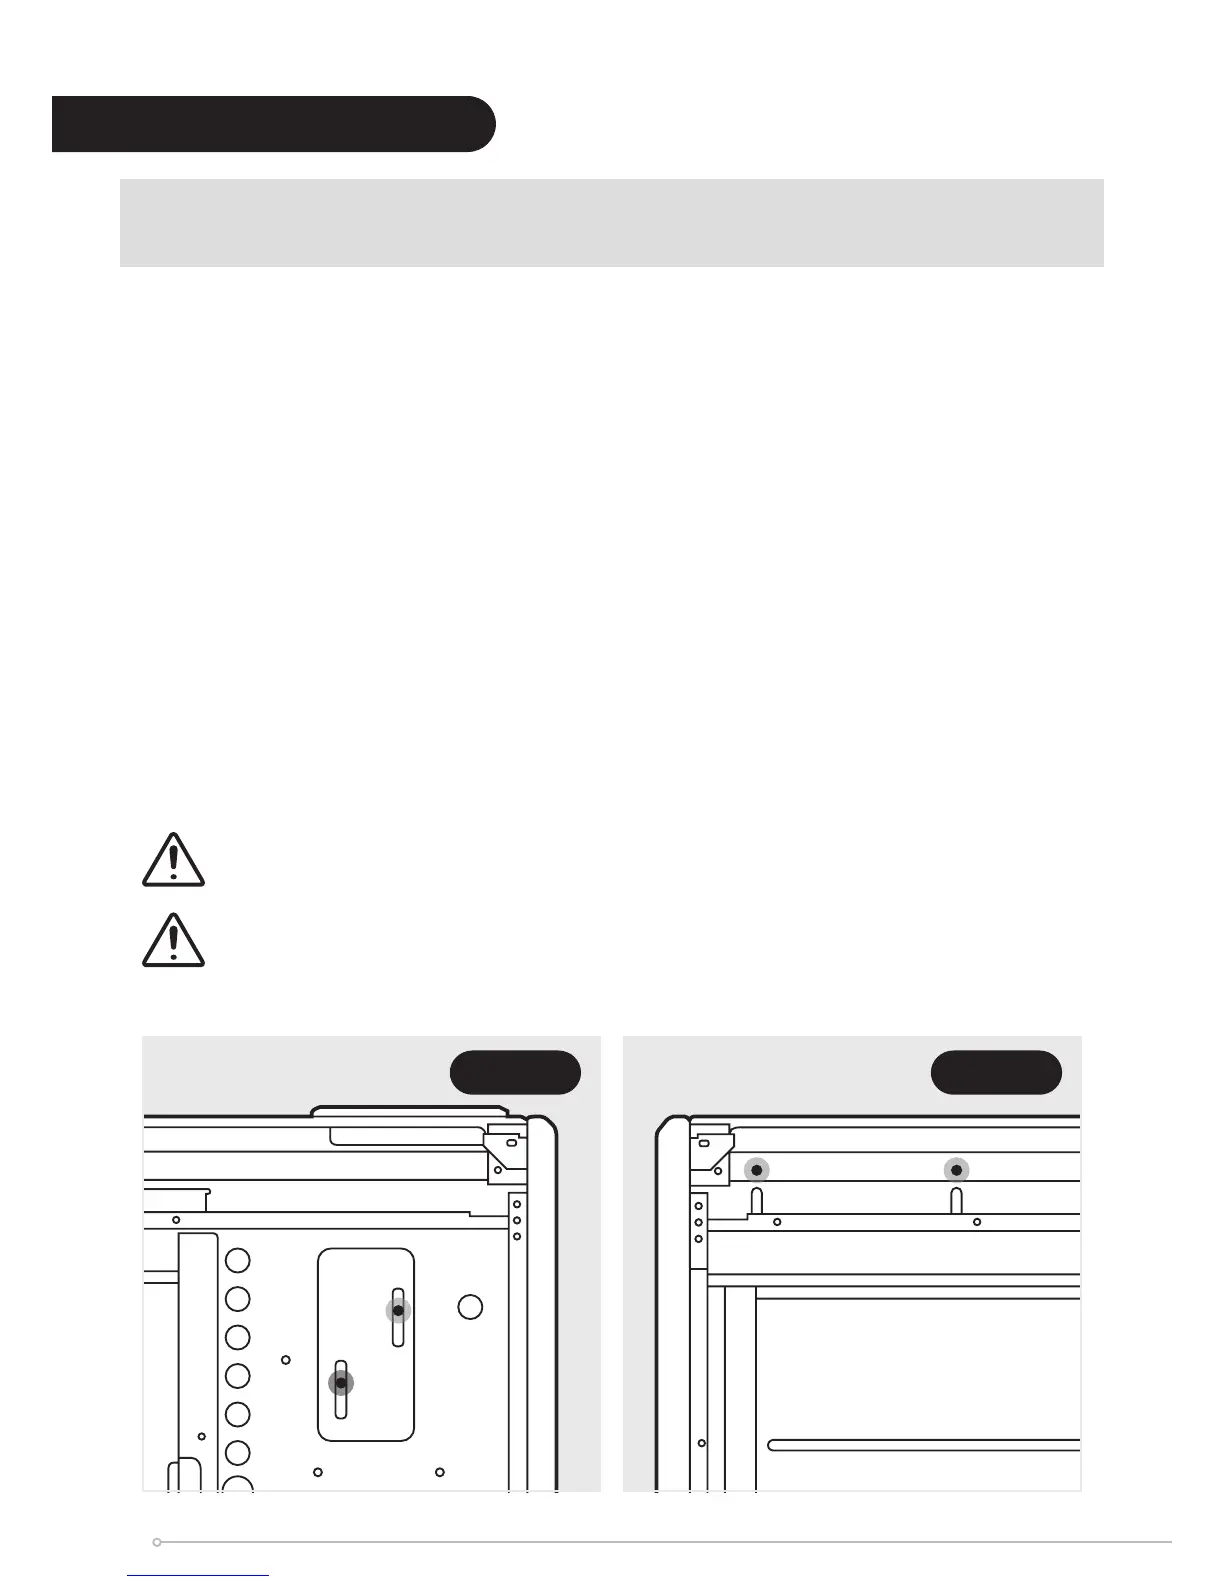
IMPORTANT Head of wall xing screw must be anged pan head type and have a diameter
no less than 11mm. No countersunk headed screws to be used for wall xing.
Installing the Heater
Fig. 5Fig. 4
8