Do you have a question about the designer's image 211-4578 and is the answer not in the manual?
Details product SKU, finish options, and required tools for assembly.
Provides essential safety warnings and guidelines to prevent injury during assembly and use.
Lists all hardware components required for assembly with quantities and specifications.
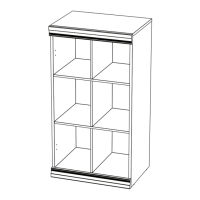
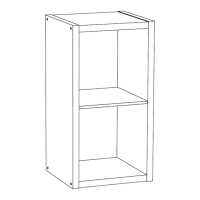
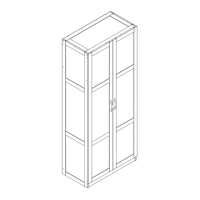
Identifies cabinet parts and explains finished/unfinished edges for correct assembly.
Installs cam posts, cam locks, and dowels into the left and right side panels (A & B).
Installs cam posts, cam locks, and dowels into the top (C) and bottom (D) shelves.
Inserts short and long dowels into the vertical dividers (E) for alignment.
Connects middle shelves (F) to vertical dividers (E) using dowels.
Connects the last vertical divider (E) and the bottom shelf (D) using dowels.
Aligns and secures the left (A) and right (B) side panels to the bottom shelf (D).
Aligns and secures the top shelf (C) to the side panels (A & B).
Nails the back panel (G) and attaches nail-on feet (H7) to the unit.
Installs trim pieces (H) to the top and bottom edges of the unit.
Installs cover caps (H8), secures anti-tip anchors (H9) to the unit and wall.
Installs stacking brackets (H13) to connect multiple units vertically.
| Brand | designer's image |
|---|---|
| Model | 211-4578 |
| Category | Indoor Furnishing |
| Language | English |