EasyManua.ls Logo

DESSALATOR DUO100 - User Manual

DESSALATOR DUO100
21 pages
Print Icon
To Next Page IconTo Next Page
Loading...
USER’S MANUAL
DUO100® AC&DC installation and utilisation
First bi powered water maker world-wide, producing 100 L/Hr,
with automatic rinsing model patented
DESSALATOR
Technical and Sales Departments :
Z.I des 3 Moulins « Euro 92 » Bât. D rue des Cistes 06600 ANTIBES
FRANCE
Tel: (33) (0)4 93 95 04 55 Fax: (33) (0)4 93 95 04 66
e-mail: contact@dessalator.com
Web site: www.dessalator.com
Version A3
Question and Answer IconNeed help?

Do you have a question about the DESSALATOR DUO100 and is the answer not in the manual?

Overview

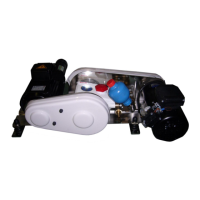
This document describes the DESSALATOR DUO 100 AC&DC watermaker, a bi-powered device operating on 12 or 24 V DC and 120V or 230V AC. It is a first bi-powered watermaker in the world, producing 100 L/Hr, with automatic rinsing and a patented model.

Function Description

The DESSALATOR DUO 100 AC&DC is a reverse osmosis desalinator designed to convert seawater into fresh water. The system works by forcing seawater through semi-permeable membranes, which filter out salt and other impurities. The production capacity of the desalinator is influenced by seawater temperature, with maximum output achieved at 25°C. Output drops by approximately 2.5% to 5% for each degree below 25°C. The system automatically monitors fresh water quality and flow into the tank via an electronics board.

Important Technical Specifications

  • Power Supply: Bi-powered: 12 or 24 V DC and 120V or 230V AC.
  • Production Capacity: 100 L/Hr.
  • Membrane Type: Reverse osmosis membranes.
  • TDS Rejection: Designed to reject 99% of the TDS (Totally Dissolved Solids); approximately 2% of 35,000 PPM/TDS will pass through the membrane.
  • Motor Unit: Comprised of a 12 or 24 V motor and a 120 or 230 V motor.
    • Length: 710 mm
    • Width: 400 mm
    • Height: 240 mm
  • Membrane Unit: Includes 3 membranes 2521 assembled in a compact frame.
    • Length: 700 mm
    • Width: 270 mm
    • Height: 120 mm
  • Control Panel: Includes a HP gauge, a flowmeter, an on/off switch, a pressure adjustment knob, an operating time meter, and 3 indicator lights.
    • Length: 320 mm
    • Width: 200 mm
    • Depth: 150 mm
  • Filter:
    • Width: 310 mm
    • Height: 390 mm
    • Depth: 240 mm
  • Hoses: Tricoflex hose of inner Ø 12mm for sea water circuit and pressurized rinsing. HP pipe for connection to membrane inlet.
  • Electrical Connections:
    • 12V or 24V motor: Positive (brown wire) on relay, negative (green/yellow wire) on motor. Cable diameter: 35mm² for 12V, 20mm² for 24V.
    • Control cable: 5m long with a pin locator system.
    • 120V or 230V motor: Connected via cable from the control panel.

Usage Features

  • Installation:
    • Sea Water Inlet: Strainer positioned as low as possible below the waterline, away from deck waste outlet. Grooves on strainer should face forward (towards the bow). Hull valve accessible for maintenance.
    • Cartridge Pre-filter: Positioned as low as possible below the waterline and accessible. Mounting bracket is reversible. Hose connection with 12mm inner diameter Tricoflex hose. 5cm space below filter body for removal. Fresh water pressurized rinsing connected to board pump output. Electro-valve (diam. 12) for automatic rinsing. Valve handle positioned to the front for sea water mode, to the back for manual rinsing.
    • Motor Unit: Installed horizontally, as low as possible, protected from water spray. Mounted with two brackets, leaving space for air circulation. Connection between prefilter outlet and pump inlet via Tricoflex hose (Ø 12mm) with doubled stainless jubilee clips. HP head of pump connected to membrane inlet via HP pipe.
    • Membrane Unit: Can be installed horizontally, flat, or on a wall support using 8 Parker screws in stainless steel brackets. Insulating tube recommended for hose from HP pump due to vibrations. HP connectors installed per instructions (Appendix A2).
    • Control Panel: Mounted as close as possible to motor/pump unit and membranes. Leave space behind panel for connections. Recommended installation at bottom or on sides of cupboards, under chart table, or on cabin seats.
  • Starting the DUO:
    1. Ensure hull valve and waste outlet valve are open.
    2. Compulsory for first use, filter replacement, or long periods of disuse: Fill circuit with fresh water for 3-4 minutes (valve handle on pre-filter to the back, watermaker stopped, pressure captor open). Then return valve handle to the front.
    3. Consider battery ampere capacity and working duration; starting the boat's motor is recommended for risk-free use.
    4. Pressure regulator must be open before switching on.
    5. Turn pressure regulator dial right until HP gauge is in orange zone, then gradually adjust to beginning of green zone.
    6. Fresh water quality and flow are automatically monitored.
    7. If pressure becomes too high, watermaker cuts out, and red indicator lights up. Reduce pressure, switch off, and restart.
    8. To shut down: switch off, then reduce pressure.
    9. For shut down with rinsing, refer to instructions on pages 8 and 9.
    10. For extended periods of non-use, rinse monthly or sterilize membranes for storage (6 months).
  • Membrane Use Recommendations:
    • Avoid temperatures below 0°C (freezing can rupture membranes) and above 60°C (high temperatures can prevent salt removal).
    • Membranes must be permanently immersed in liquid (seawater, fresh water, or sterilizing liquid). Sterilizer is effective for six months.
    • Not recommended for use in muddy or polluted water (briny water, river, Red Sea) as it can clog the pre-filter and damage membranes. If used in such conditions, run for short periods, rinse membranes with clean seawater, and run without pressure for 30 minutes with the pressure regulator open.
  • Troubleshooting:
    • Leak on pressure regulator: Tighten cable gland with a 12 wrench.
    • Noisy HP pump: Ensure correct hose size, secure clips, clean filters. Replace seals.
    • Oil leak on HP pump: Replace seals.
    • Insufficient water flow: Replace pre-filter, recharge batteries, check connection, reinforce power cable section.
    • Water leak under HP head: Replace plunger seals.
    • No pressure reading: Open hull valve and/or rinsing valve. Dismantle and clean valves in pump head.
    • LED Indicator for Troubleshooting: Provides visual cues for system status, including startup, production, rinsing, and alarms (time-out, power failure, high pressure).

Maintenance Features

  • Maintaining the Membrane:
    • Flow lowers by 10-15% after 1,000 working hours.
    • Production drops below 25°C.
    • Pressure of 65 bars.
    • Volume of drinking water produced depends on sea water temperature and pressure.
  • Rinsing the Membranes:
    • Flush with fresh water before and after each use.
    • Manual Flush:
      1. Don't turn watermaker ON (leave in OFF position).
      2. Turn pressure dial all the way anti-clockwise.
      3. Turn fresh water intake valve (next to filter) for 2 minutes. Boat's water pump starts, fresh water runs through watermaker.
    • Automatic Flush:
      1. After using watermaker, don't switch it off.
      2. Turn pressure dial all the way anti-clockwise. Watermaker stops making water and automatically starts flushing (green and orange lights on control panel turn on).
      3. Flushing takes 30 seconds and stops automatically. Green and orange lights shut off, blue flashing light on ON/OFF button indicates to shut watermaker OFF.
      4. Automatic flush also backwashes pre-filter, dumping dirt and debris to the sea.
    • Post-Flushing:
      1. Ensure pressure dial is all the way anti-clockwise.
      2. Turn watermaker ON and run with no pressure for 1 minute until red alarm light comes on (allows sea water to replace fresh water in system before running pressurized sea water).
      3. WARNING: Running fresh water in high pressure through membranes will damage them.
  • Sterilizing the Membrane:
    • Required if monthly rinsing is not possible, or every six months.
    • Manual Method:
      1. Rinse desalinator with fresh water for 10 minutes using three-way valve on pre-filter (machine idle).
      2. Pour sterilizer packet into 8 litres of water in a bucket.
      3. Disconnect sea water inlet hose and immerse in bucket.
      4. Run desalinator without increasing pressure until bucket is empty. Reconnect hose.
    • Garden Spray Method:
      1. Mix sterilizer packet with 8 litres of fresh water.
      2. Fill spray bottle and spray mixture into watermaker inlet at 3-4 bars.
    • Sterilizing Cartridge ST2 (Reusable):
      1. Close sea water inlet valve.
      2. Open sterilizing cartridge.
      3. Remove top grid, place foam filter at bottom, pour powder into cartridge.
      4. Replace top grid, close cartridge, check seal.
      5. Dismantle pre-filter basin, remove 5µm cartridge.
      6. Replace with sterilizing cartridge ST2.
      7. Set rinsing valve to pressurized fresh water and rinse until all traces of sterilizer are removed.
      8. Switch off desalinator.
      9. Sterilization effective for six months.
      10. Caution: Before next use, rinse desalinator thoroughly with fresh water for 15 minutes and replace sterilizing cartridge with a 5µm cartridge.
  • HP Pump:
    • Half-filled with oil to indicated level on gauge.
    • Normally no additional oil needed. If refilling, use multi-grade oil 15W40, not exceeding middle of red mark on gauge (on back of pump, opposite pump head).
    • BEWARE: Remove red oil filling cap sticker before use (for shipment only).
  • Spare Parts and Accessories:
    • Spare Parts: 5µm 10 ft filter, driving belt, motor relays, production solenoid valve, HP pump seals and valves, HP hose (sold by meter), connector for HP tube, flowmeter tube.
    • Accessories: Sterilizing cartridge ST2, sterilizer bag, mineralizing cartridge.

DESSALATOR DUO100 Specifications

General IconGeneral
BrandDESSALATOR
ModelDUO100
CategoryMarine Equipment
LanguageEnglish