8
ENGLISH
unless they are supervised by a person responsible for their
safety. Children should never be left alone with thisproduct.
ASSEMBLY AND ADJUSTMENTS
WARNING: To reduce the risk of serious personal
injury, turn tool off before making any adjustments
or removing/installing attachments or accessories.
An accidental start-up can causeinjury.
WARNING: Use only DeWALT battery packs andchargers.
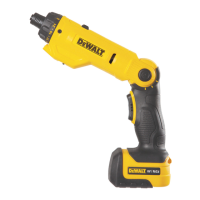
Inserting an Accessory (Fig. C)
1. Hold the screwdriver upright as shown in Figure C and pull
down on the quick release collar
4
.
2. Insert a hex shank accessory into theholder.
3. Release the quick release collar.
NOTE: If bit does not fit into spindle, rotate the bit and
reinsertit.
Removing an Accessory (Fig. C)
1. Hold the screwdriver upright as shown in Figure C and pull
down on the quick release collar
4
.
2. Pull accessory straightout.
OPERATION
Instructions for Use
WARNING: Always observe the safety instructions and
applicableregulations.
WARNING: To reduce the risk of serious personal
injury, turn tool off before making any adjustments
or removing/installing attachments or accessories.
An accidental start-up can causeinjury.
Proper Hand Position (Fig. A, D, E)
WARNING: To reduce the risk of serious personal injury,
ALWAYS use proper hand position asshown.
WARNING: To reduce the risk of serious personal
injury, ALWAYS hold securely in anticipation of a
suddenreaction.
Proper hand position requires one hand on the main handle
9
.
Hold tool firmly to control its twistingaction.
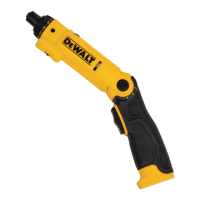
Angling the Screwdriver (Fig. A, E)
WARNING: To avoid being pinched, hold the screwdriver
as shown in Figure E when changingpositions.
To convert the tool to an angled screwdriver, push in on the
release button
6
and rotate the top portion of the tool until it
locks into one of the remaining twopositions.
Torque Control (Fig. F)
The torque adjustment collar
2
is marked with numbers and
a drill bit icon. There are 22 clutch settings in all. Each click in a
clockwise direction means an increase in the torqueproduced.
To set the torque align the desired setting with the arrow on the
tool housing. The higher the number on the collar, the higher
the torque.
To lock the clutch for heavy fastening operations, move to the
drill bit icon.
If you do not know the appropriate setting to use when
tightening a screw, begin at the lowest torque setting. If the
clutch ratchets before the desired result is achieved, increase the
collar setting and continue tightening the screw. Repeat until
you reach the correctsetting.
Two Speed Operation (Fig. A)
The dual range feature of your screwdriver allows you to shift
gears for greater versatility.
To select low speed, (high torque setting), turn tool off and
permit to stop. Push the slide switch
4
located on the top of
the tool to the left. Use low speed for screwdrivingoperations.
To select the high speed, (low torque setting), turn tool off and
permit to stop. Slide gear shifter fully to the right.
LED Light (Fig. A)
To turn the light
3
on, push the slide switch located on the
underside of the screwdriver toward the front of thetool.
MAINTENANCE
Your DeWALT power tool has been designed to operate
over a long period of time with a minimum of maintenance.
Continuous satisfactory operation depends upon proper tool
care and regularcleaning.
WARNING: To reduce the risk of serious personal
injury, turn tool off before making any adjustments
or removing/installing attachments or accessories.
An accidental start-up can causeinjury.
The charger and battery pack are notserviceable.
Lubrication
Your power tool requires no additionallubrication.
Cleaning
WARNING: Blow dirt and dust out of the main housing
with dry air as often as dirt is seen collecting in and around
the air vents. Wear approved eye protection and approved
dust mask when performing thisprocedure.
WARNING: Never use solvents or other harsh chemicals
for cleaning the non-metallic parts of the tool. These
chemicals may weaken the materials used in these parts.
Use a cloth dampened only with water and mild soap.
Never let any liquid get inside the tool; never immerse any
part of the tool into aliquid.
 Loading...