ENGLISH
6
Installing and Removing the Battery Pack (Fig.D)
NOTE: For best results, make sure your battery pack is
fullycharged.
To install the battery pack
5
into the tool handle, align the
battery pack with the rails inside the tool’s handle and slide
it into the handle until the battery pack is firmly seated in
the tool and ensure that it does notdisengage.
OPERATION
WARNING: To reduce the risk of serious personal
injury, turn unit off and remove the battery pack
before making any adjustments or removing/installing
attachments or accessories. An accidental start‑up can
causeinjury.
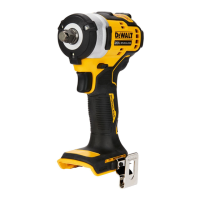
Belt Hook (Fig.A)
Included with Some Models
WARNING: To reduce the risk of serious personal
injury, ONLY use the tool's belt hook to hang the tool
from a work belt. DO NOT use the belt hook for tethering
or securing the tool to a person or object during use. DO NOT
suspend tool overhead or suspend objects from the belthook.
Anvil With Hog Ring (Fig.C)
DCF921, DCF923
To install an accessory on the hog ring anvil, firmly push
accessory onto the anvil
3
. The hog ring
12
compresses
to allow the accessory to slide on. After accessory is
installed, the hog ring applies pressure to help provide
accessoryretention.
To remove an accessory, grasp the accessory and firmly pull
itoff.
Mode Selector (Fig.A, B)
Your tool is equipped with a mode selector
7
which allows
you to select one of two speeds, Timber Screw™ mode, or
Precision Wrench™ mode. Select the mode based on the
maximum speed/torque needed and control the speed of
the tool using the variable speed trigger switch
1
.
Timber Screw™ Mode (Fig.B)
Timber Screw™ mode optimizes tool performance to help
increase the speed of wood driving applications such as
with lag bolts, lag screws and structural woodscrews.
Precision Wrench™ Mode (Fig.B)
In addition to normal impacting modes, this tool features
the Precision Wrench™ mode which grants the user greater
control in both fastening and loosening applications.
When set in forward, the tool will fasten at 2500RPM until
impact begins. The tool will then pause for 0.5 seconds
before continuing to impact at a rate of 3550IPM, providing
the user with greater control and reducing the chance of
overtightening or damagingmaterial.
When set in reverse, the tool will impact at a normal speed
and rate of 3550IPM. Upon sensing that the fastener has
broken free, the tool will cease to impact and will reduce
speed to help prevent “run‑off” of loosehardware.
Specifications
Mode Application RPM
Precision Wrench™ Precision Wrench™ 0‑2500 forward
0‑2500 reverse
Timber Screw™ Timber Screw™ 0‑2500 forward
0‑2500 reverse
Speed 1 Low Speed Impacting 0‑1400 forward
0‑2500 reverse
Speed 2 High Speed Impacting 0‑2500 forward
0‑2500 reverse
WARNING: To reduce the risk of serious personal
injury, ensure the screw holding the belt hook issecure.
IMPORTANT: When attaching or replacing a belt hook, use
only the screw that is provided. Be sure to securely tighten
thescrew.
A belt hook
8
can be attached to either side of the tool
using only the screw
9
provided, to accommodate left‑ or
right‑handed users. If the belt hook is not desired at all, it
can be removed from thetool.
To move the belt hook, remove the screw
9
that holds it
in place then reassemble on the opposite side. Be sure to
securely tighten thescrew.
Anvil (Fig.C)
WARNING: Use only impact accessories. Non‑impact
accessories may break and cause a hazardous condition.
Inspect accessory prior to use to ensure that it contains
nocracks.
CAUTION: Inspect anvils, detent pins, and hog rings
prior to use. Missing or damaged items should be replaced
beforeuse.
Place the switch in the locked off (center) position or
remove battery pack before changingaccessories.
Anvil with Detent Pin (Fig.C)
DCF922
To install an accessory on the anvil, align the hole in the side
of the accessory with the detent pin
13
on the anvil
3
.
Press the accessory on until the detent pin engages in the
hole. Depression of detent pin may be necessary to aid
installation ofaccessory.
To remove an accessory, depress the detent pin through the
hole and pull the accessoryoff.
ASSEMBLY AND ADJUSTMENTS
WARNING: To reduce the risk of serious personal
injury, turn unit off and remove the battery pack
before making any adjustments or removing/installing
attachments or accessories. An accidental start‑up can
causeinjury.
sfpm ................... surface feet per
minute
SPM .................... strokes per minute
A ......................... amperes
W ........................watts
Wh ......................watt hours
Ah ....................... amp hours
or AC ...........alternating current
or AC/DC .... alternating or
direct current
...................... Class II
Construction
(double insulated)
n
o
.......................no load speed
n .........................rated speed
PSI....................... pounds per square
inch
......................earthing terminal
.....................safety alert symbol
..................... visible radiation–
do not stare into
the light
..................... wear respiratory
protection
..................... wear eye
protection
..................... wear hearing
protection
..................... read all
documentation
 Loading...